1974 BMW 2002 for sale – **SOLD**

THE CAR HAS BEEN SOLD.

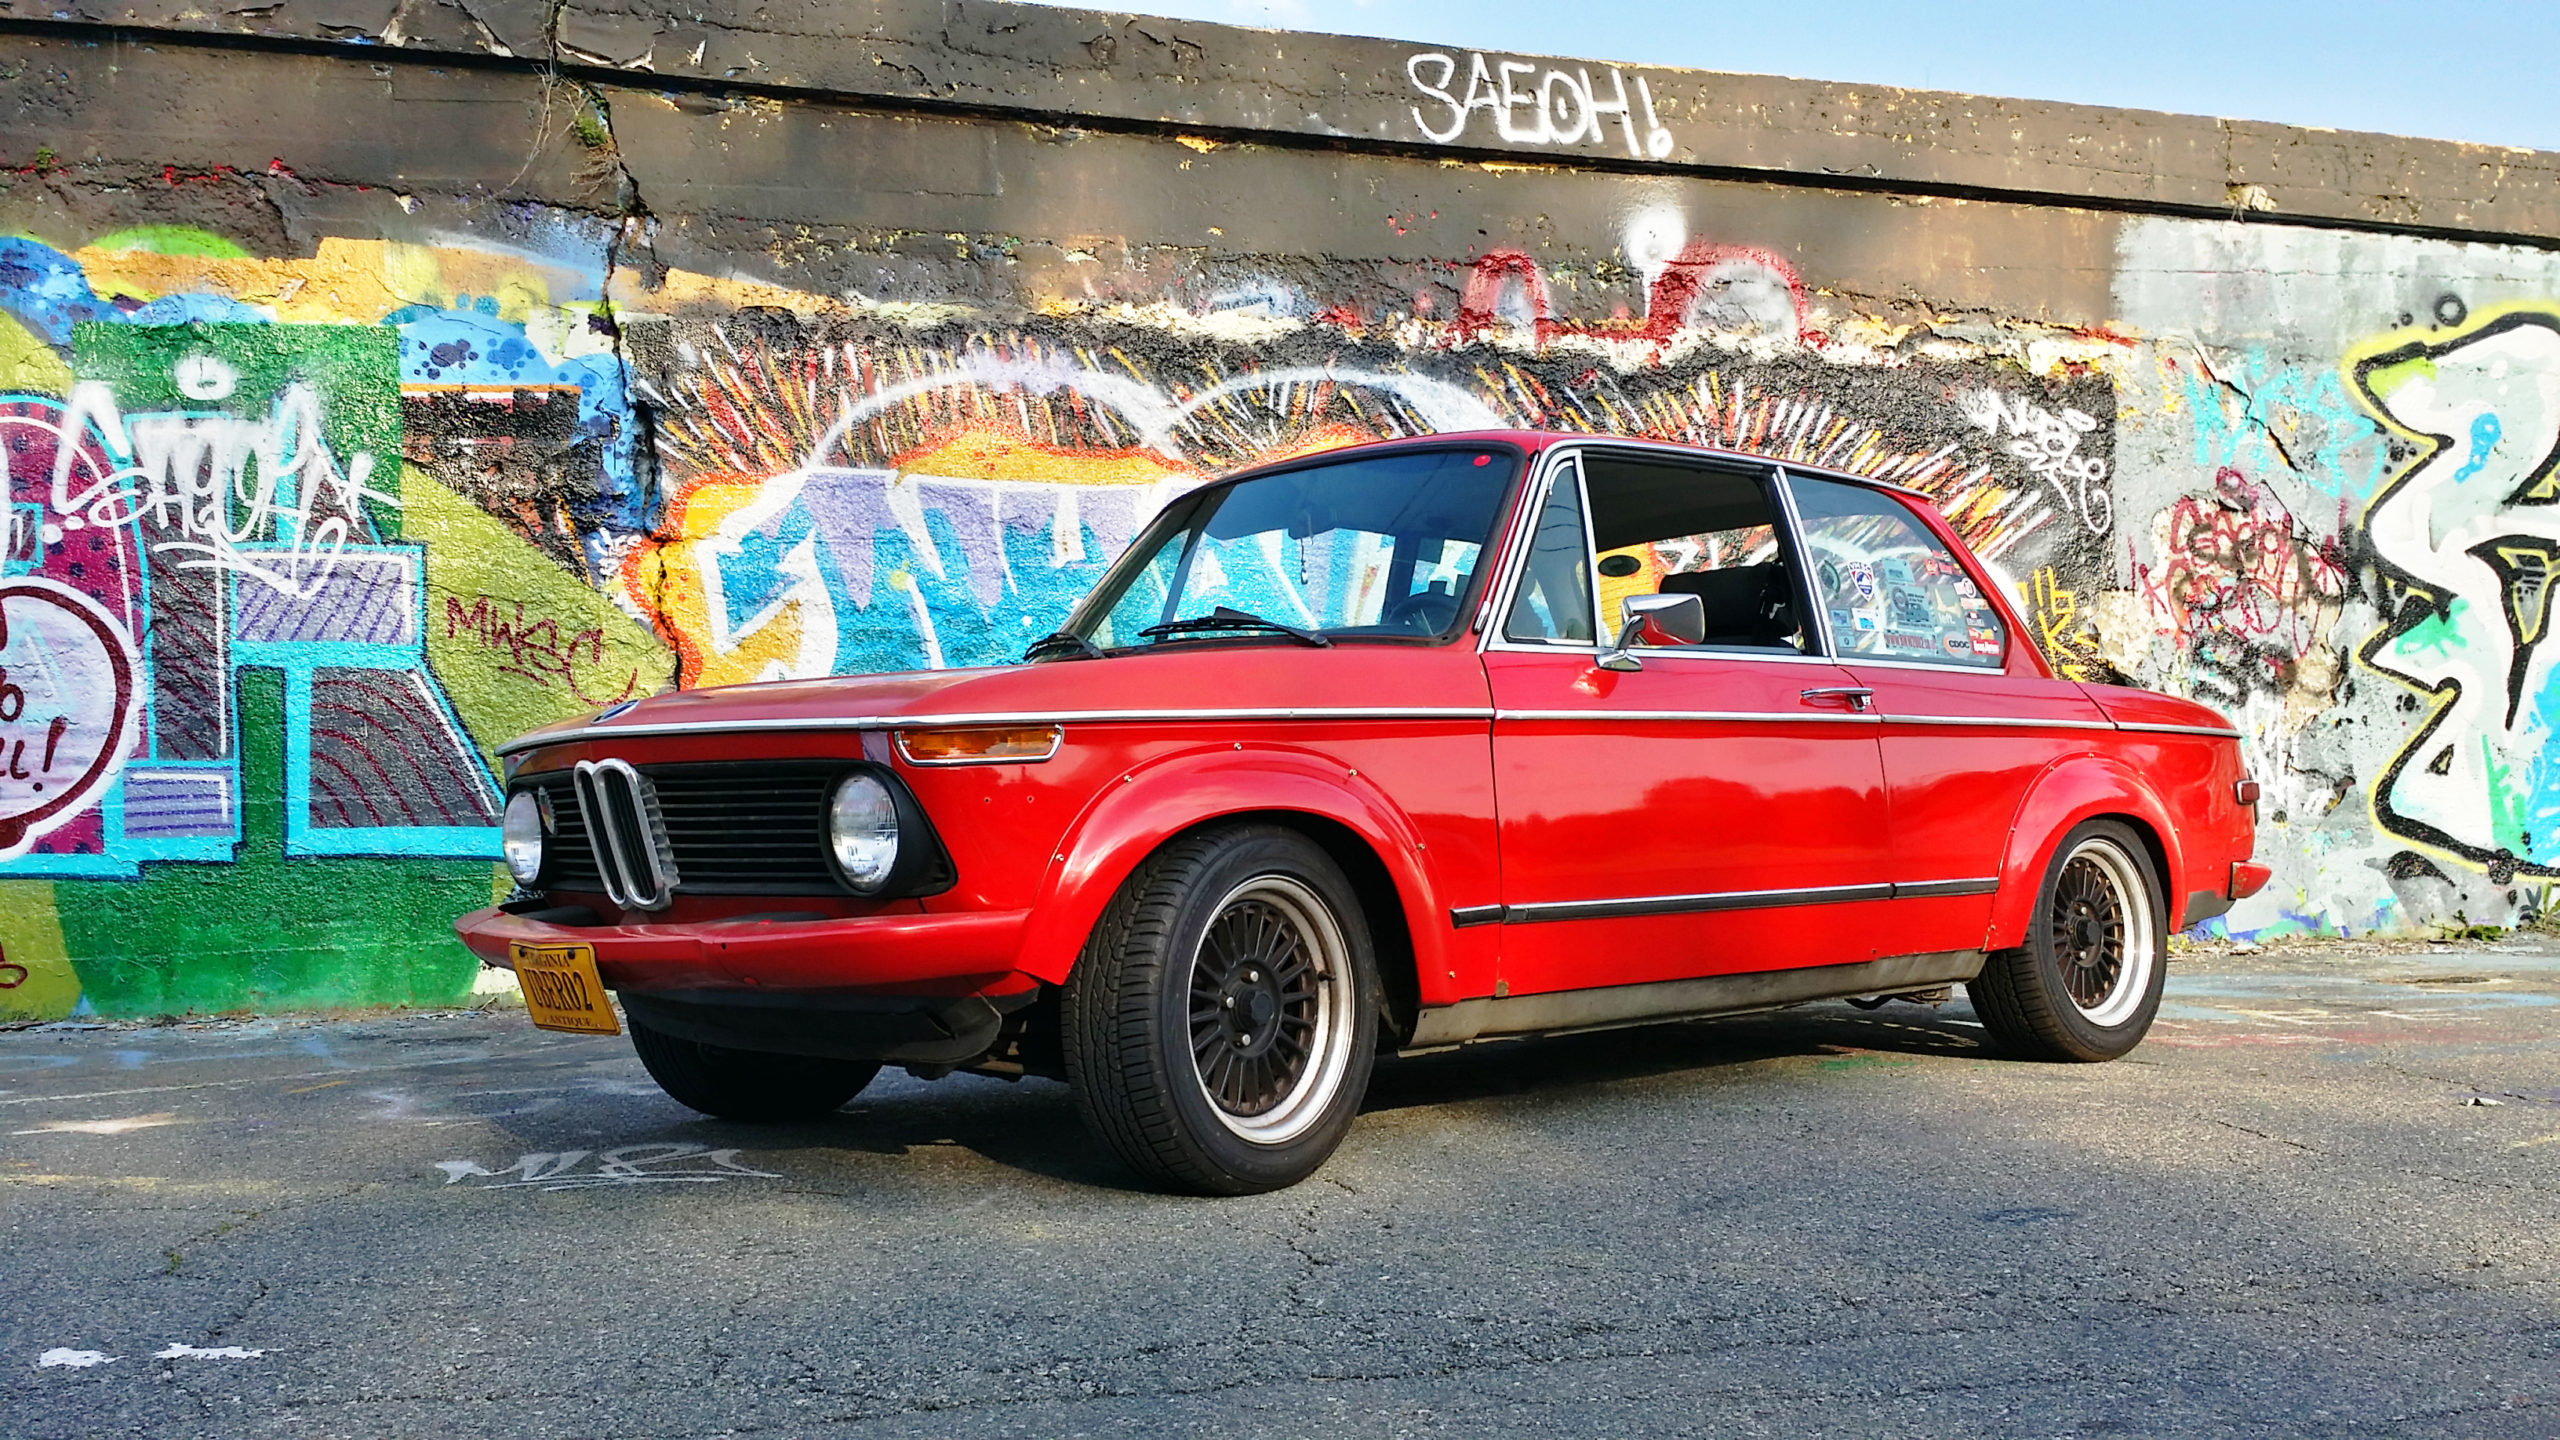
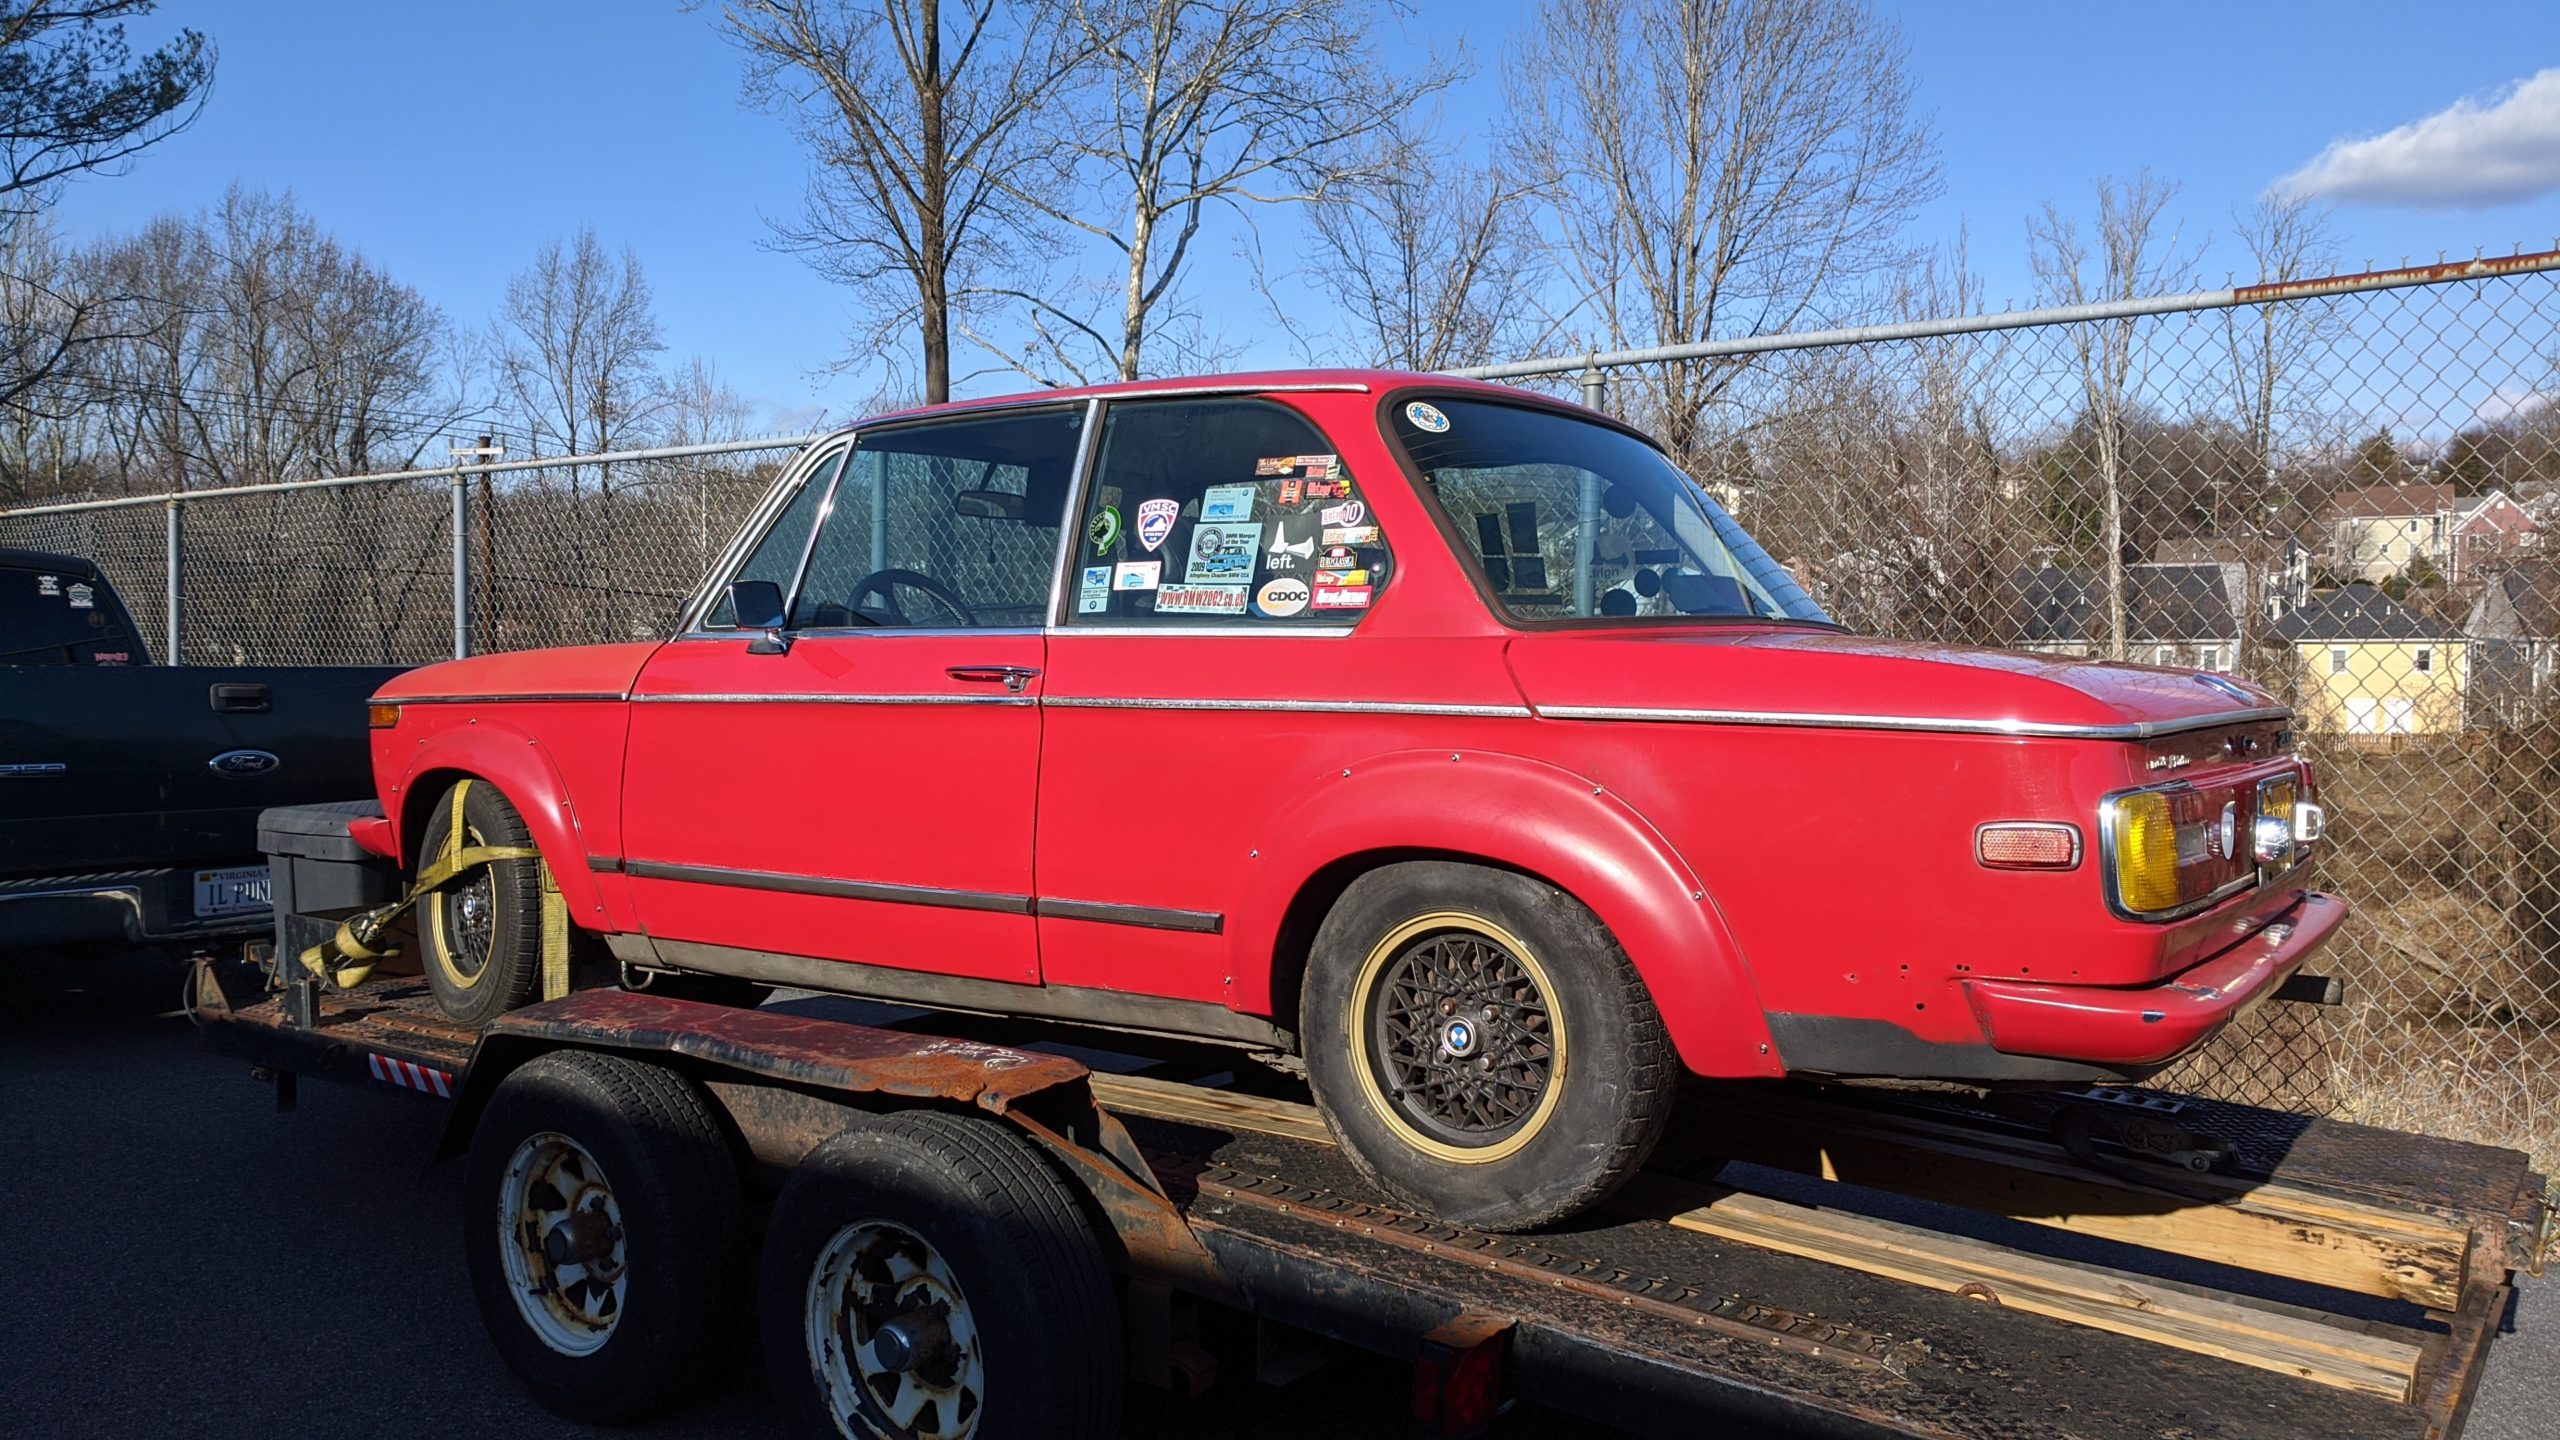
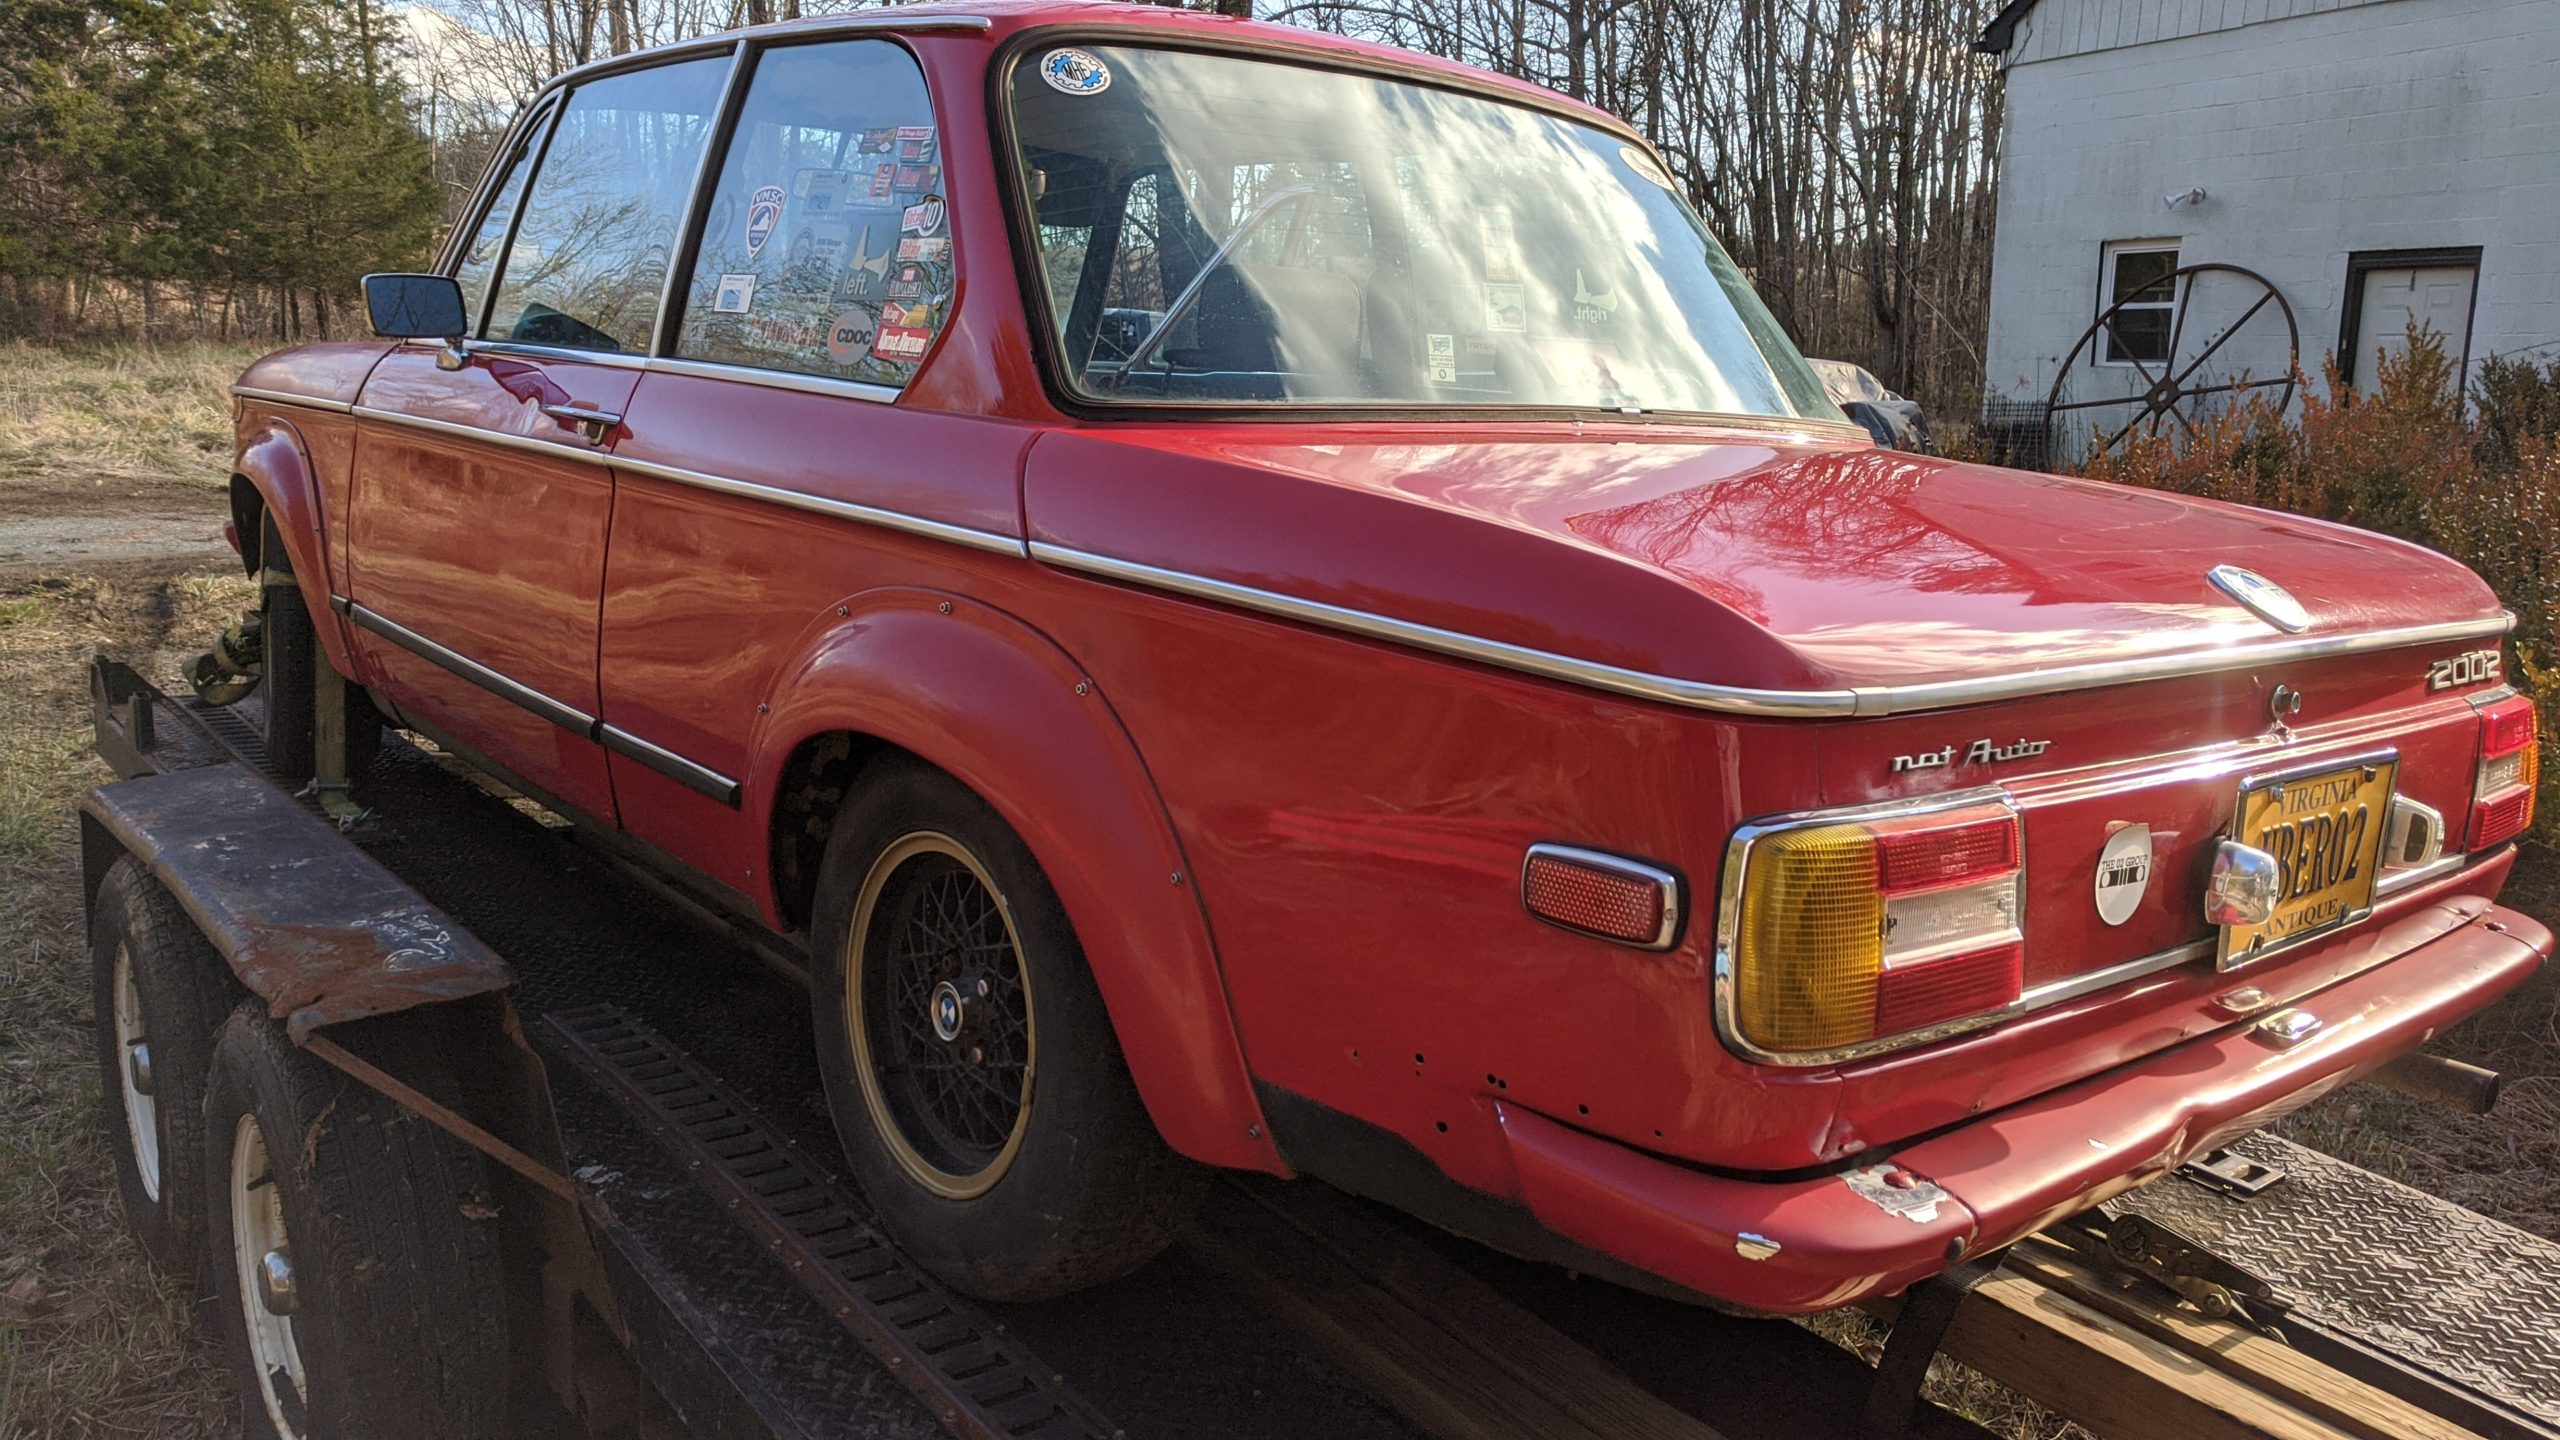
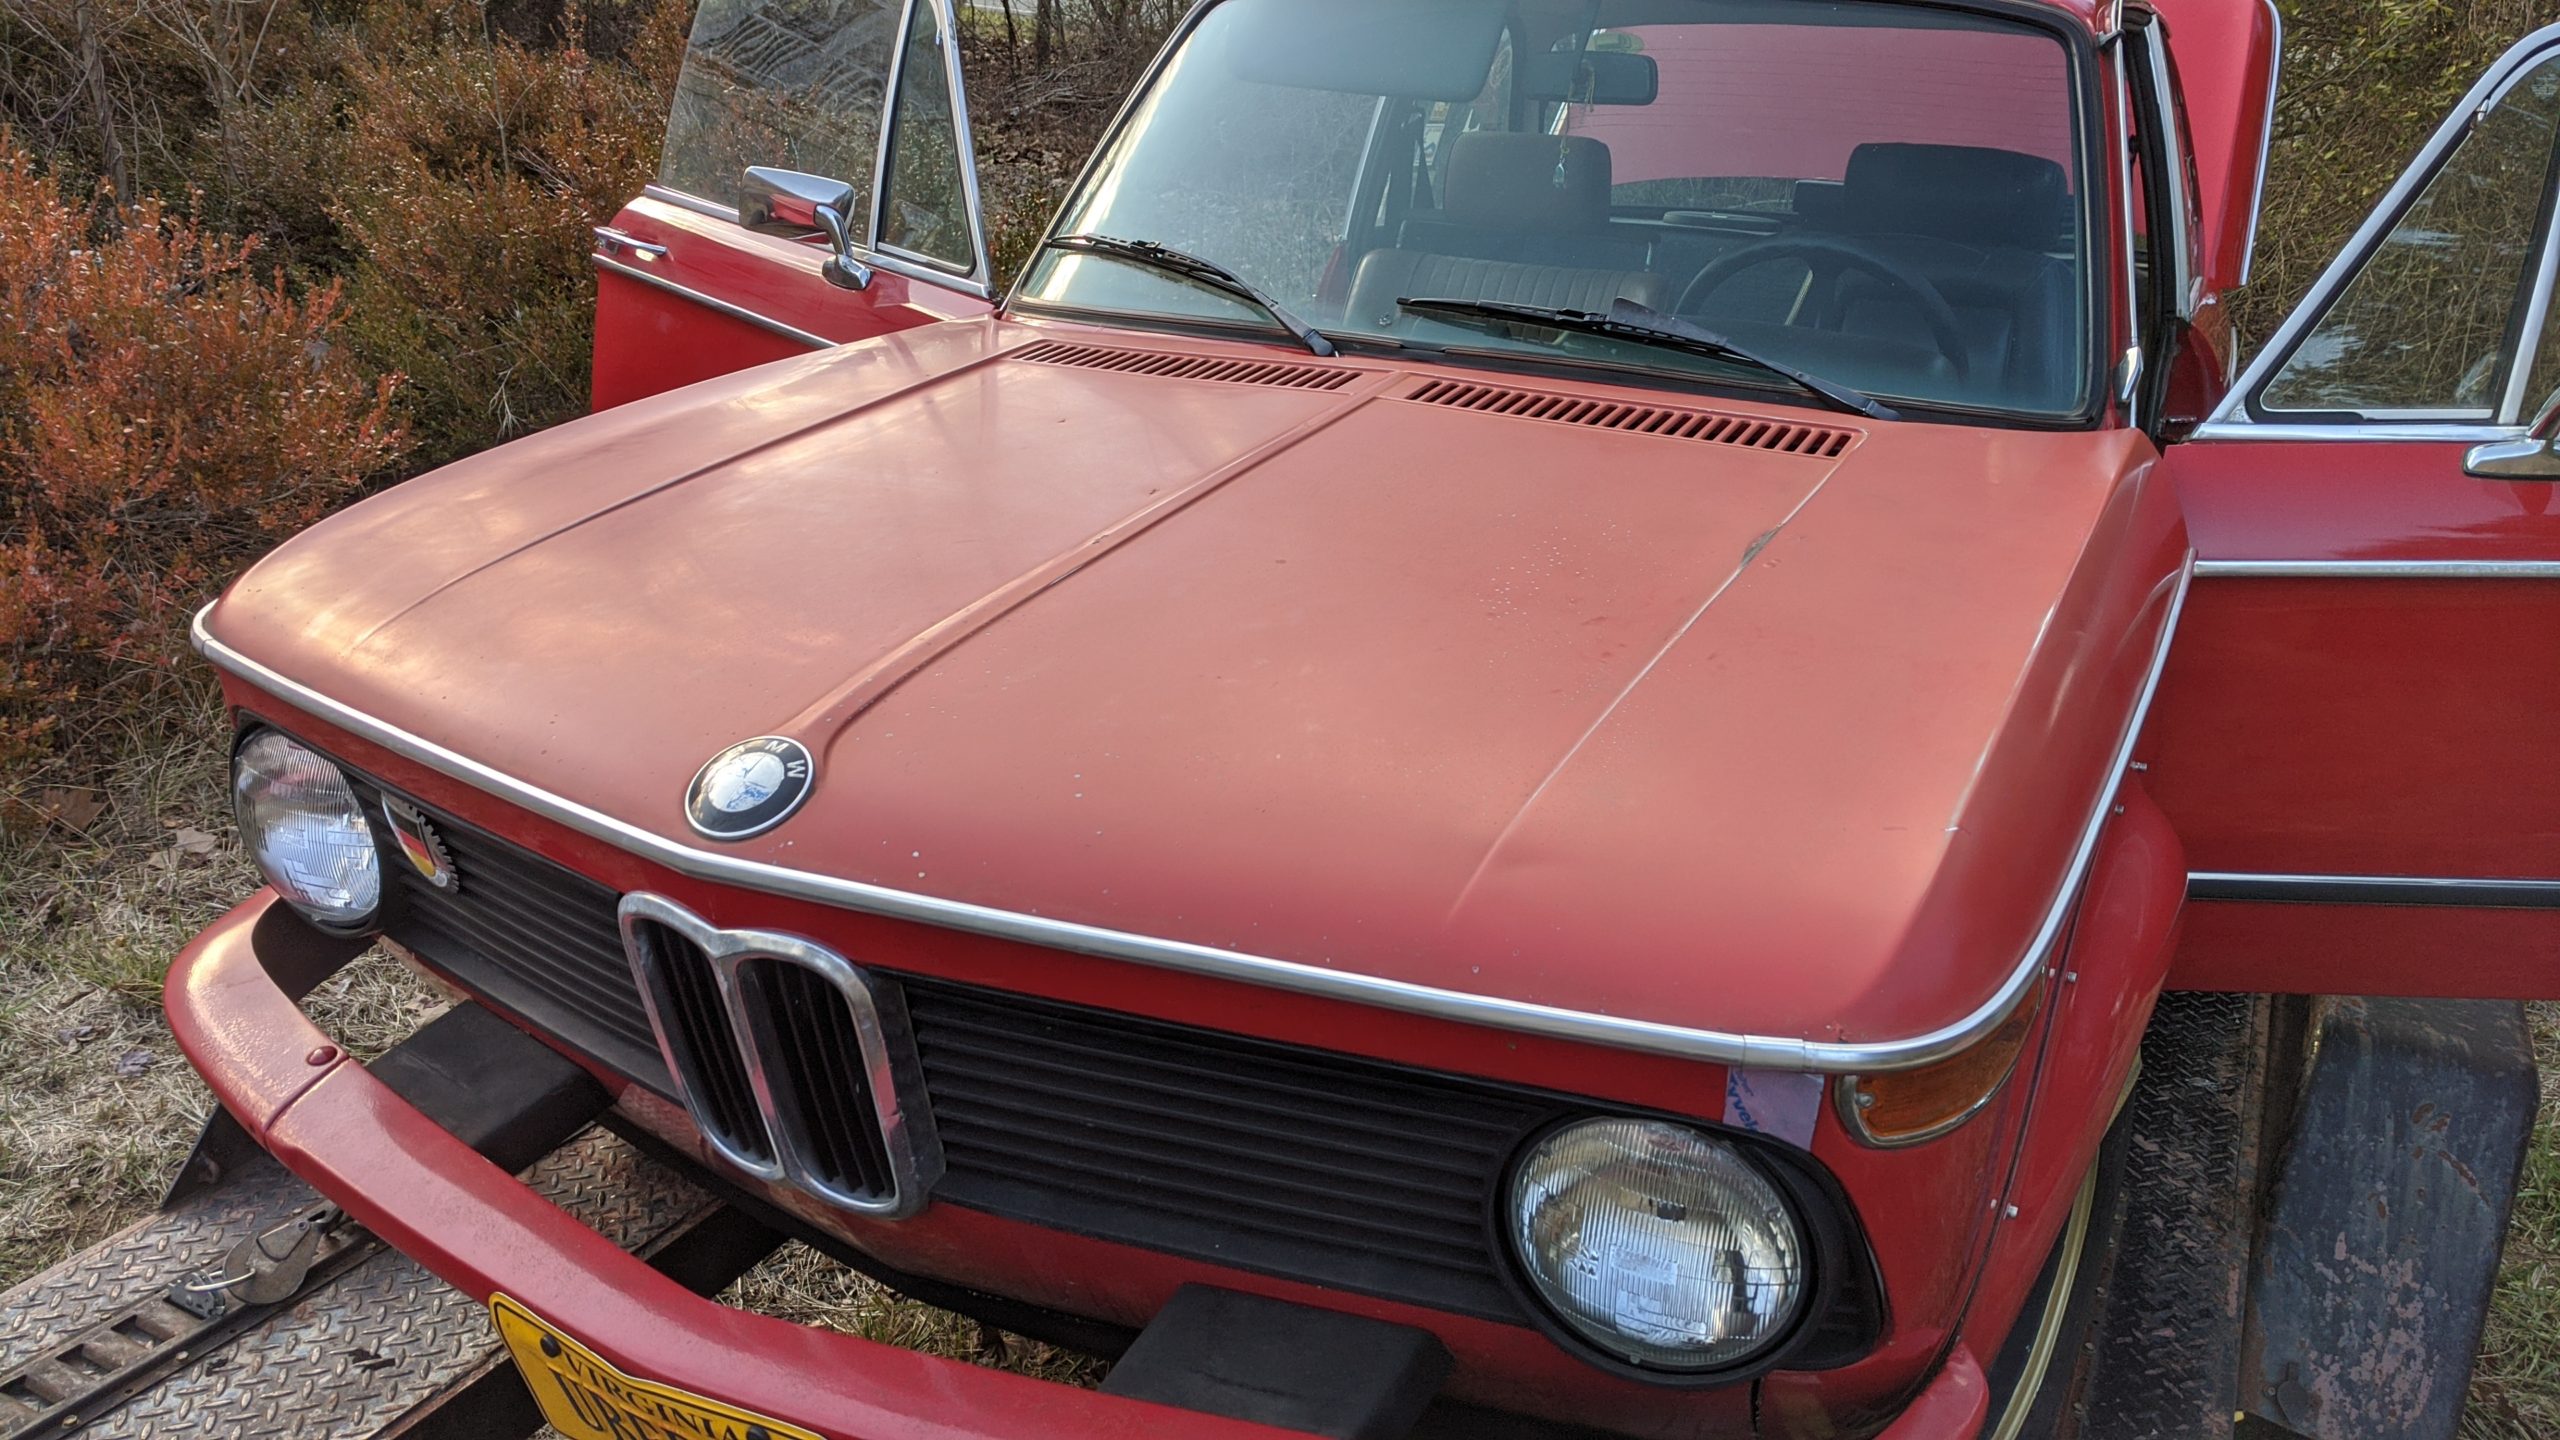
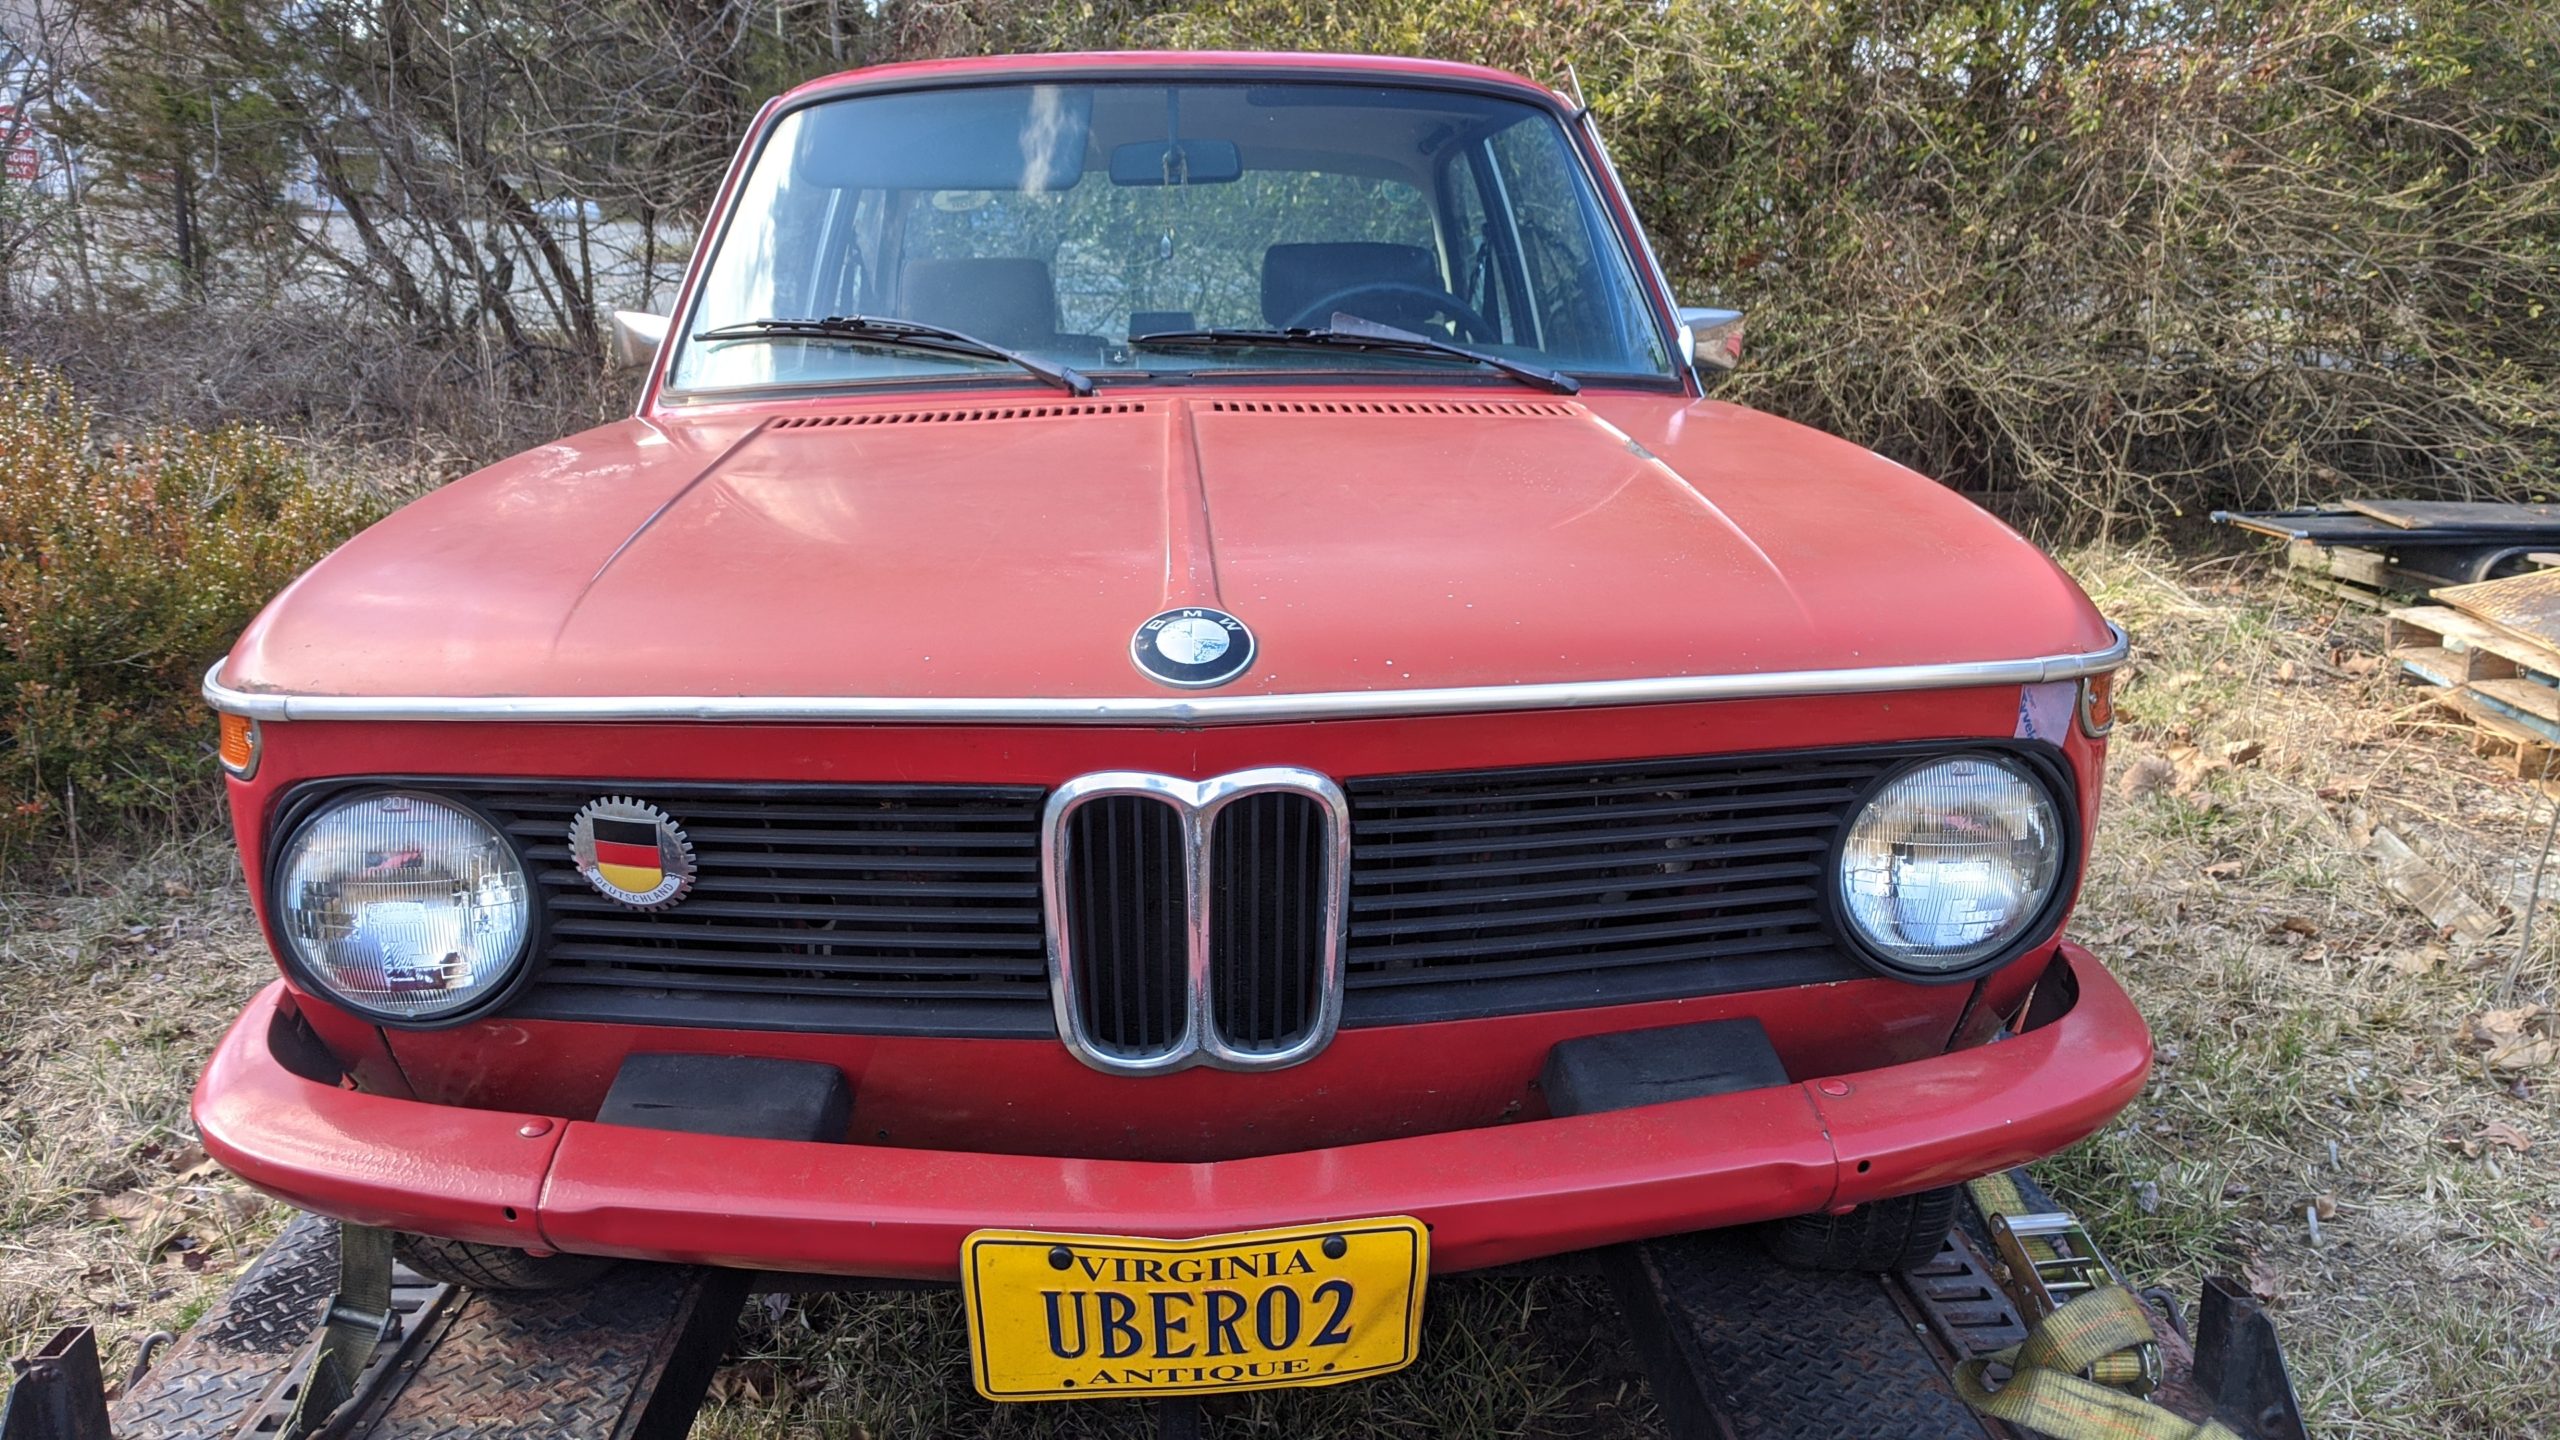
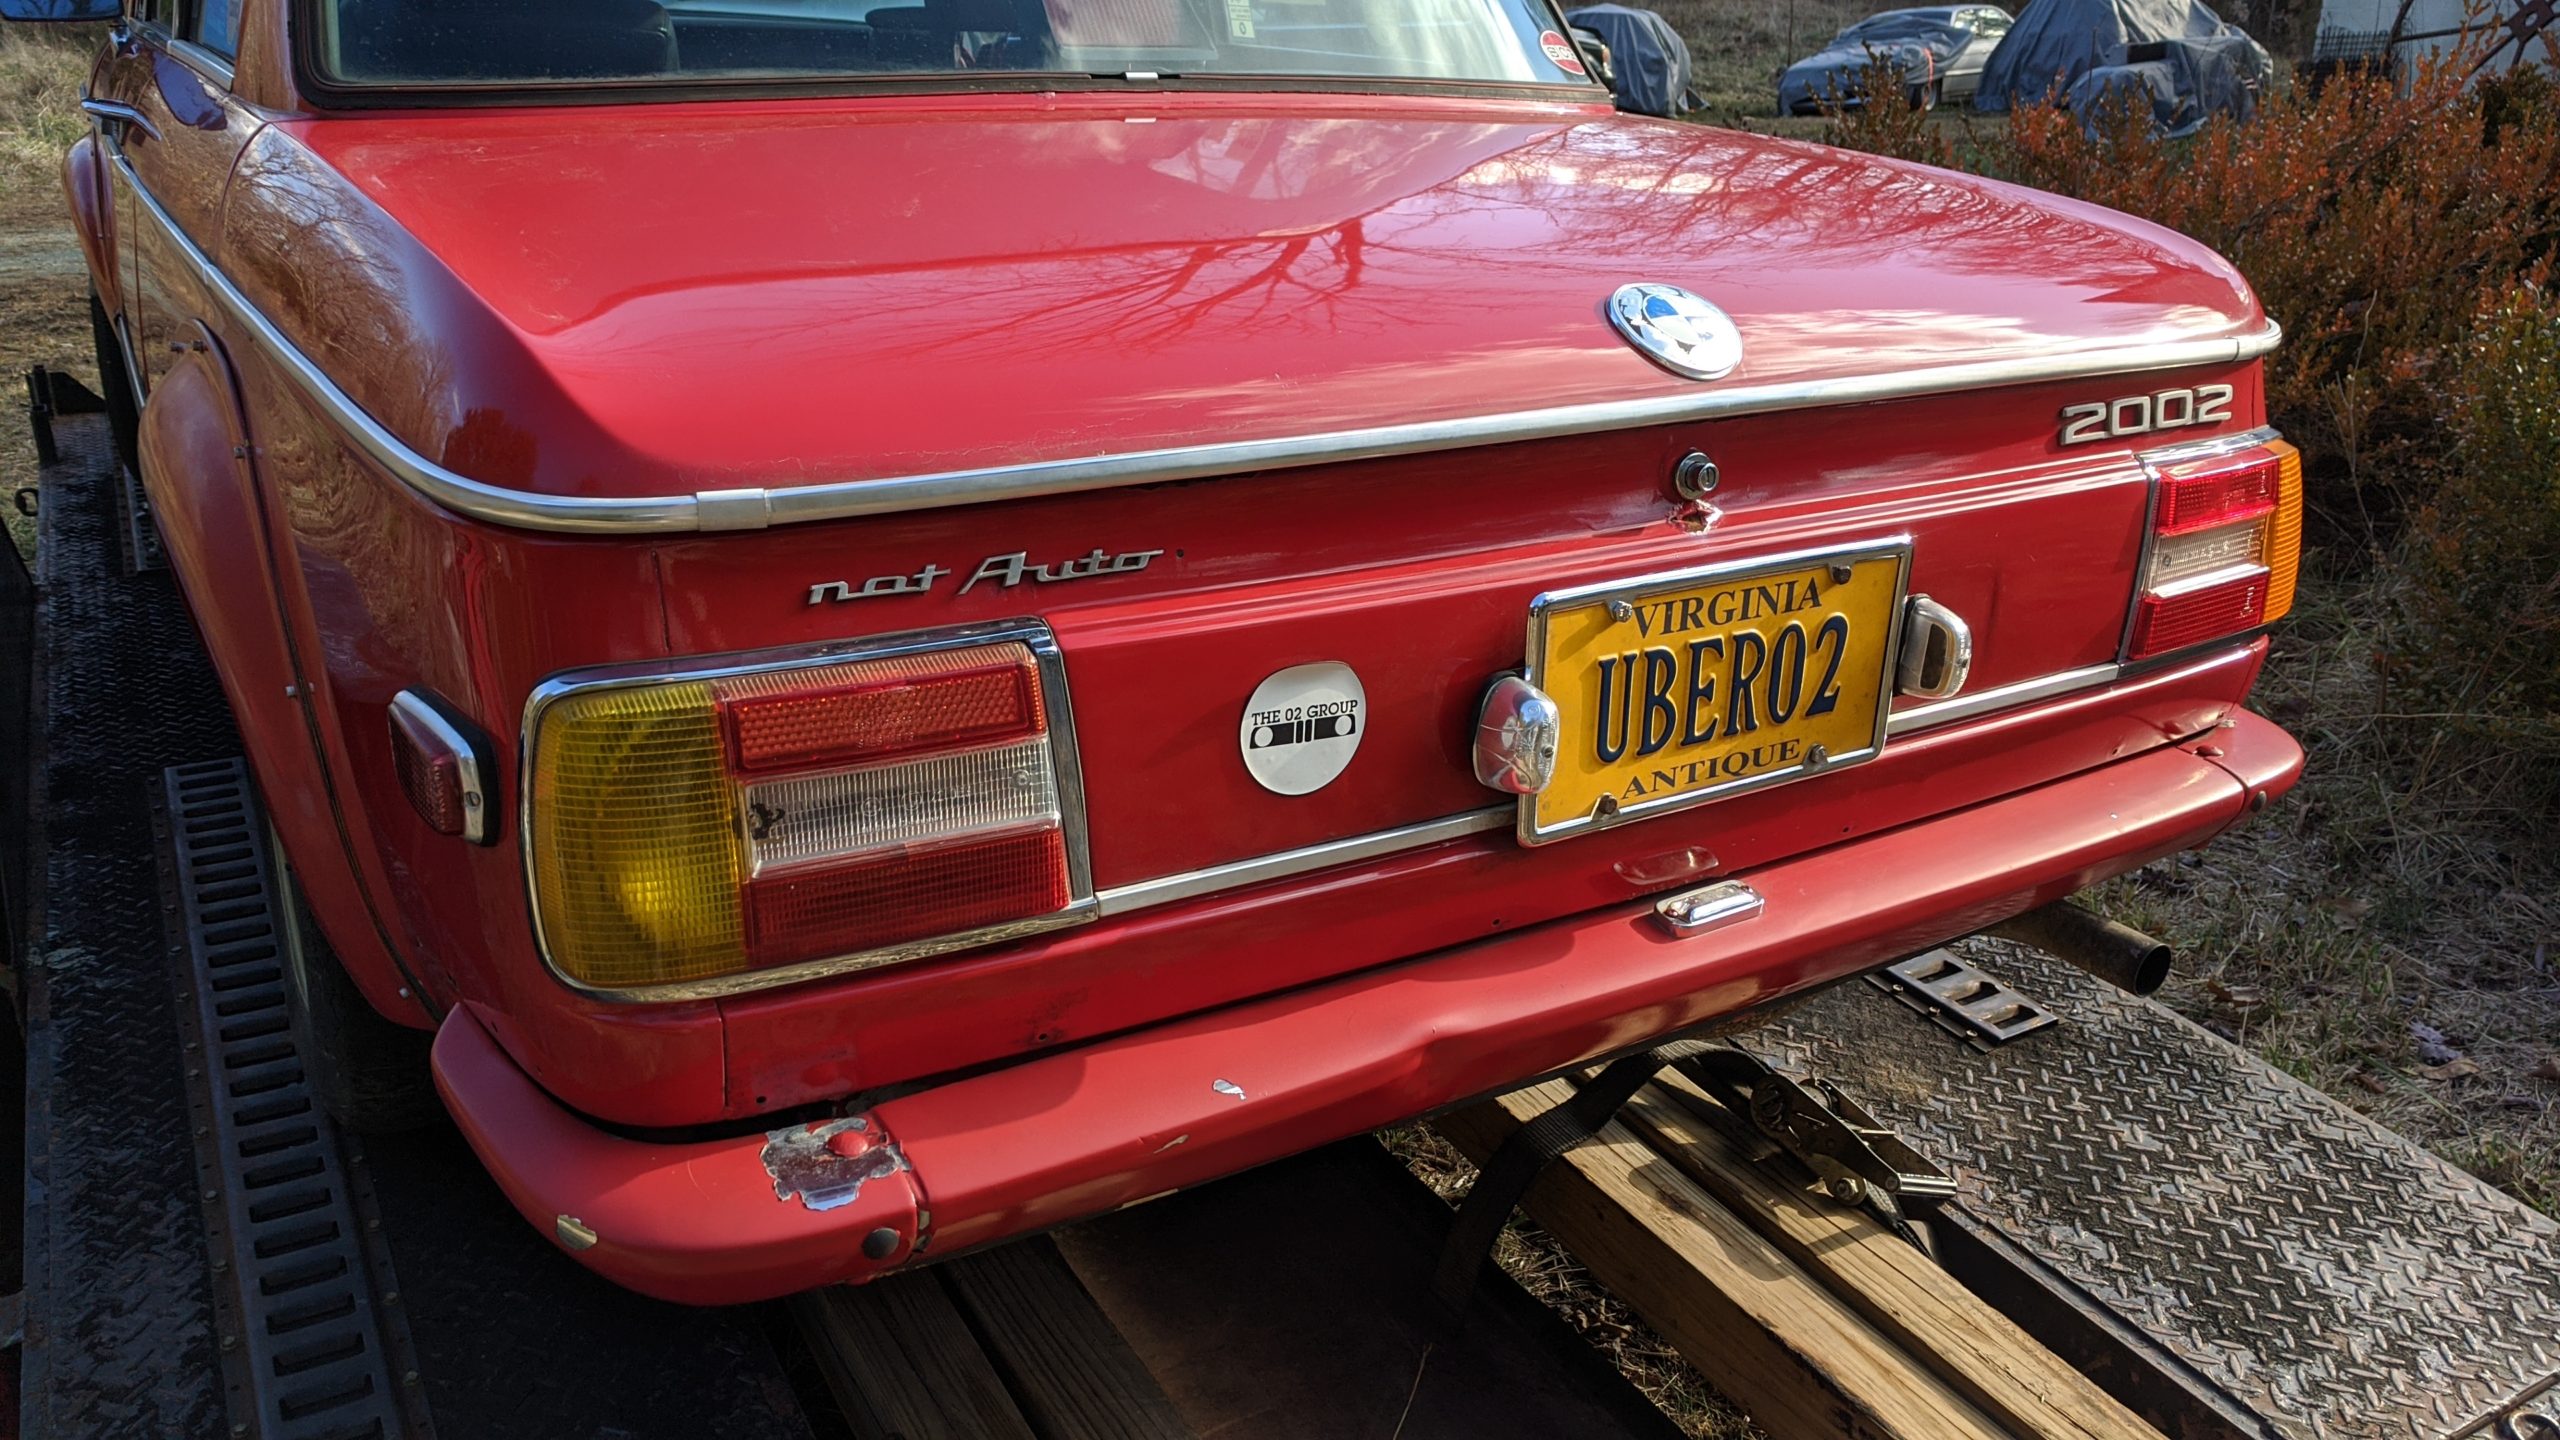
1974 BMW 2002  VIN 4280415

$6500 located in Charlottesville, VA

Photos below at the bottom of this post

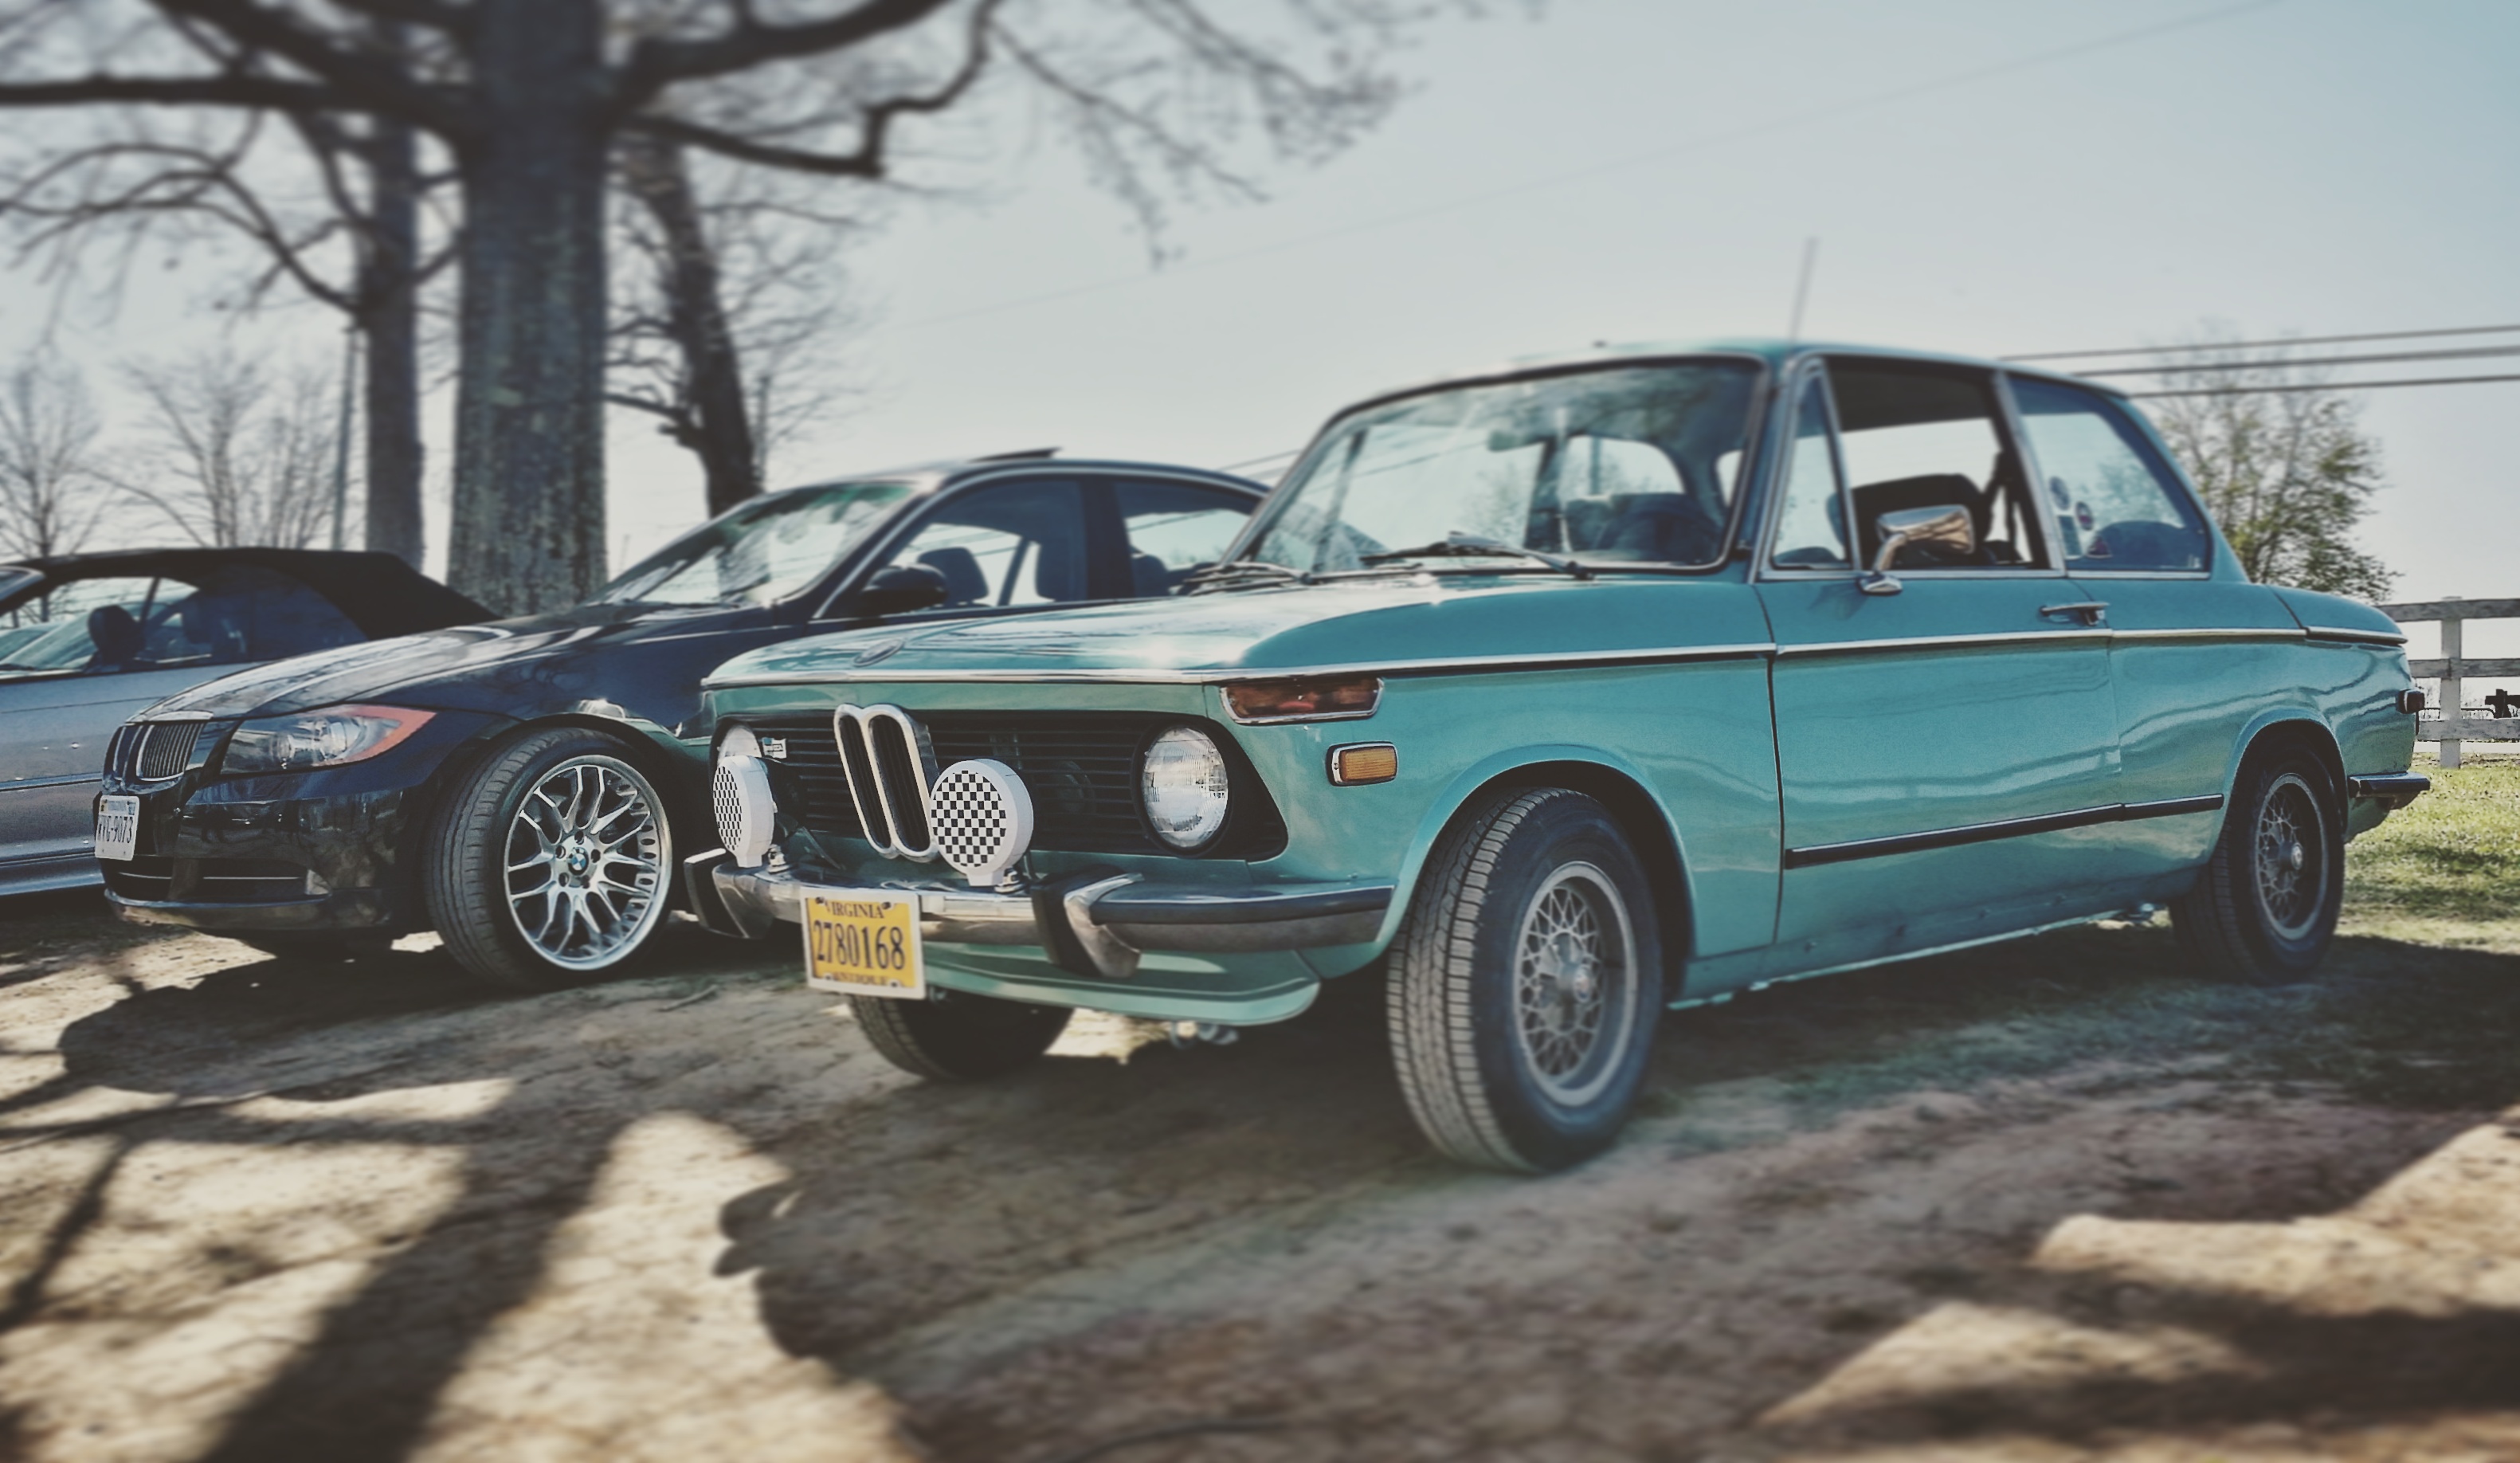
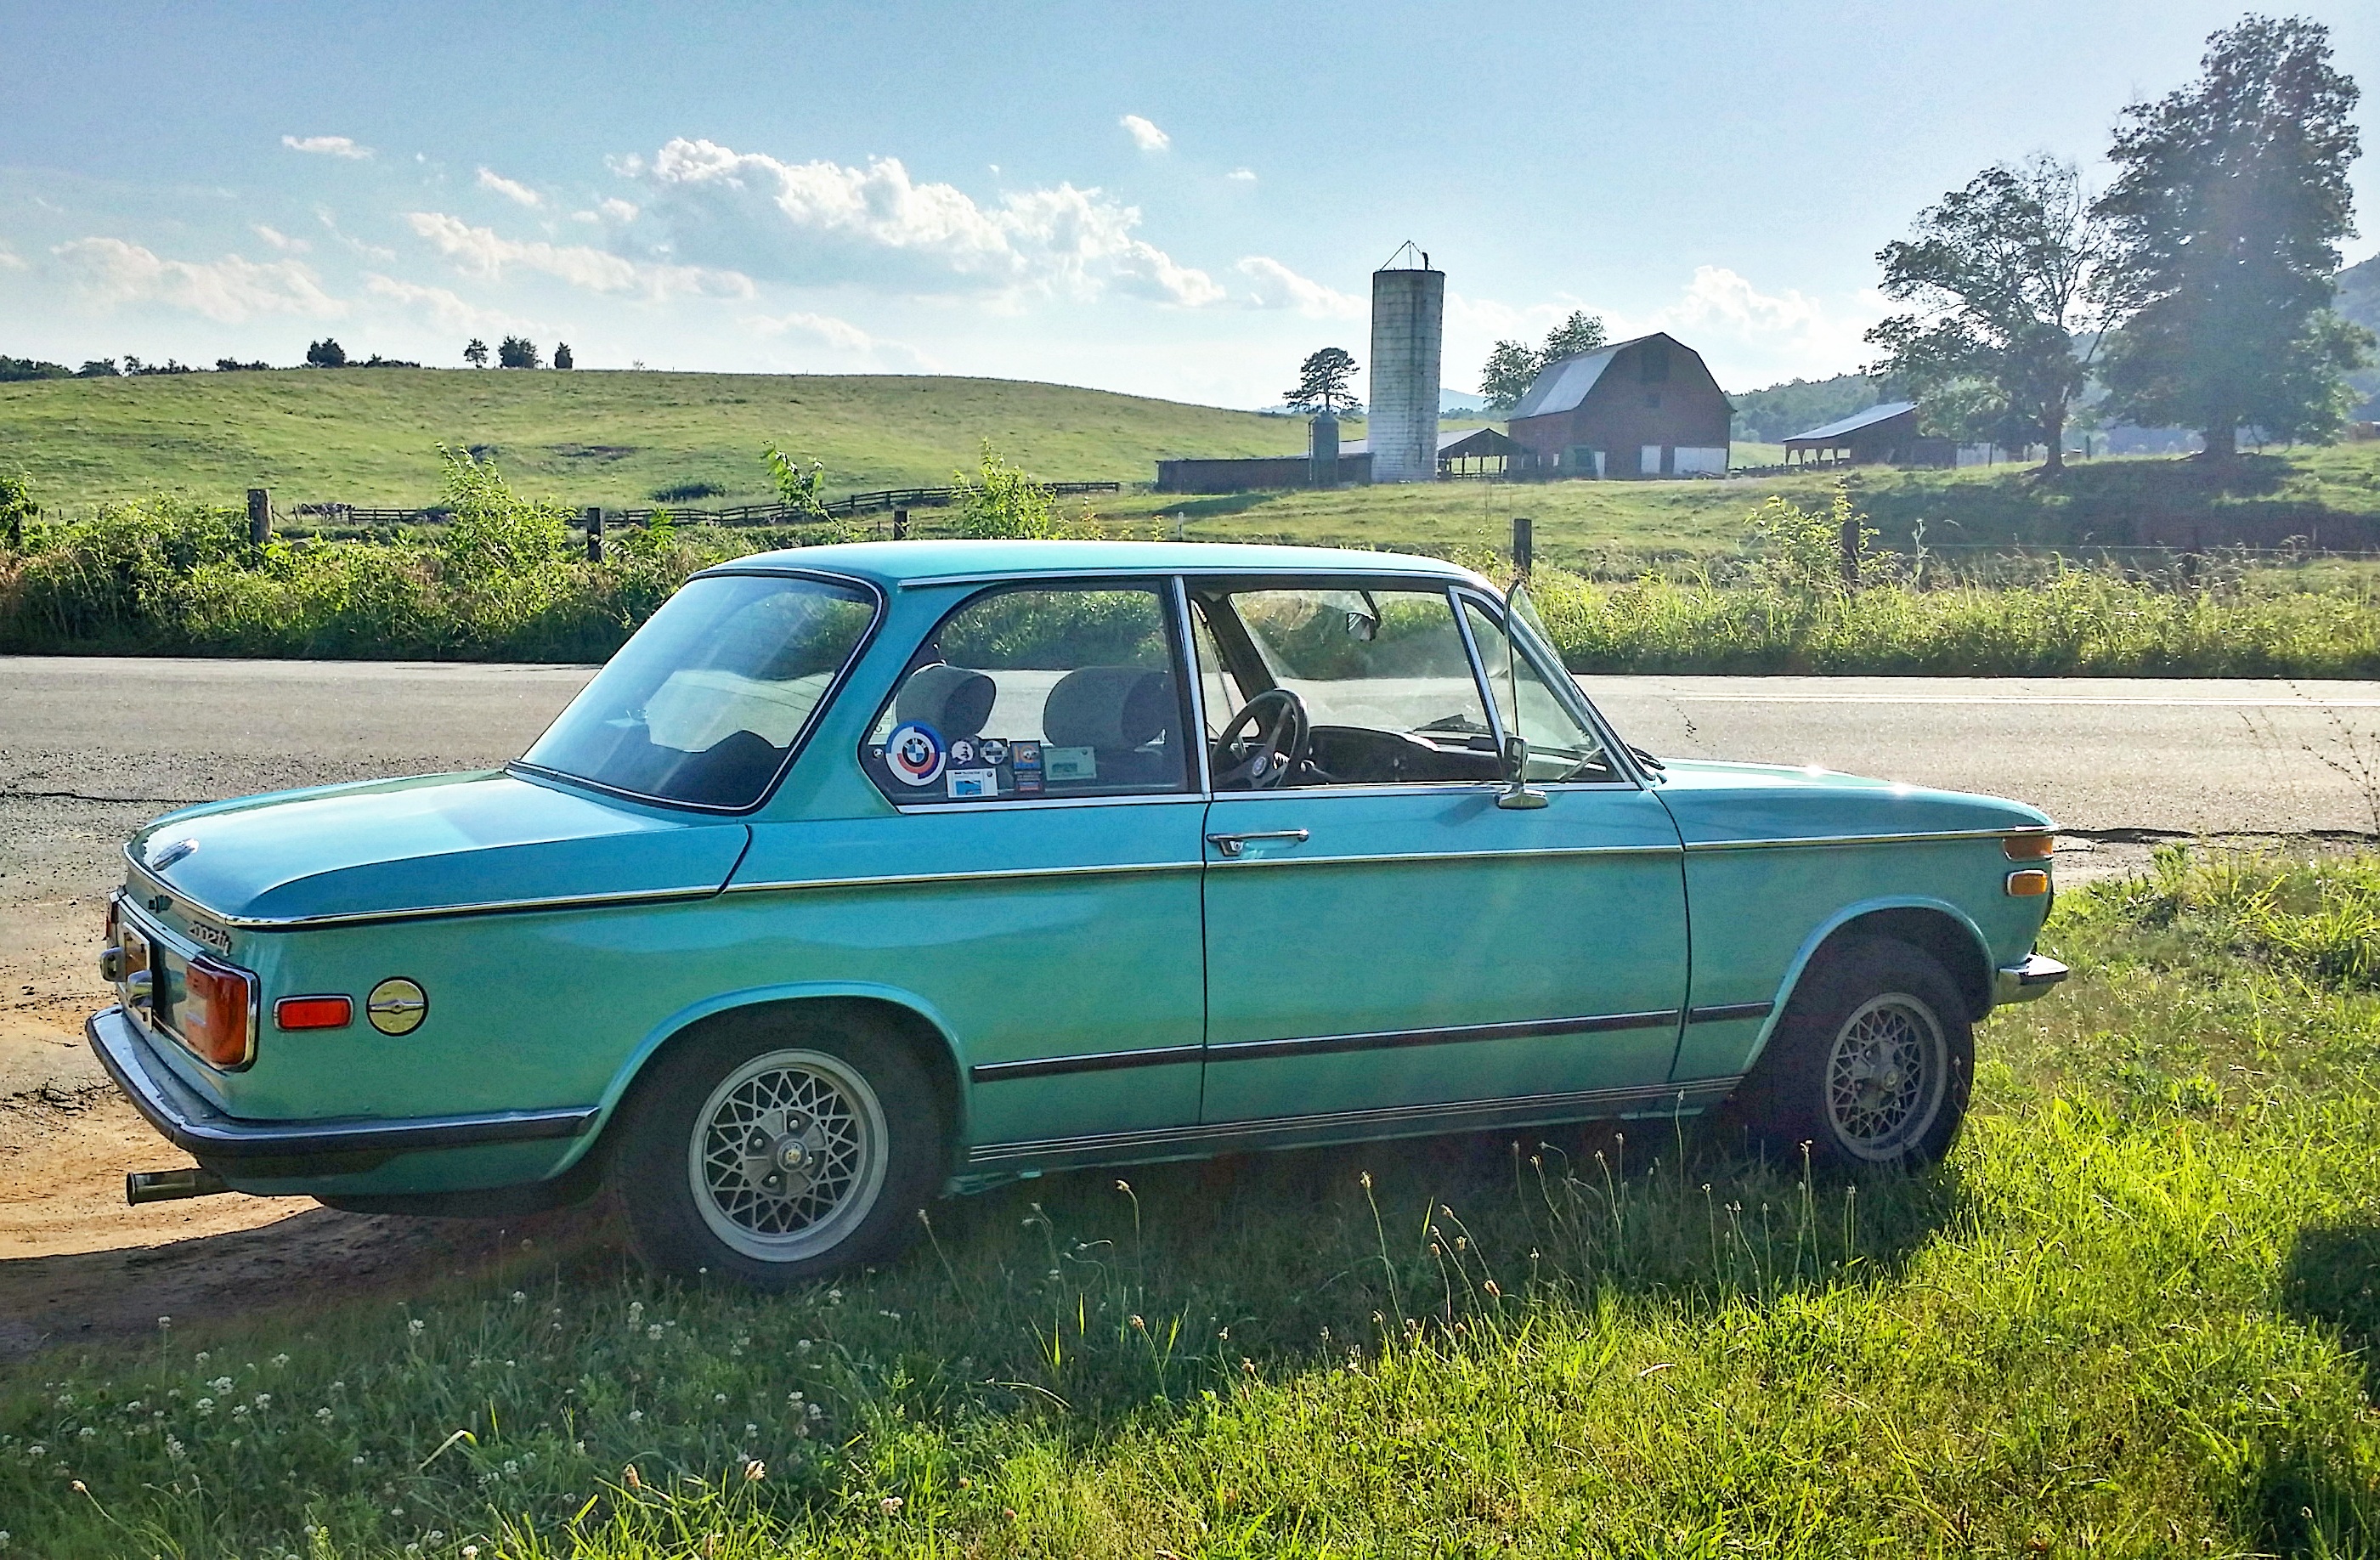
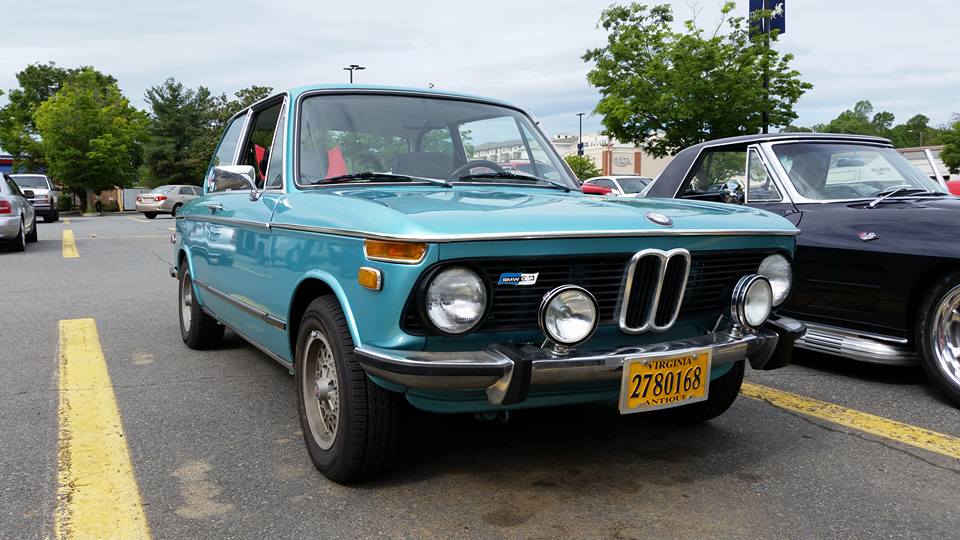
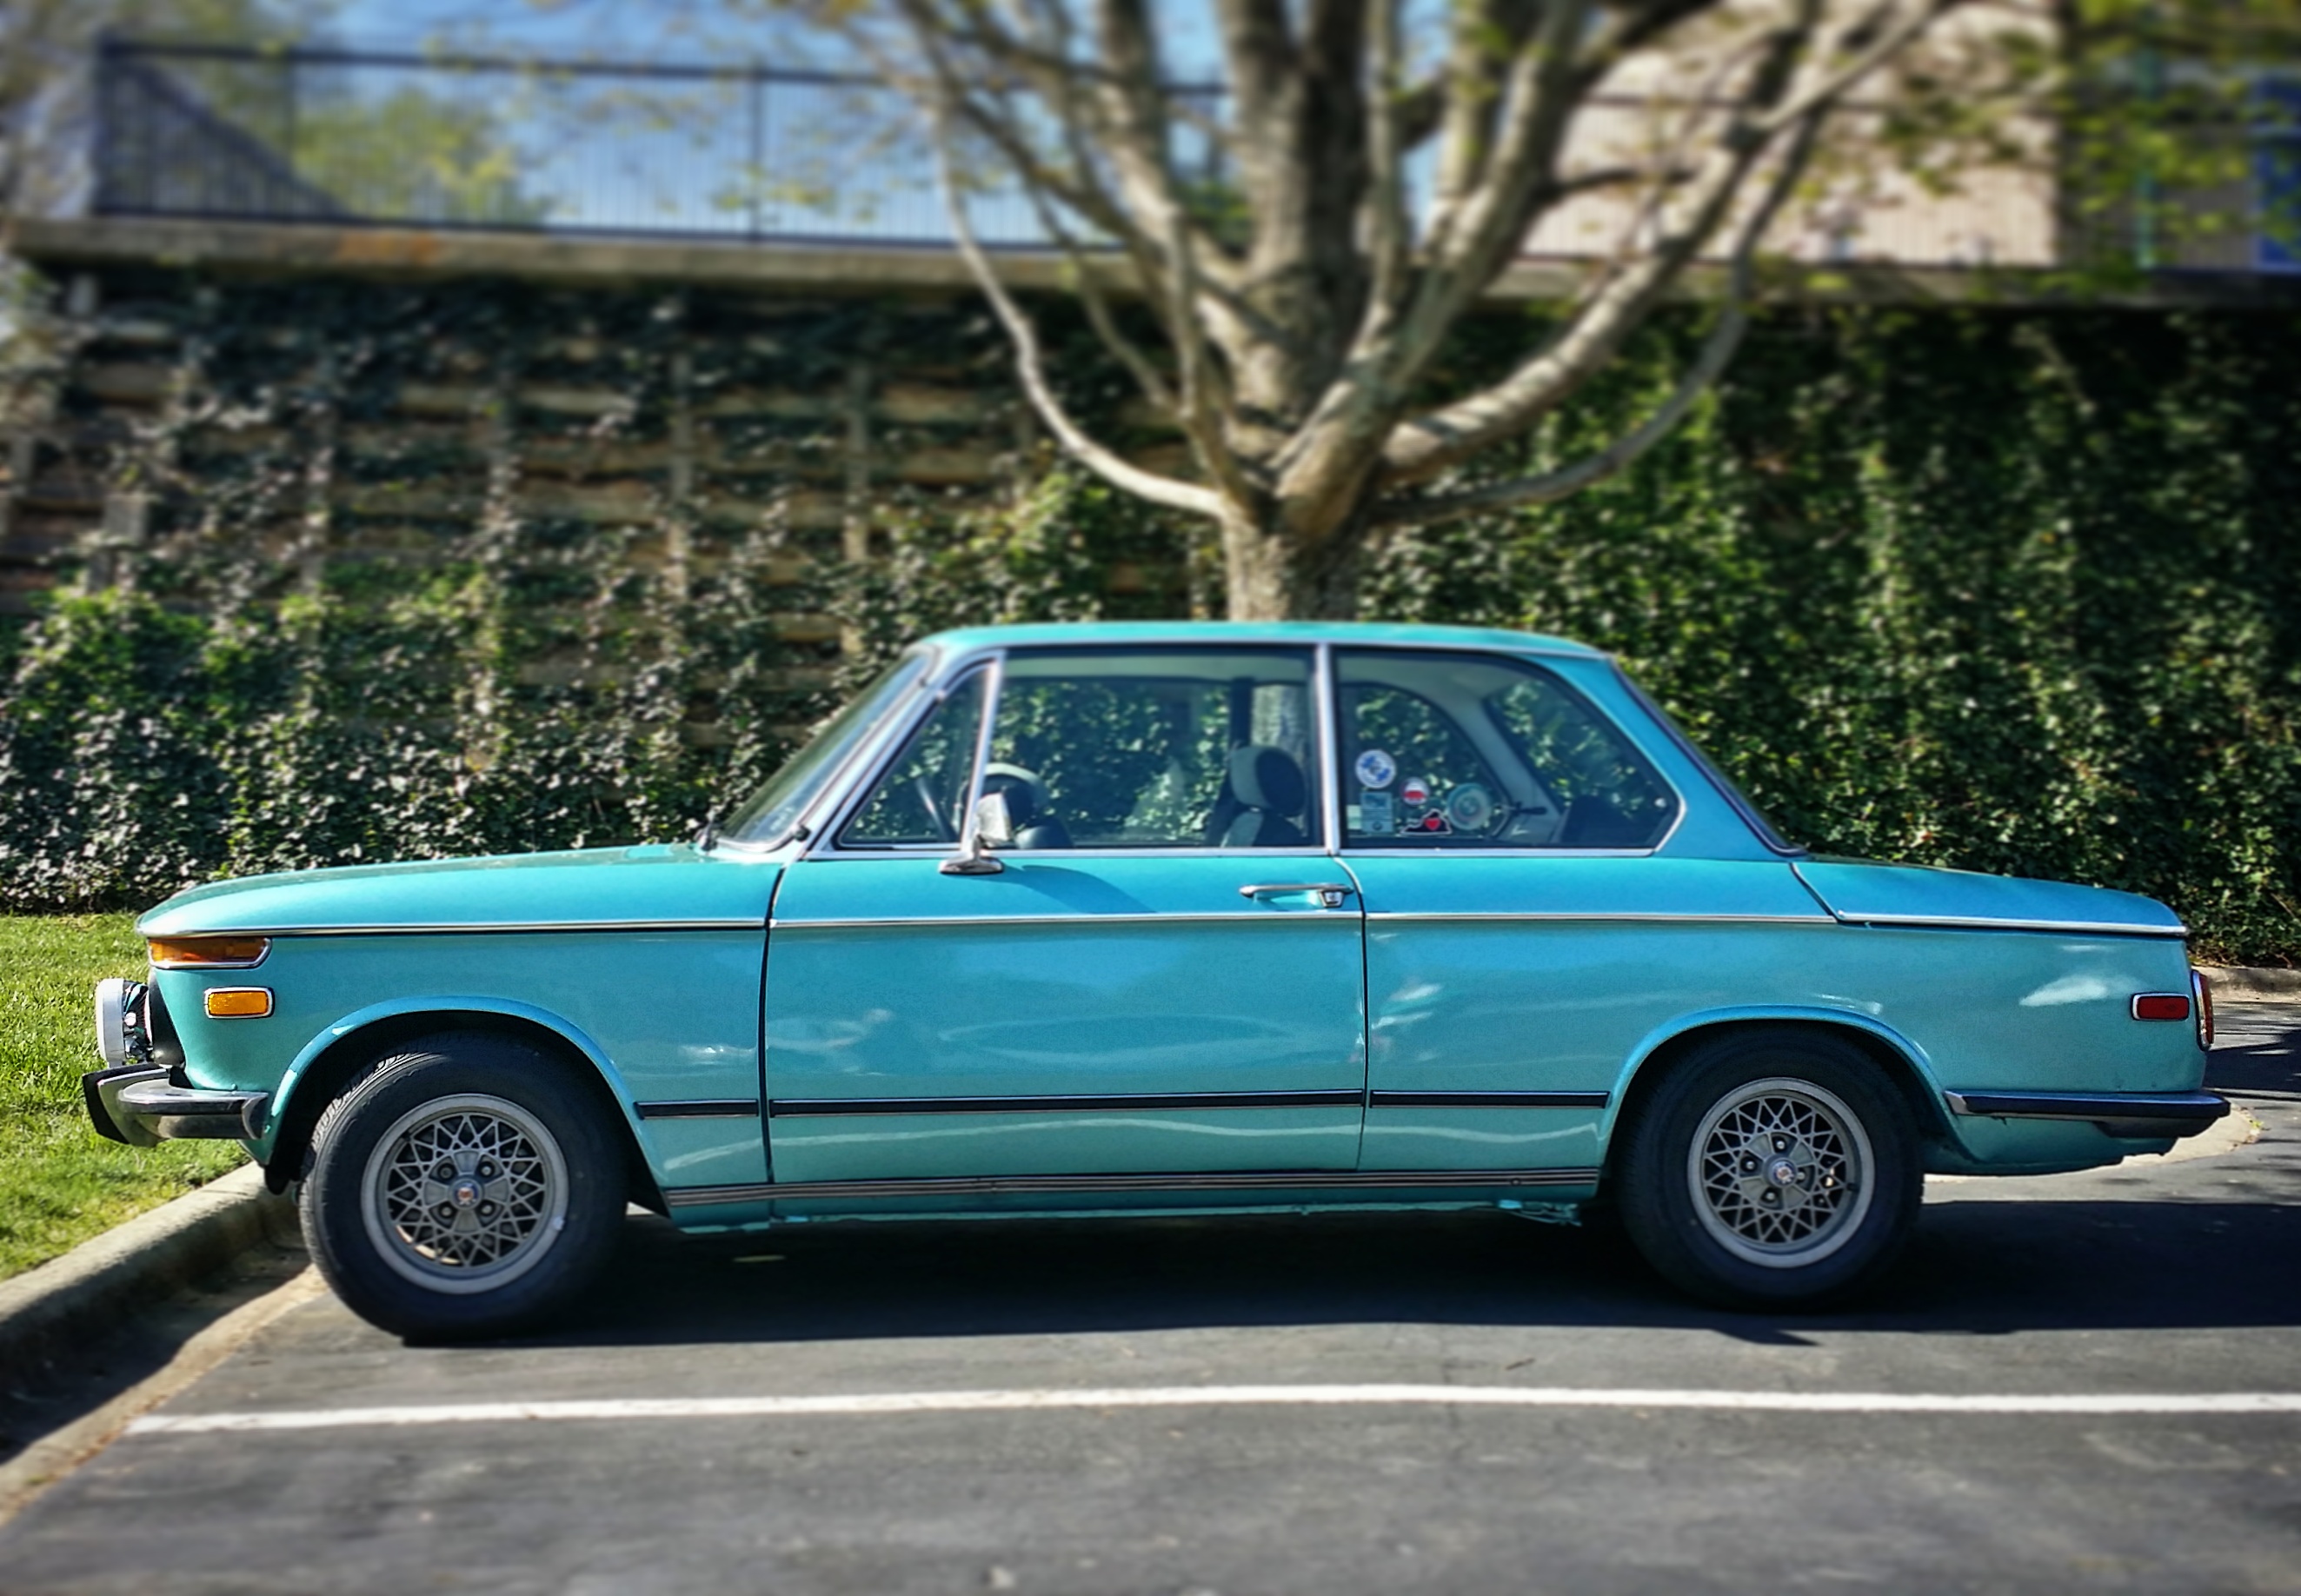
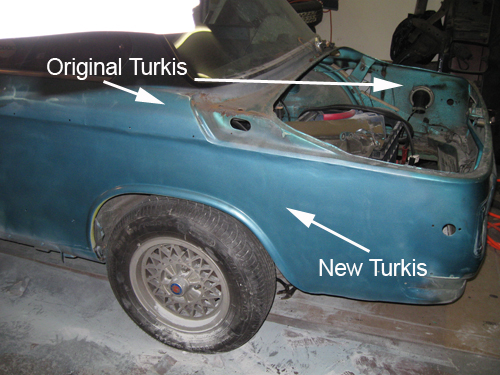
Paint code:  Verona red (originally Sahara beige from factory)

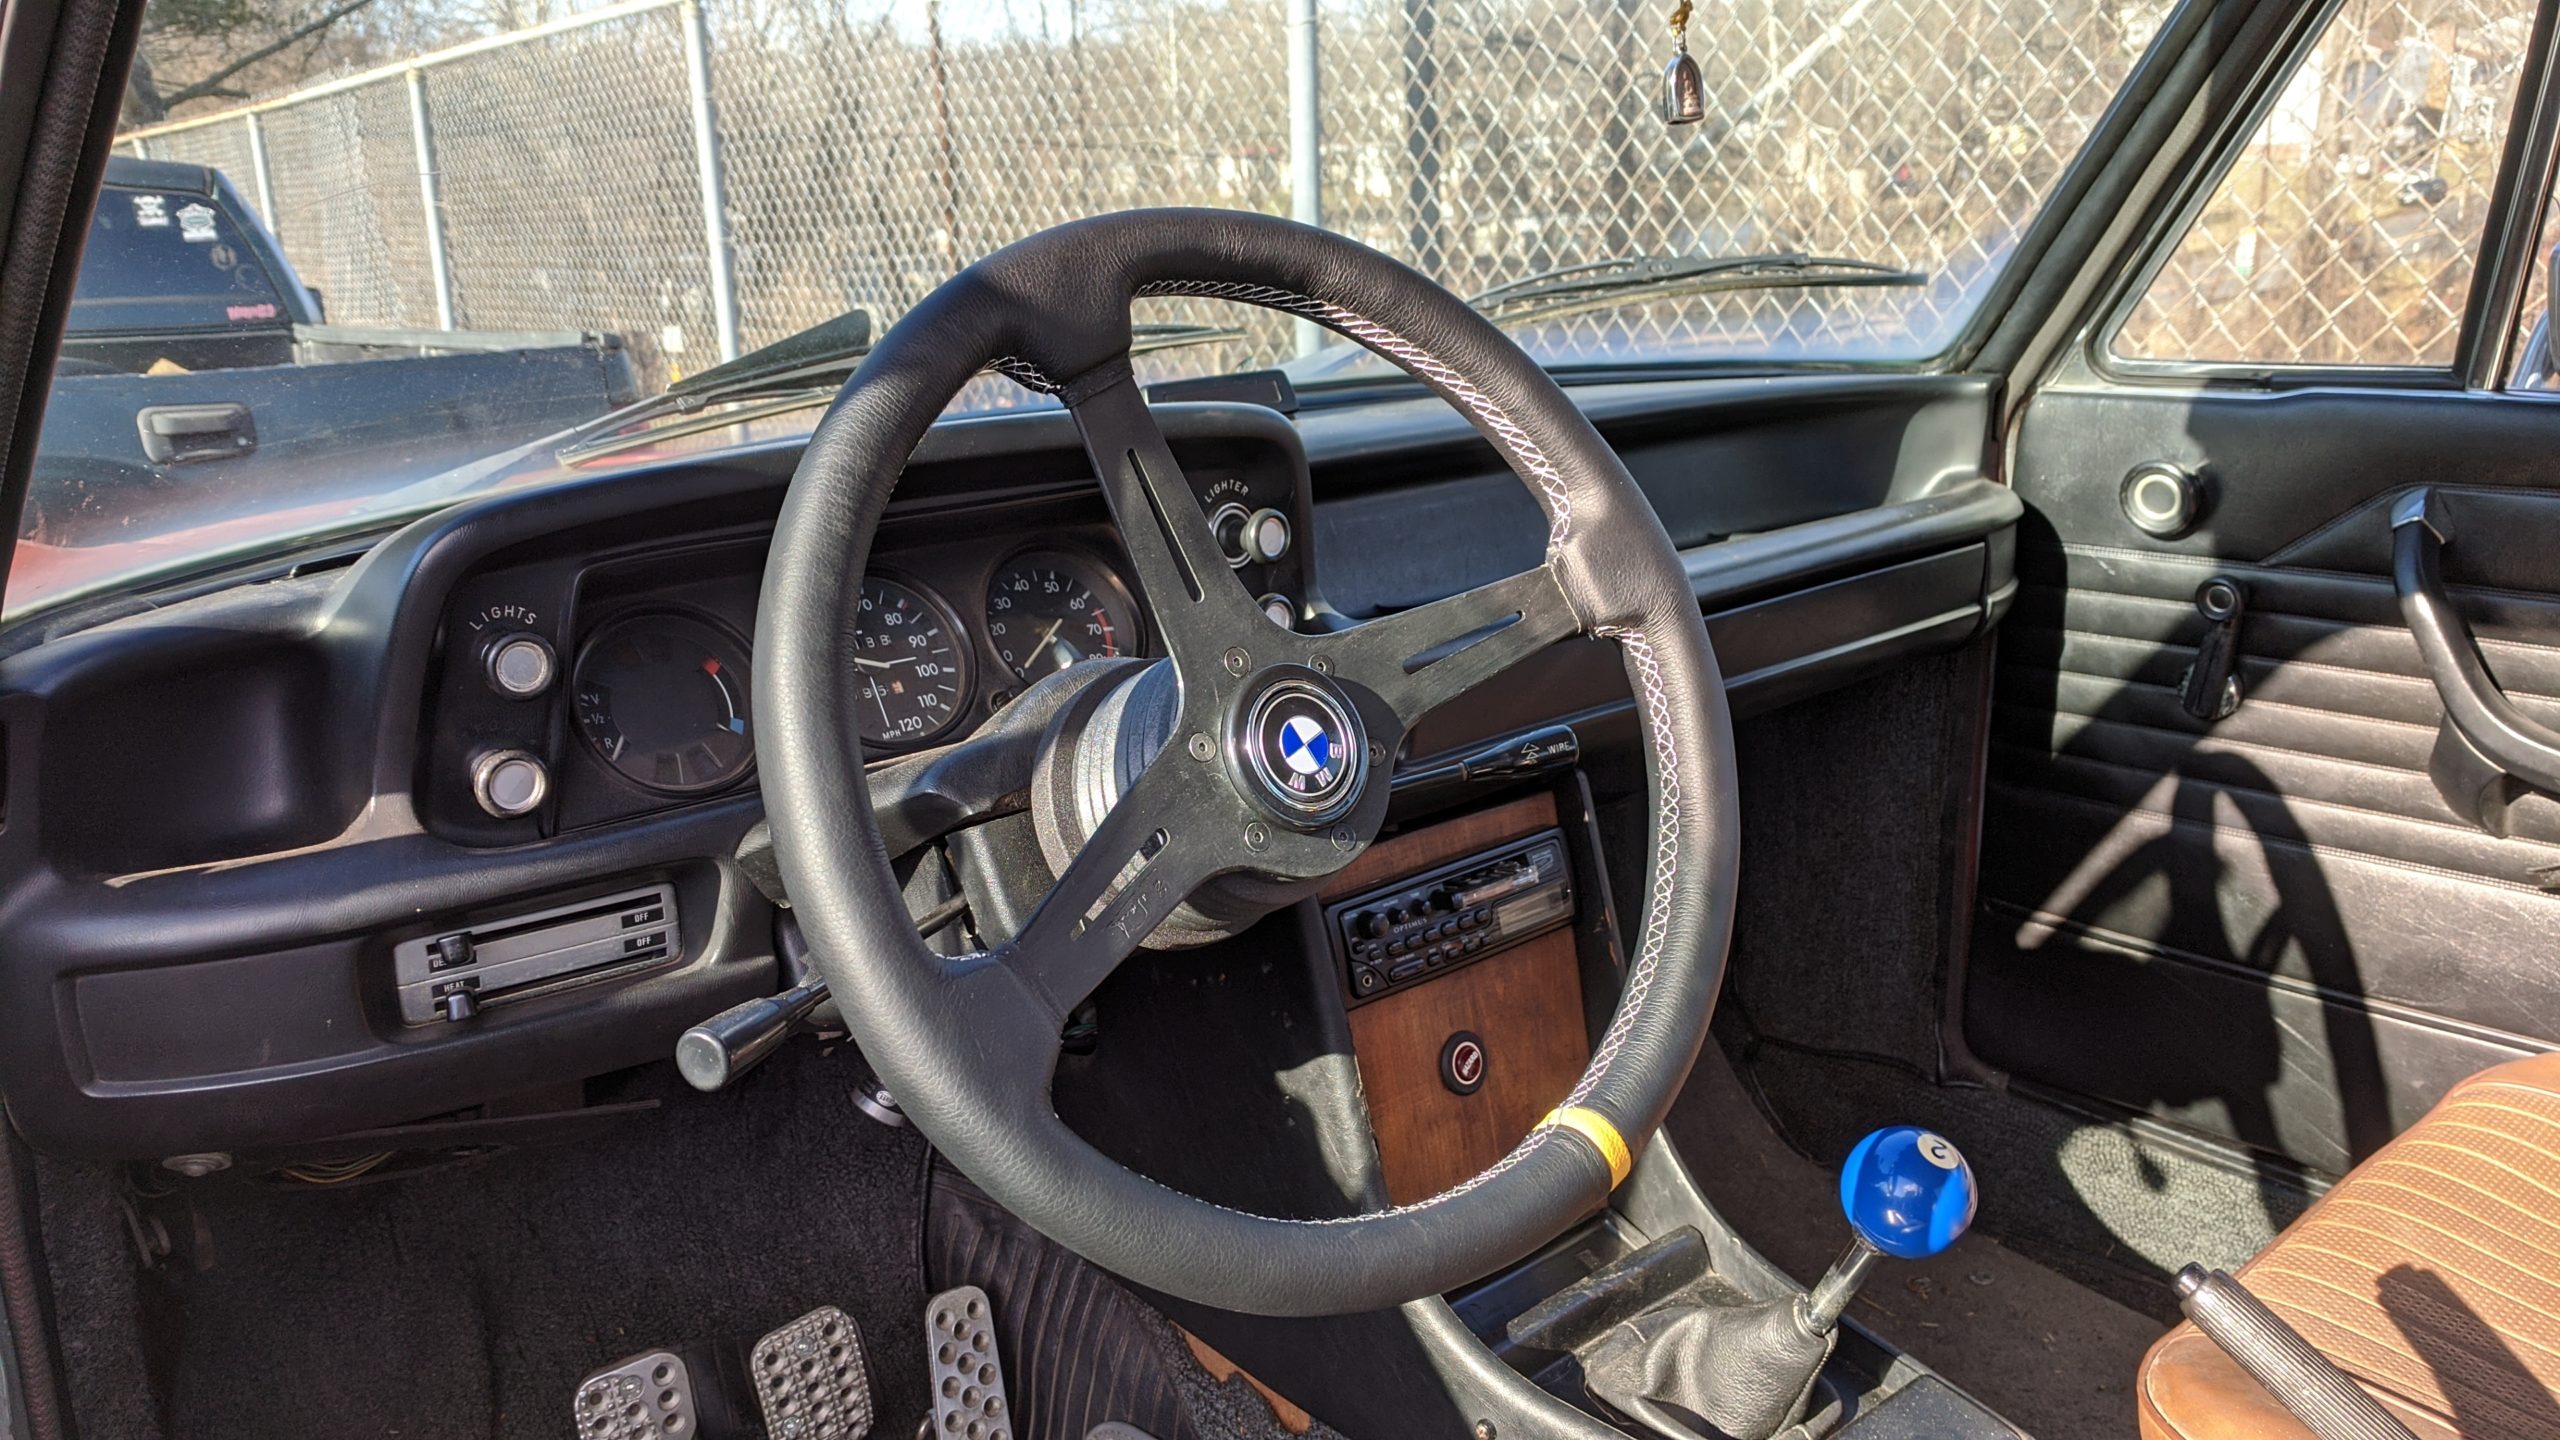
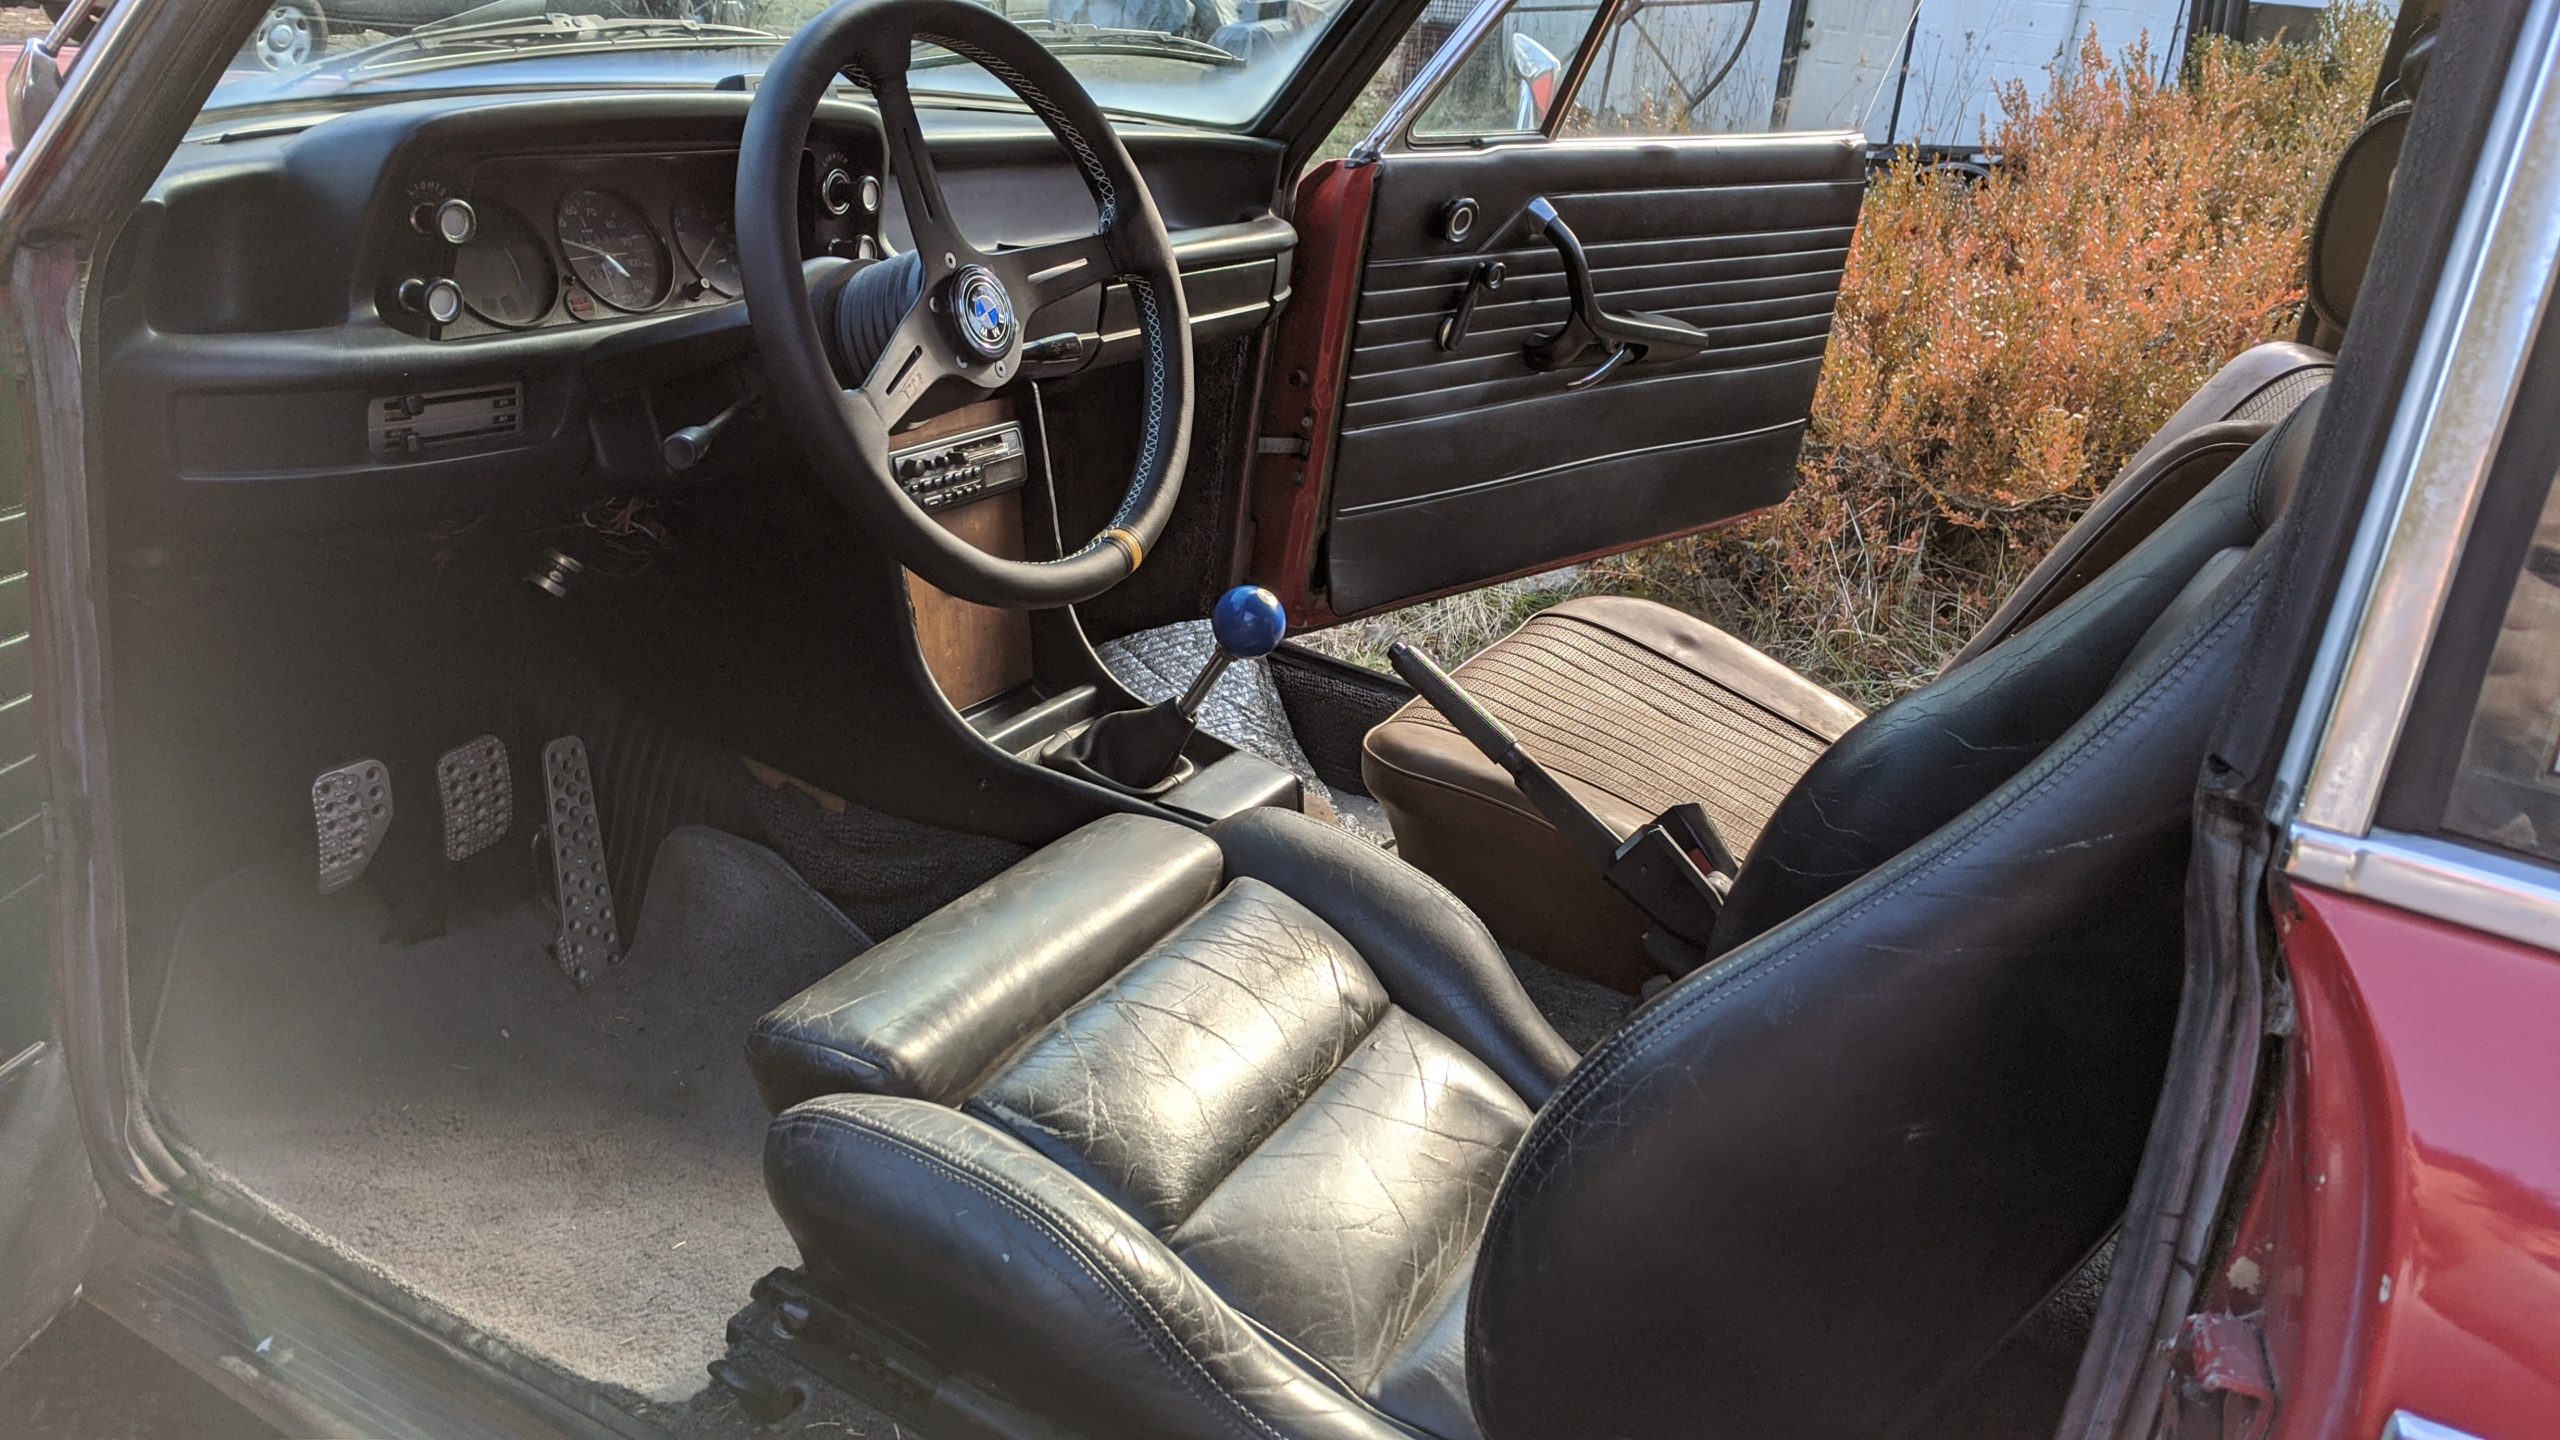
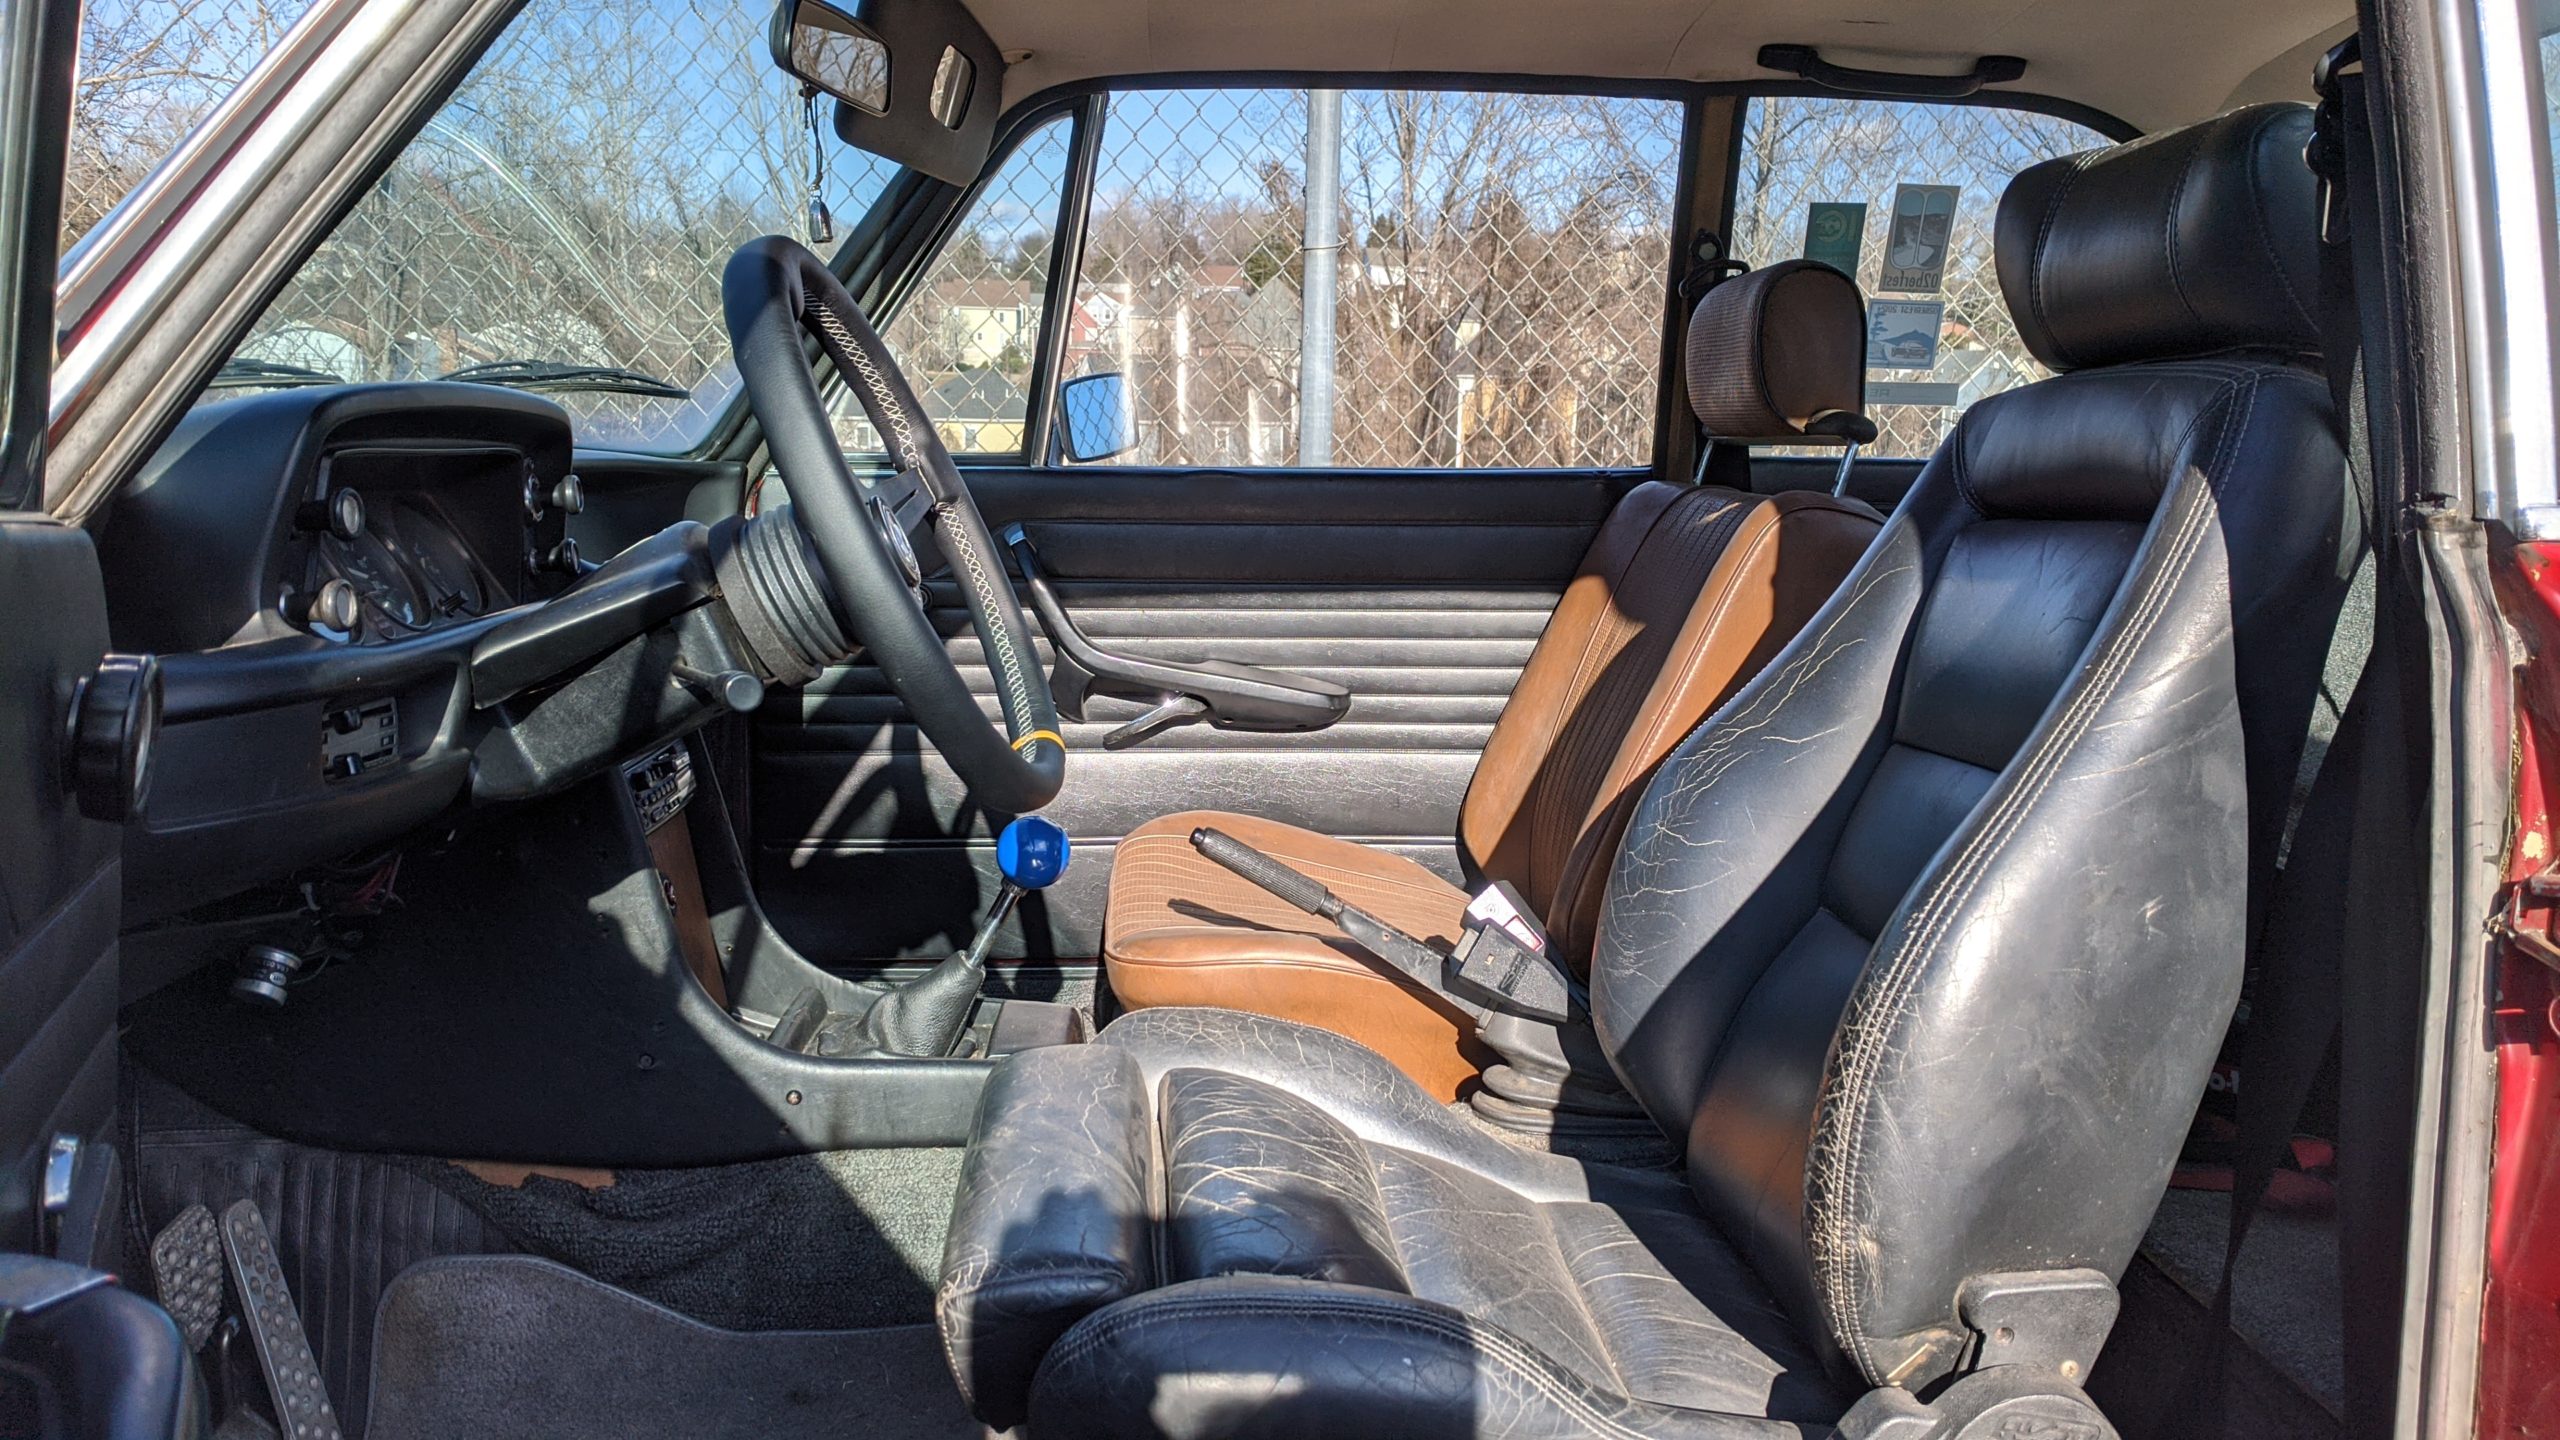
Transmission:  4 speed manual, converted from factory automatic

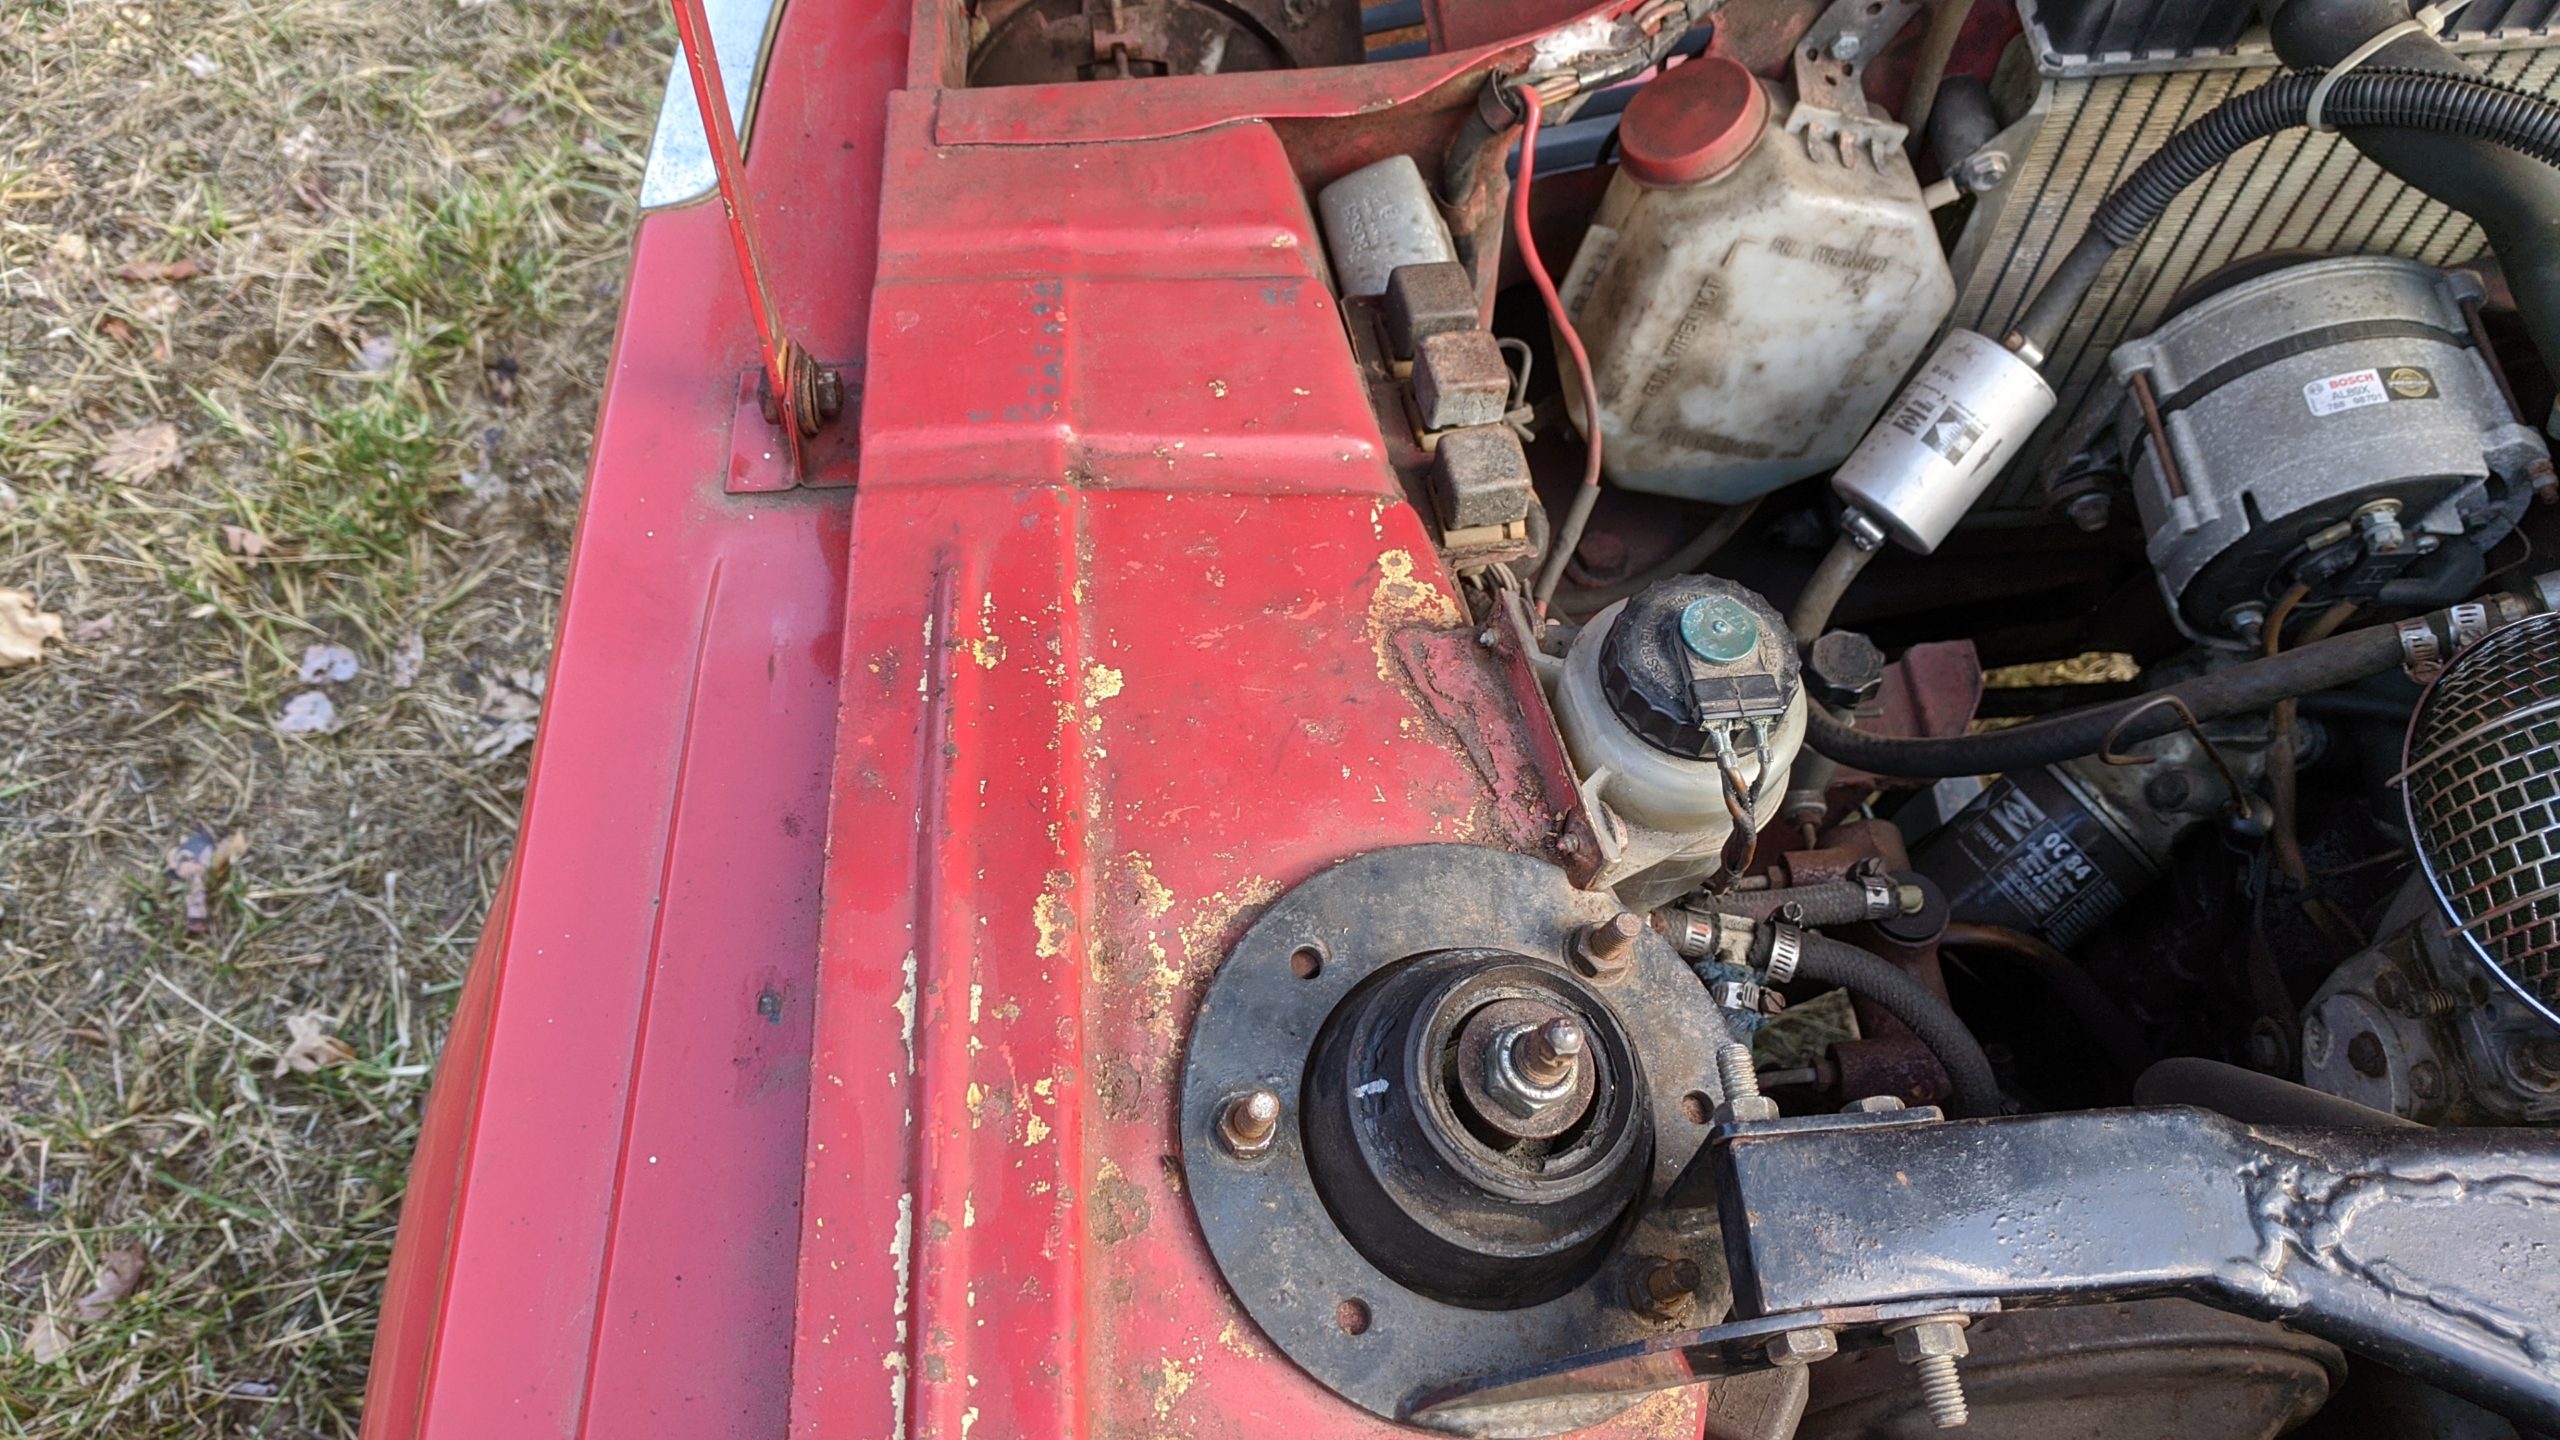
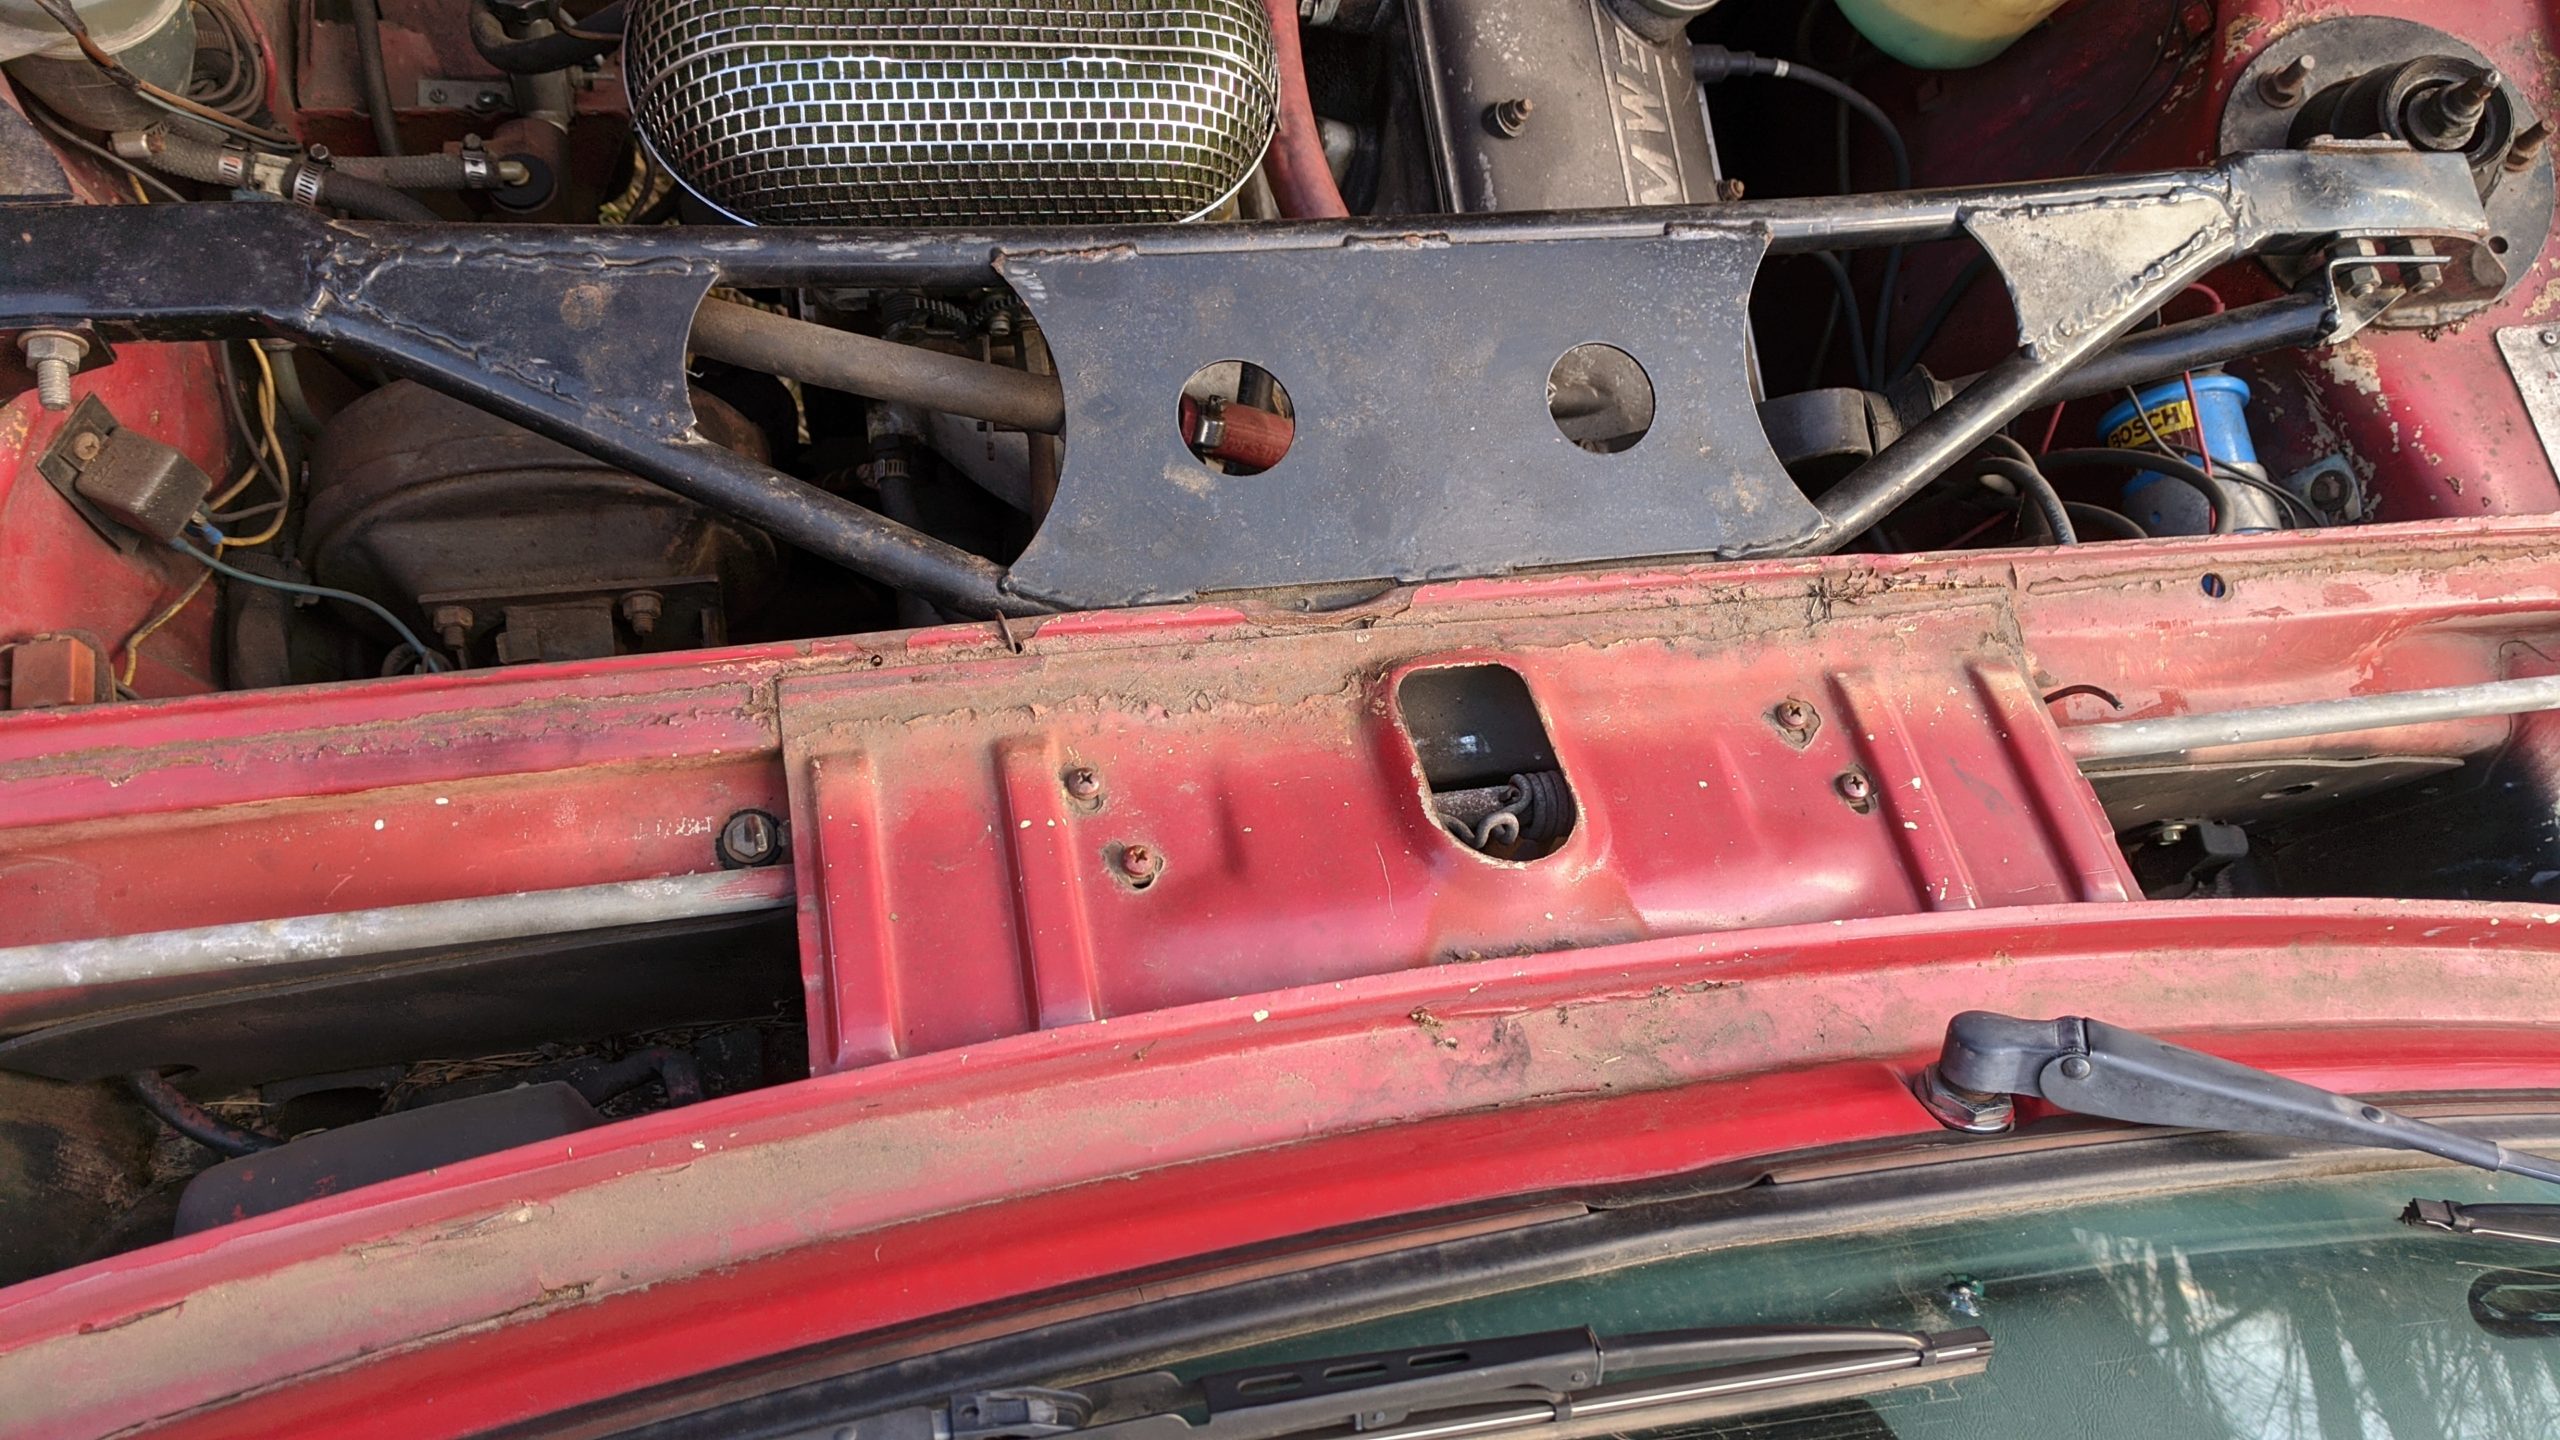
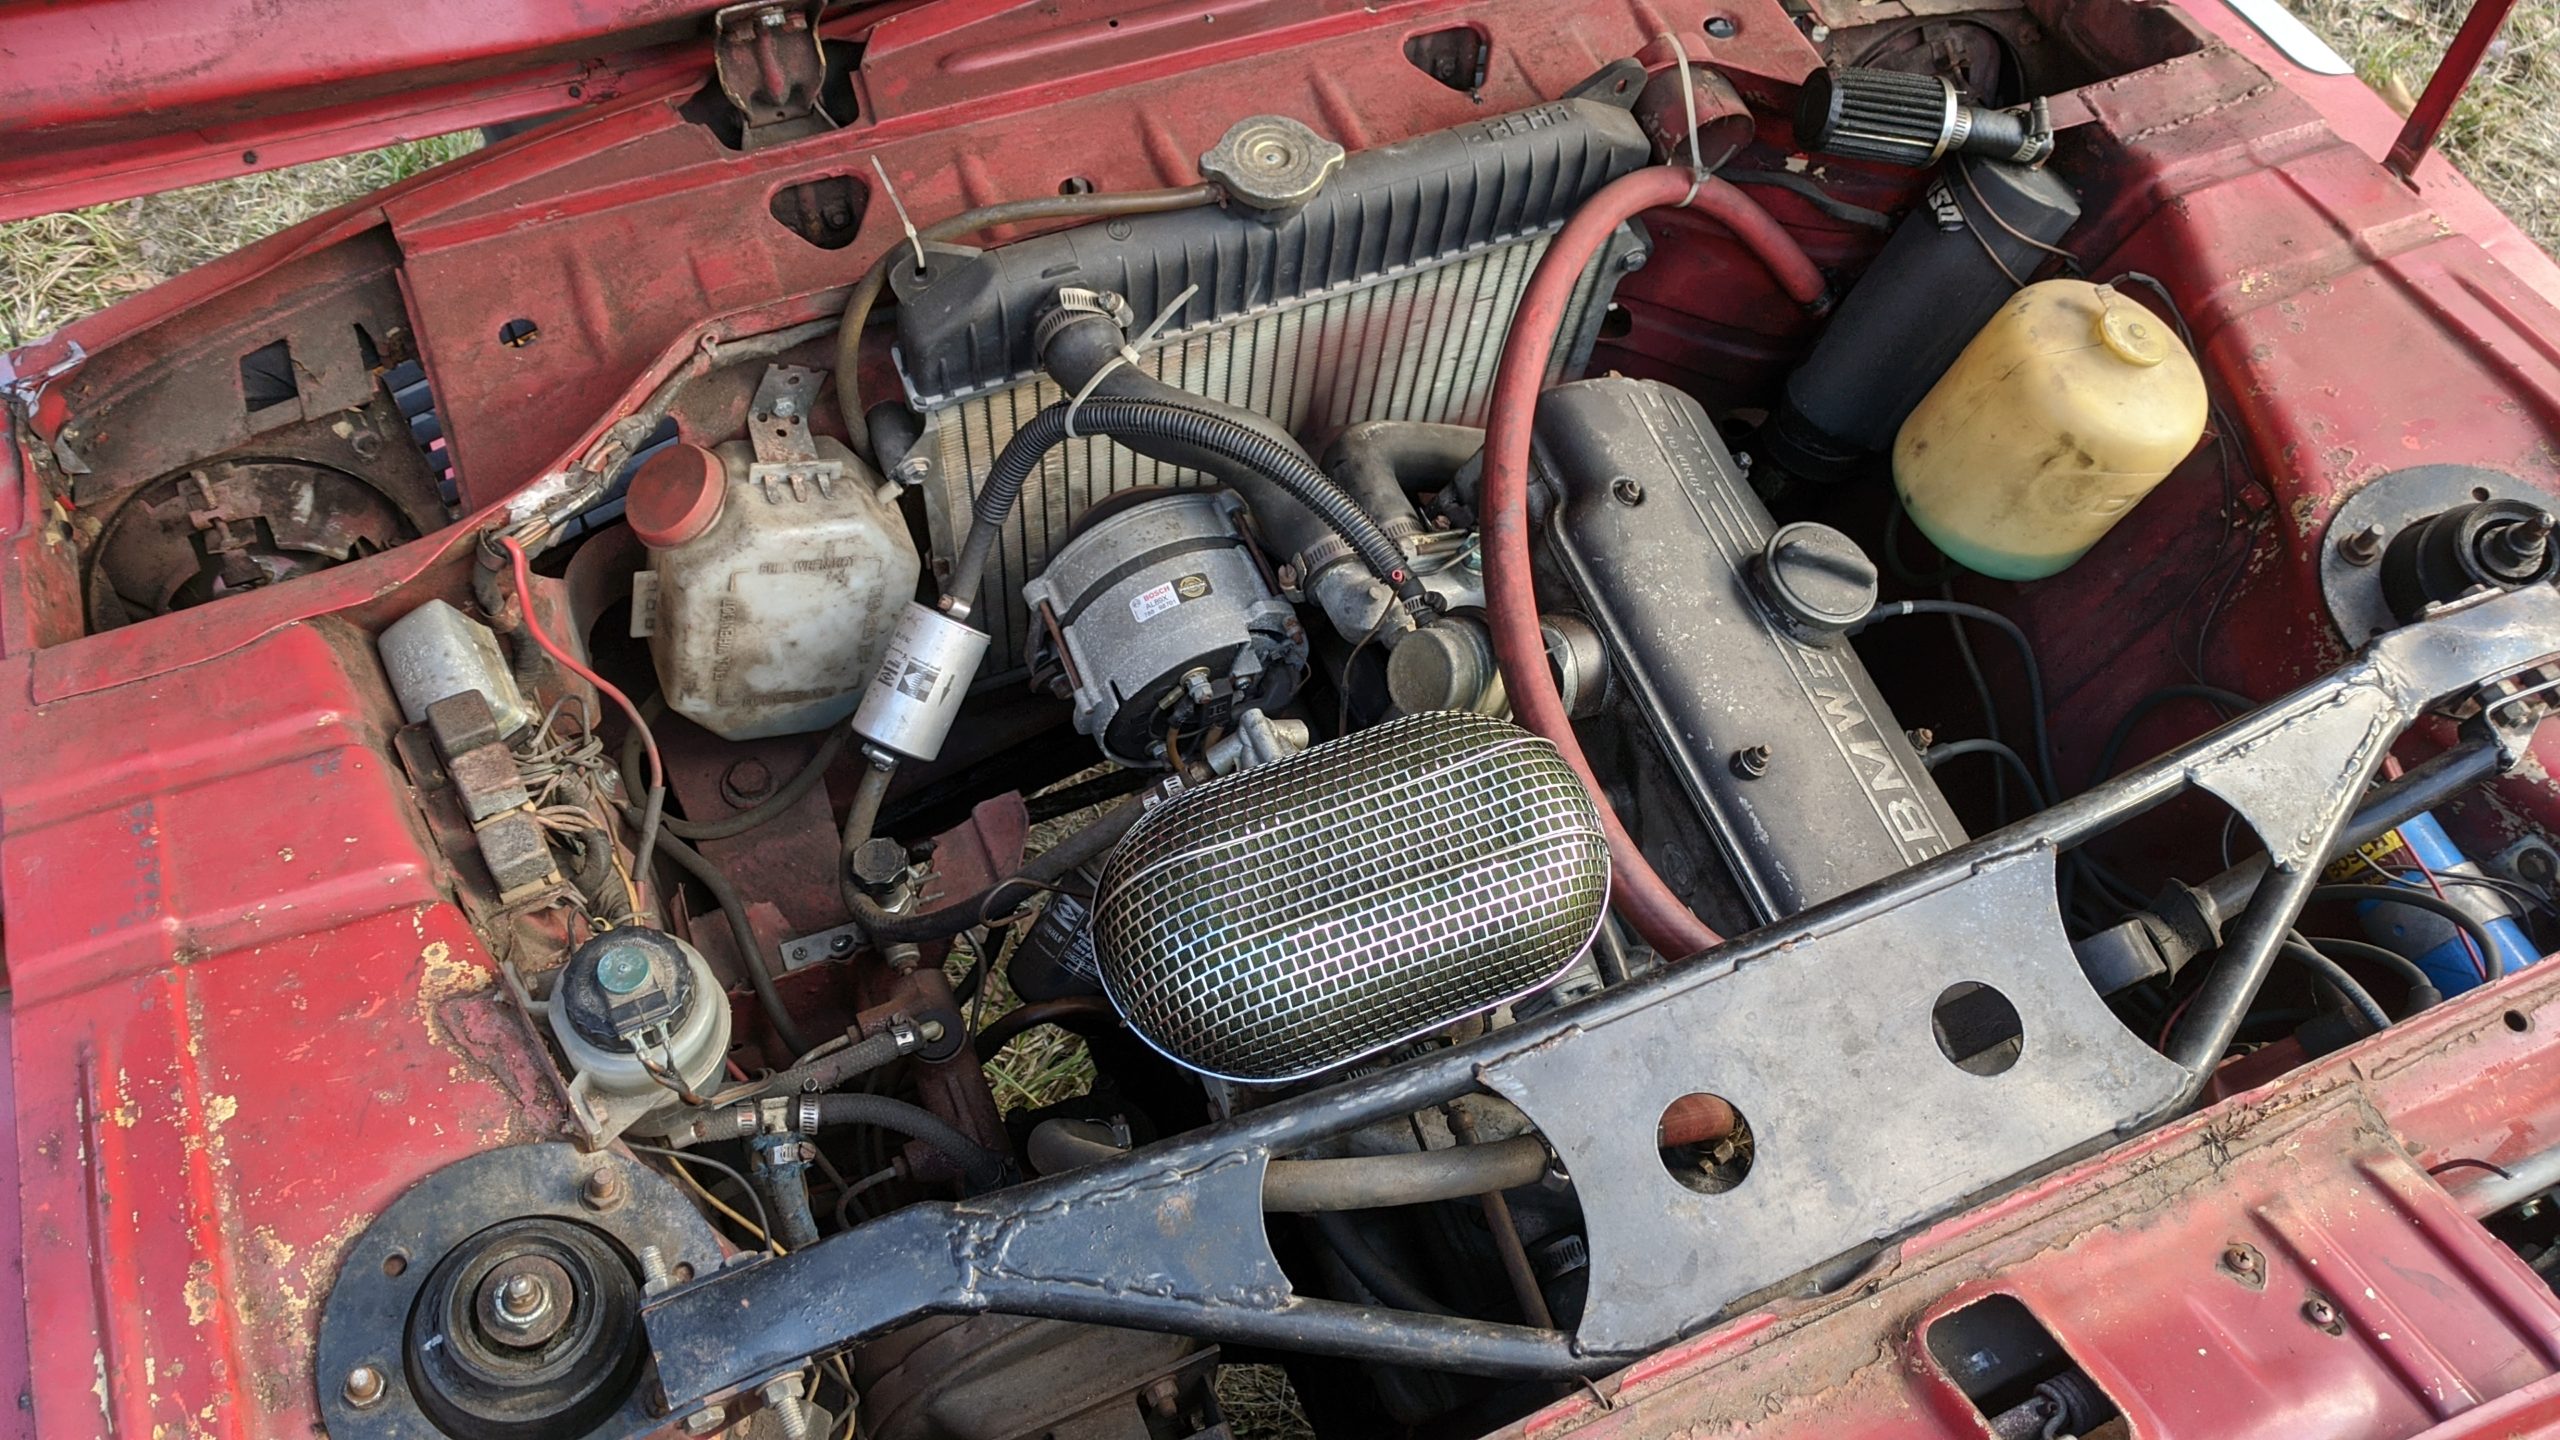
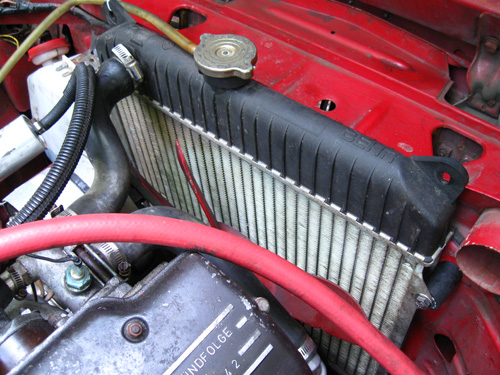
Engine:  not original to car.  M10 with E12 head, 292 regrind cam, tii pistons, 38/38 Weber carburetor, 008 tii distributor with Pertronix Ignitor, 320i radiator installed.

Exhaust:  02Again tii shorty header, stock down pipe, Ansa resonator, stock muffler

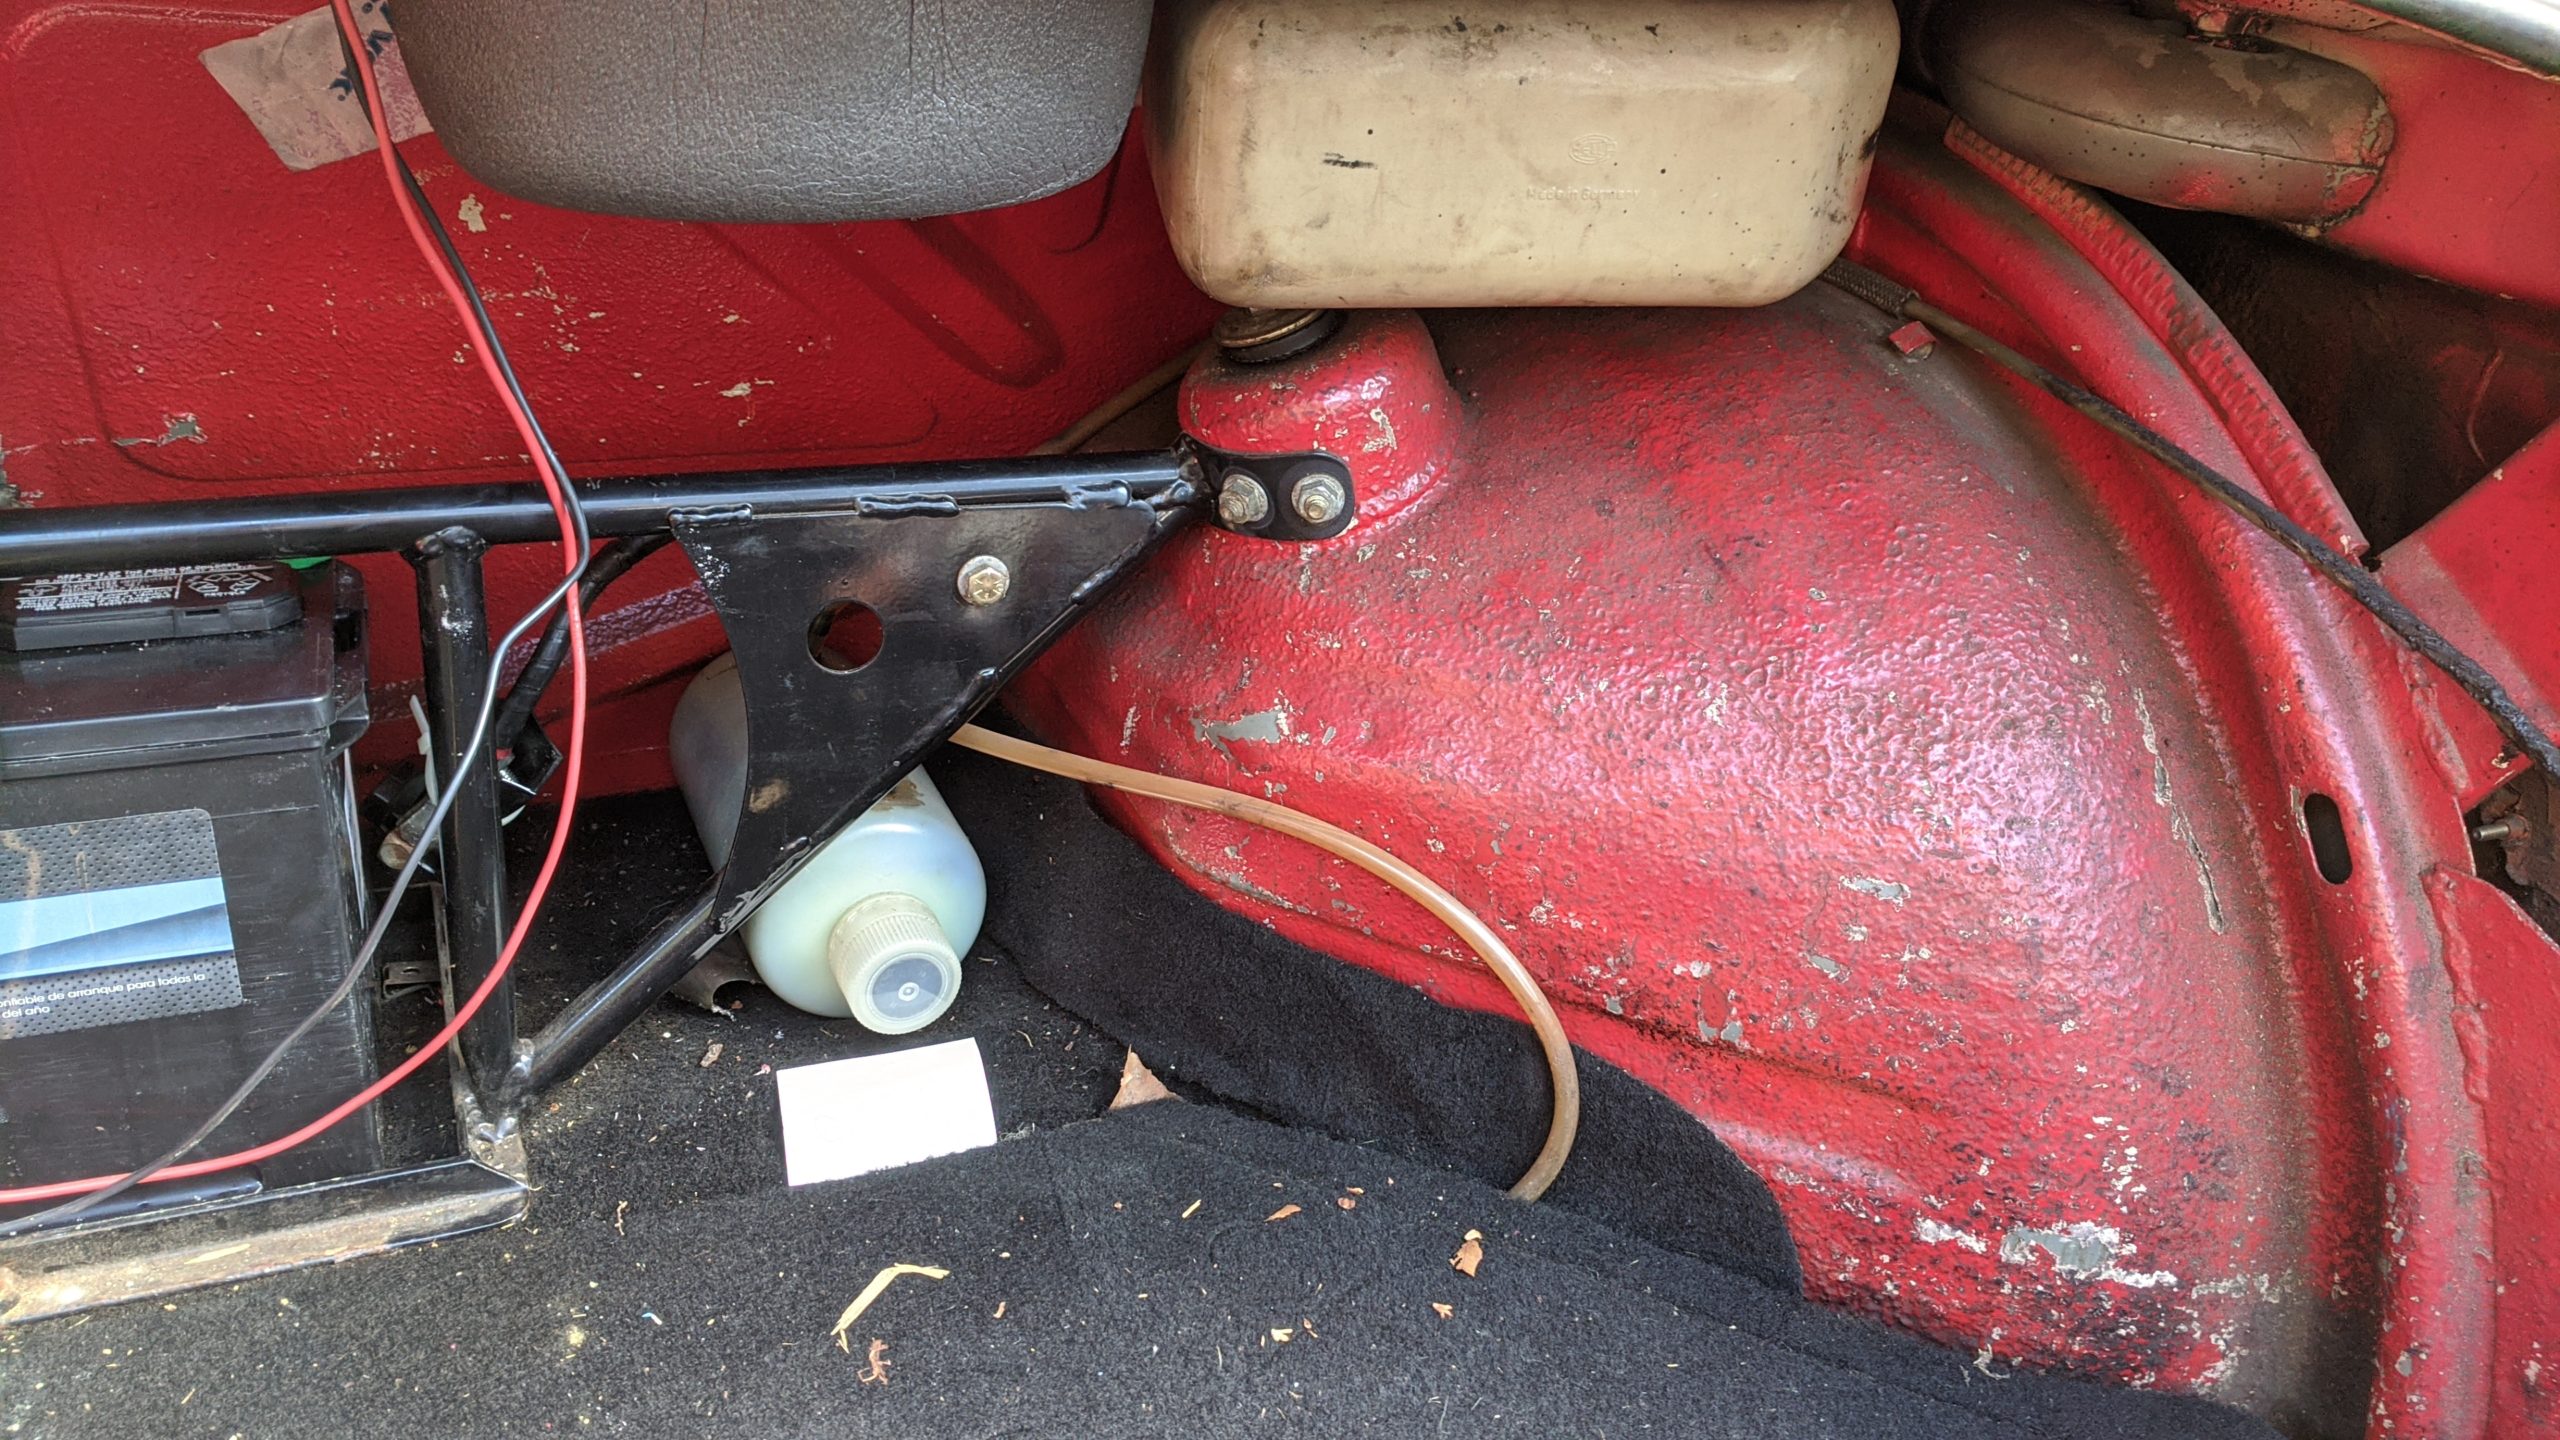
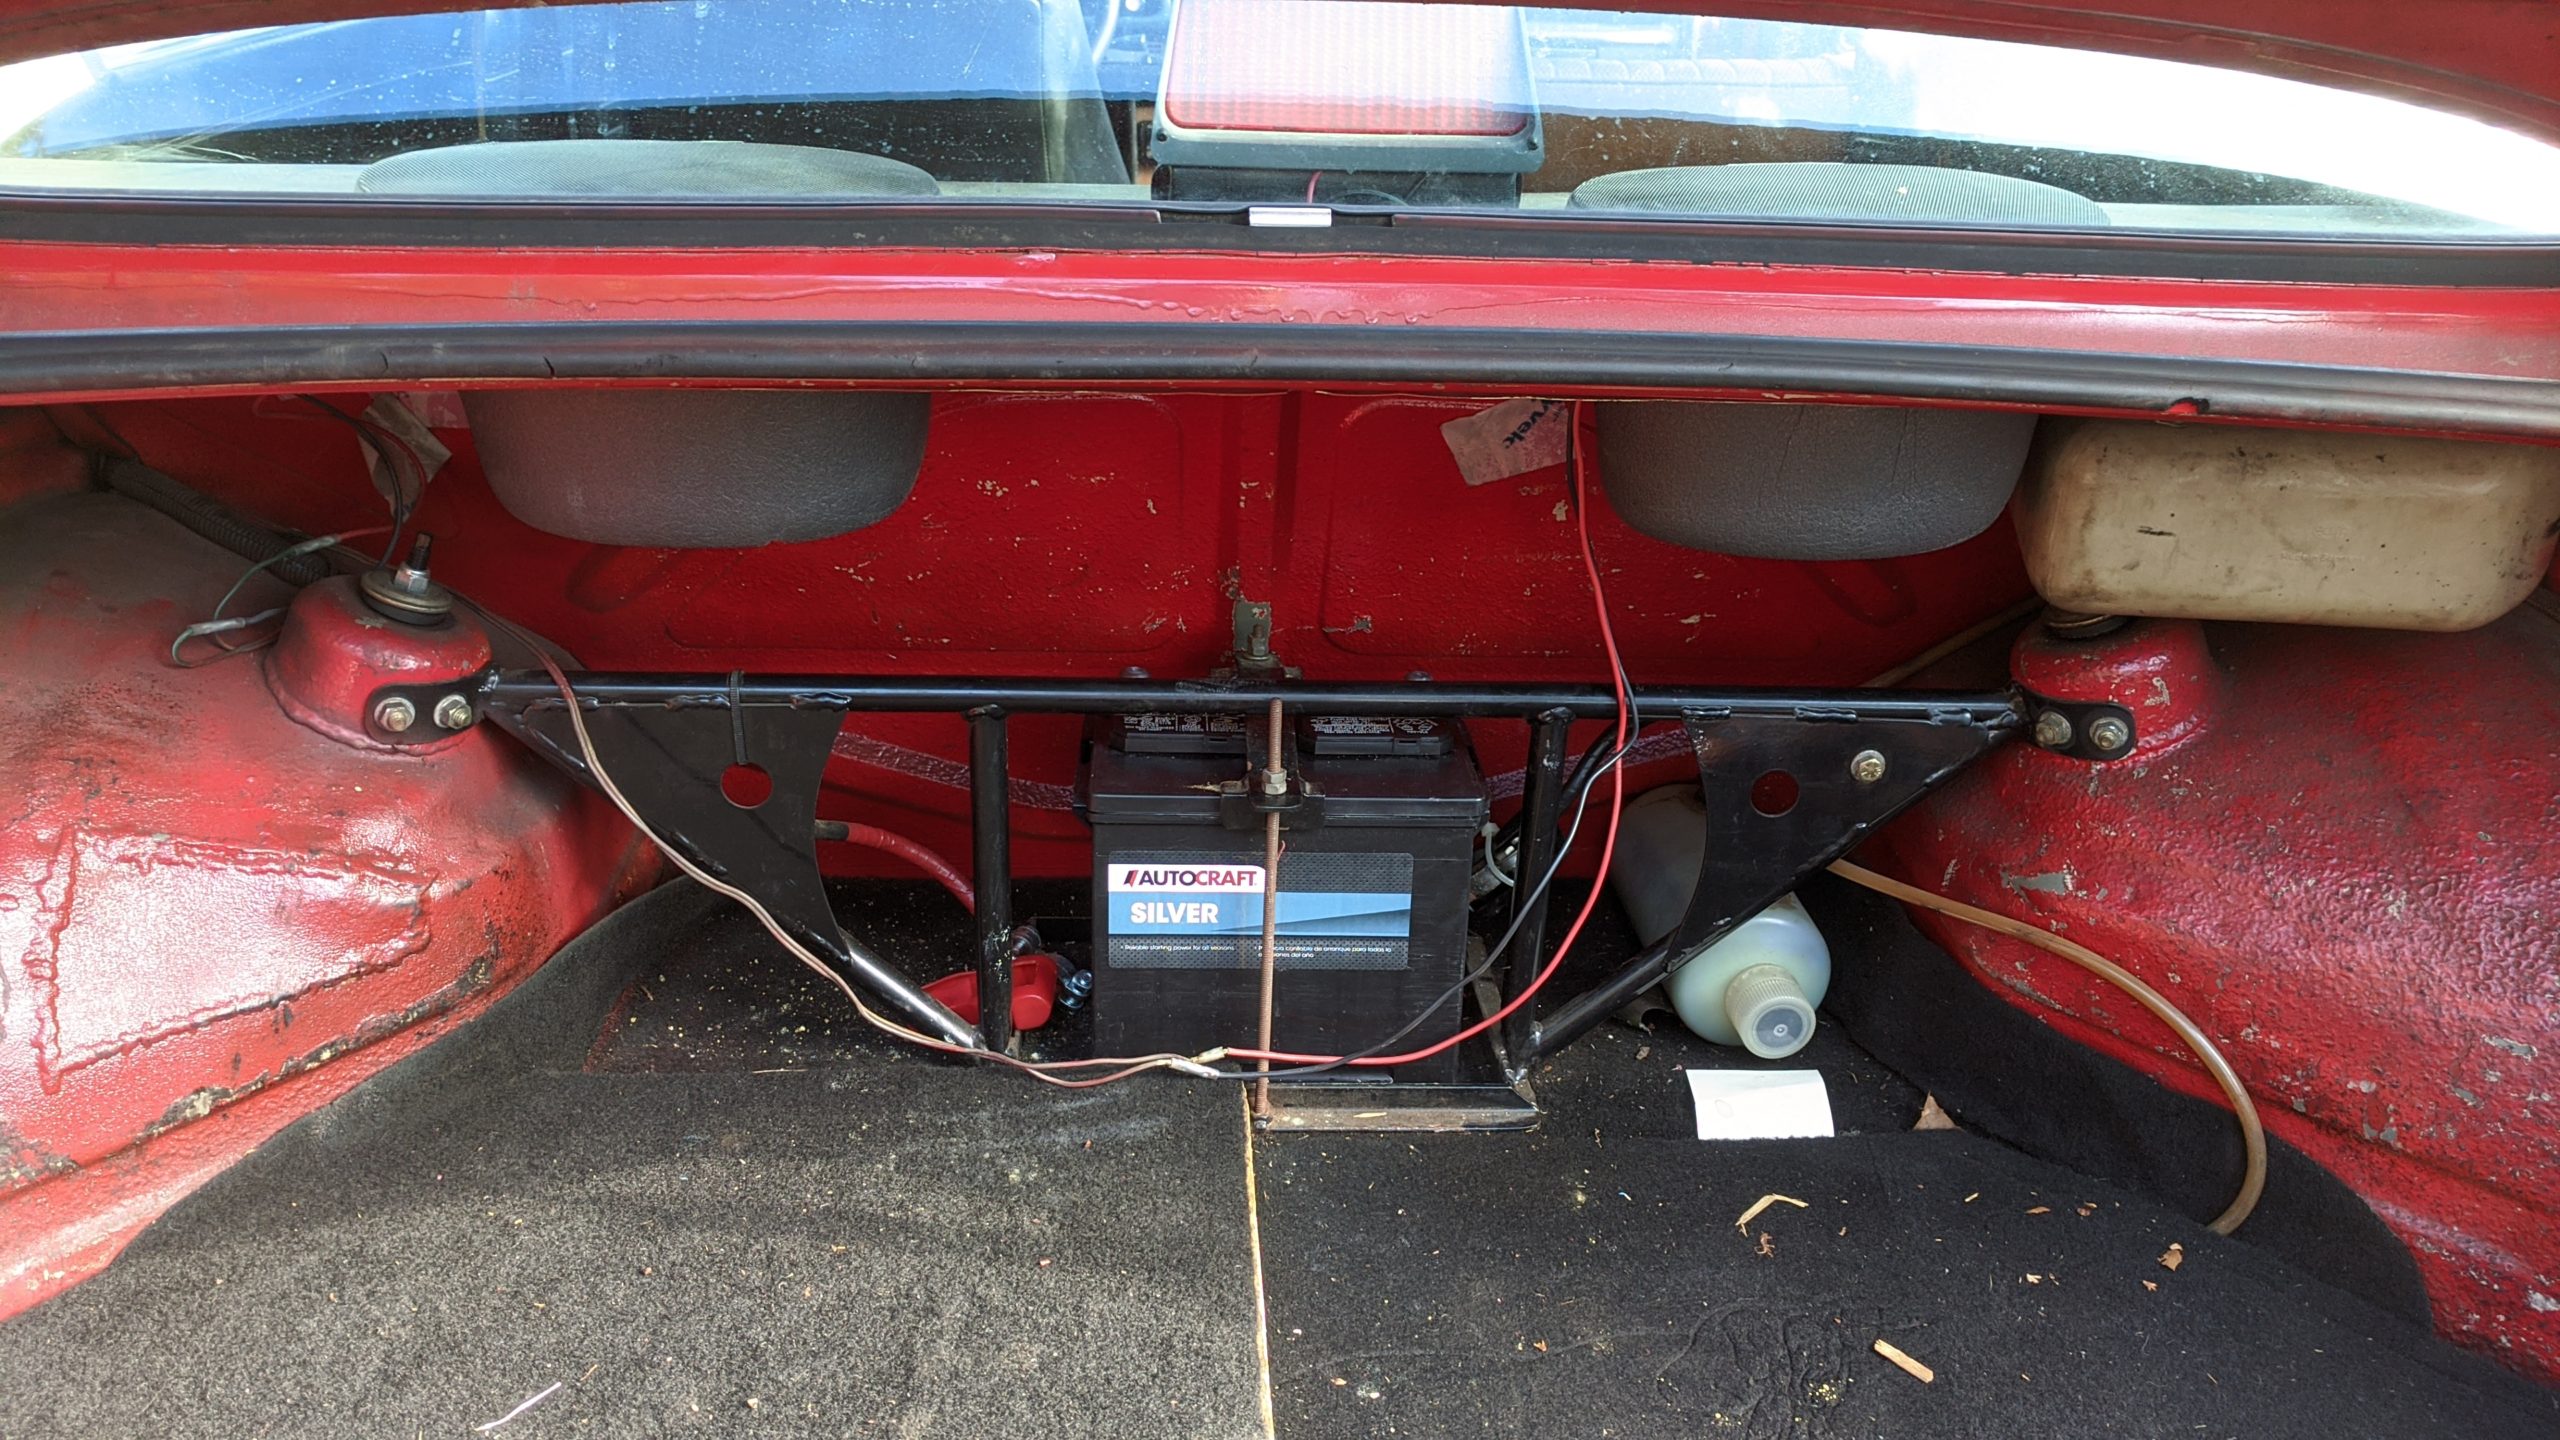
Suspension:  Spax adjustable shocks with Eibach lowering springs, Top End Performance strut braces front and rear.  Tii anti-sway bars front and rear. Urethane bushings in front, stock rubber in rear (urethane rears included with sale)

Brakes:  Volvo big brake conversion in front, Hawk HP+ pads, stainless steel braided flex lines front and back

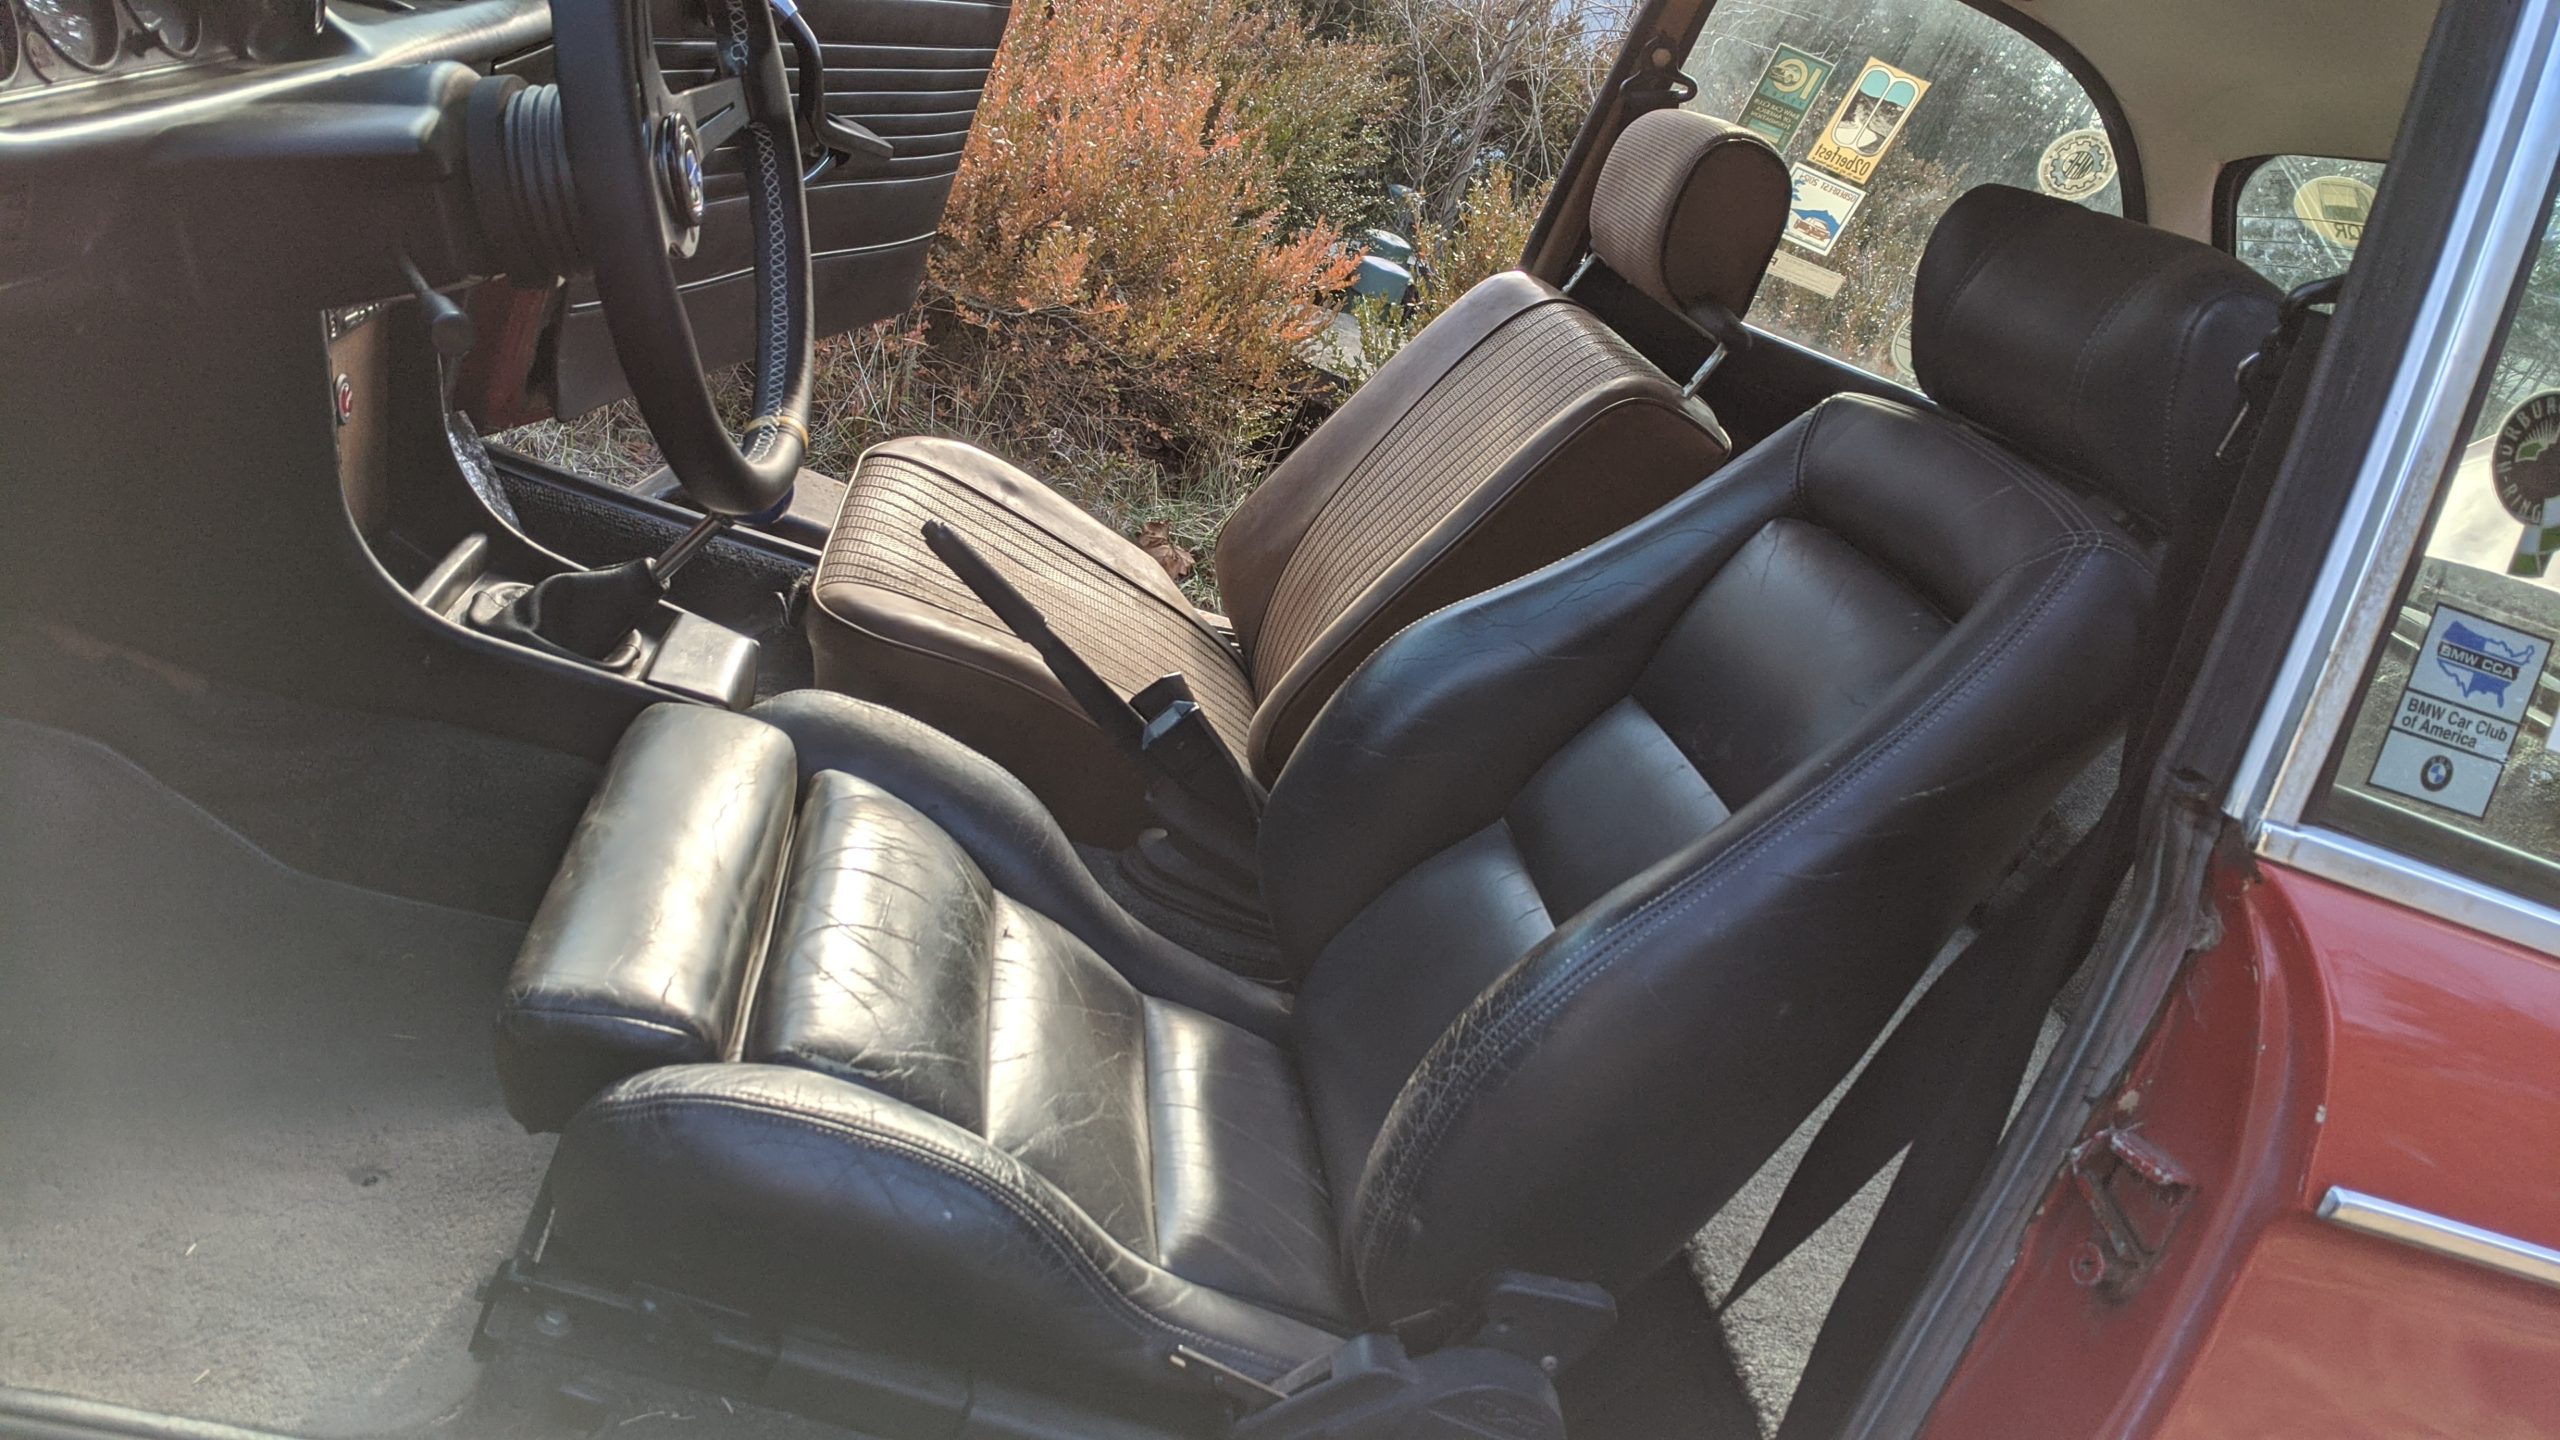
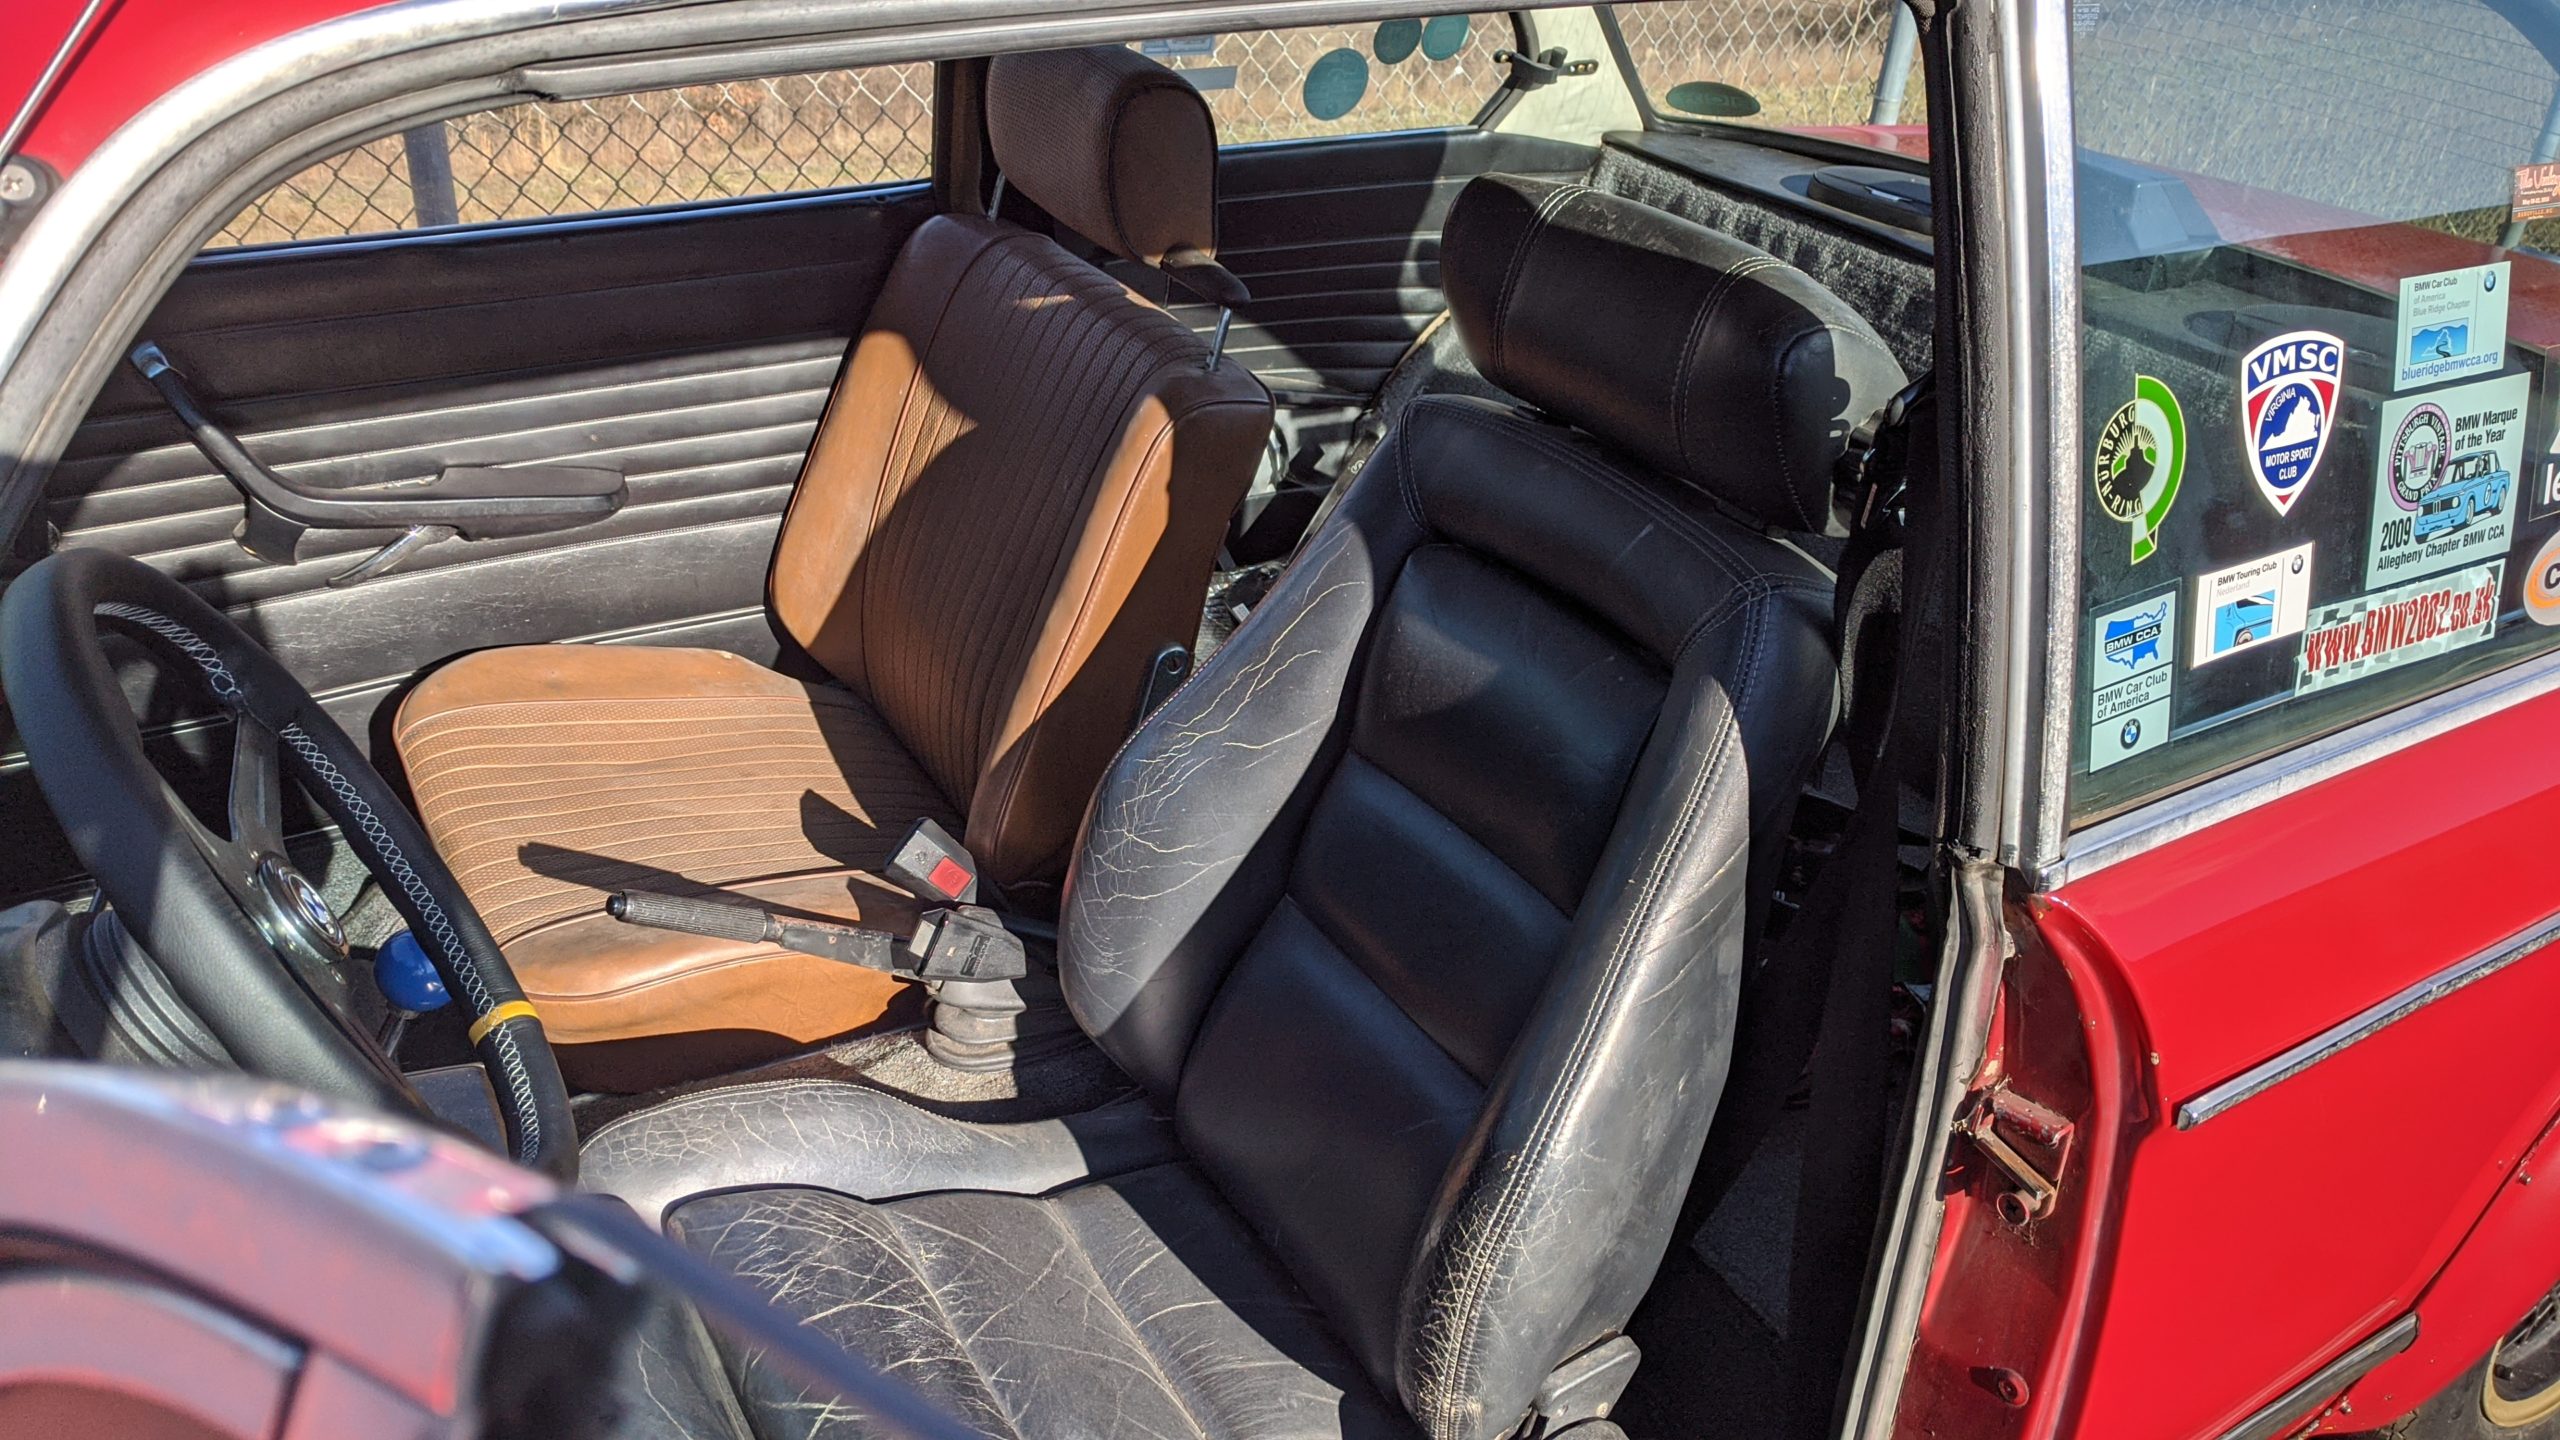
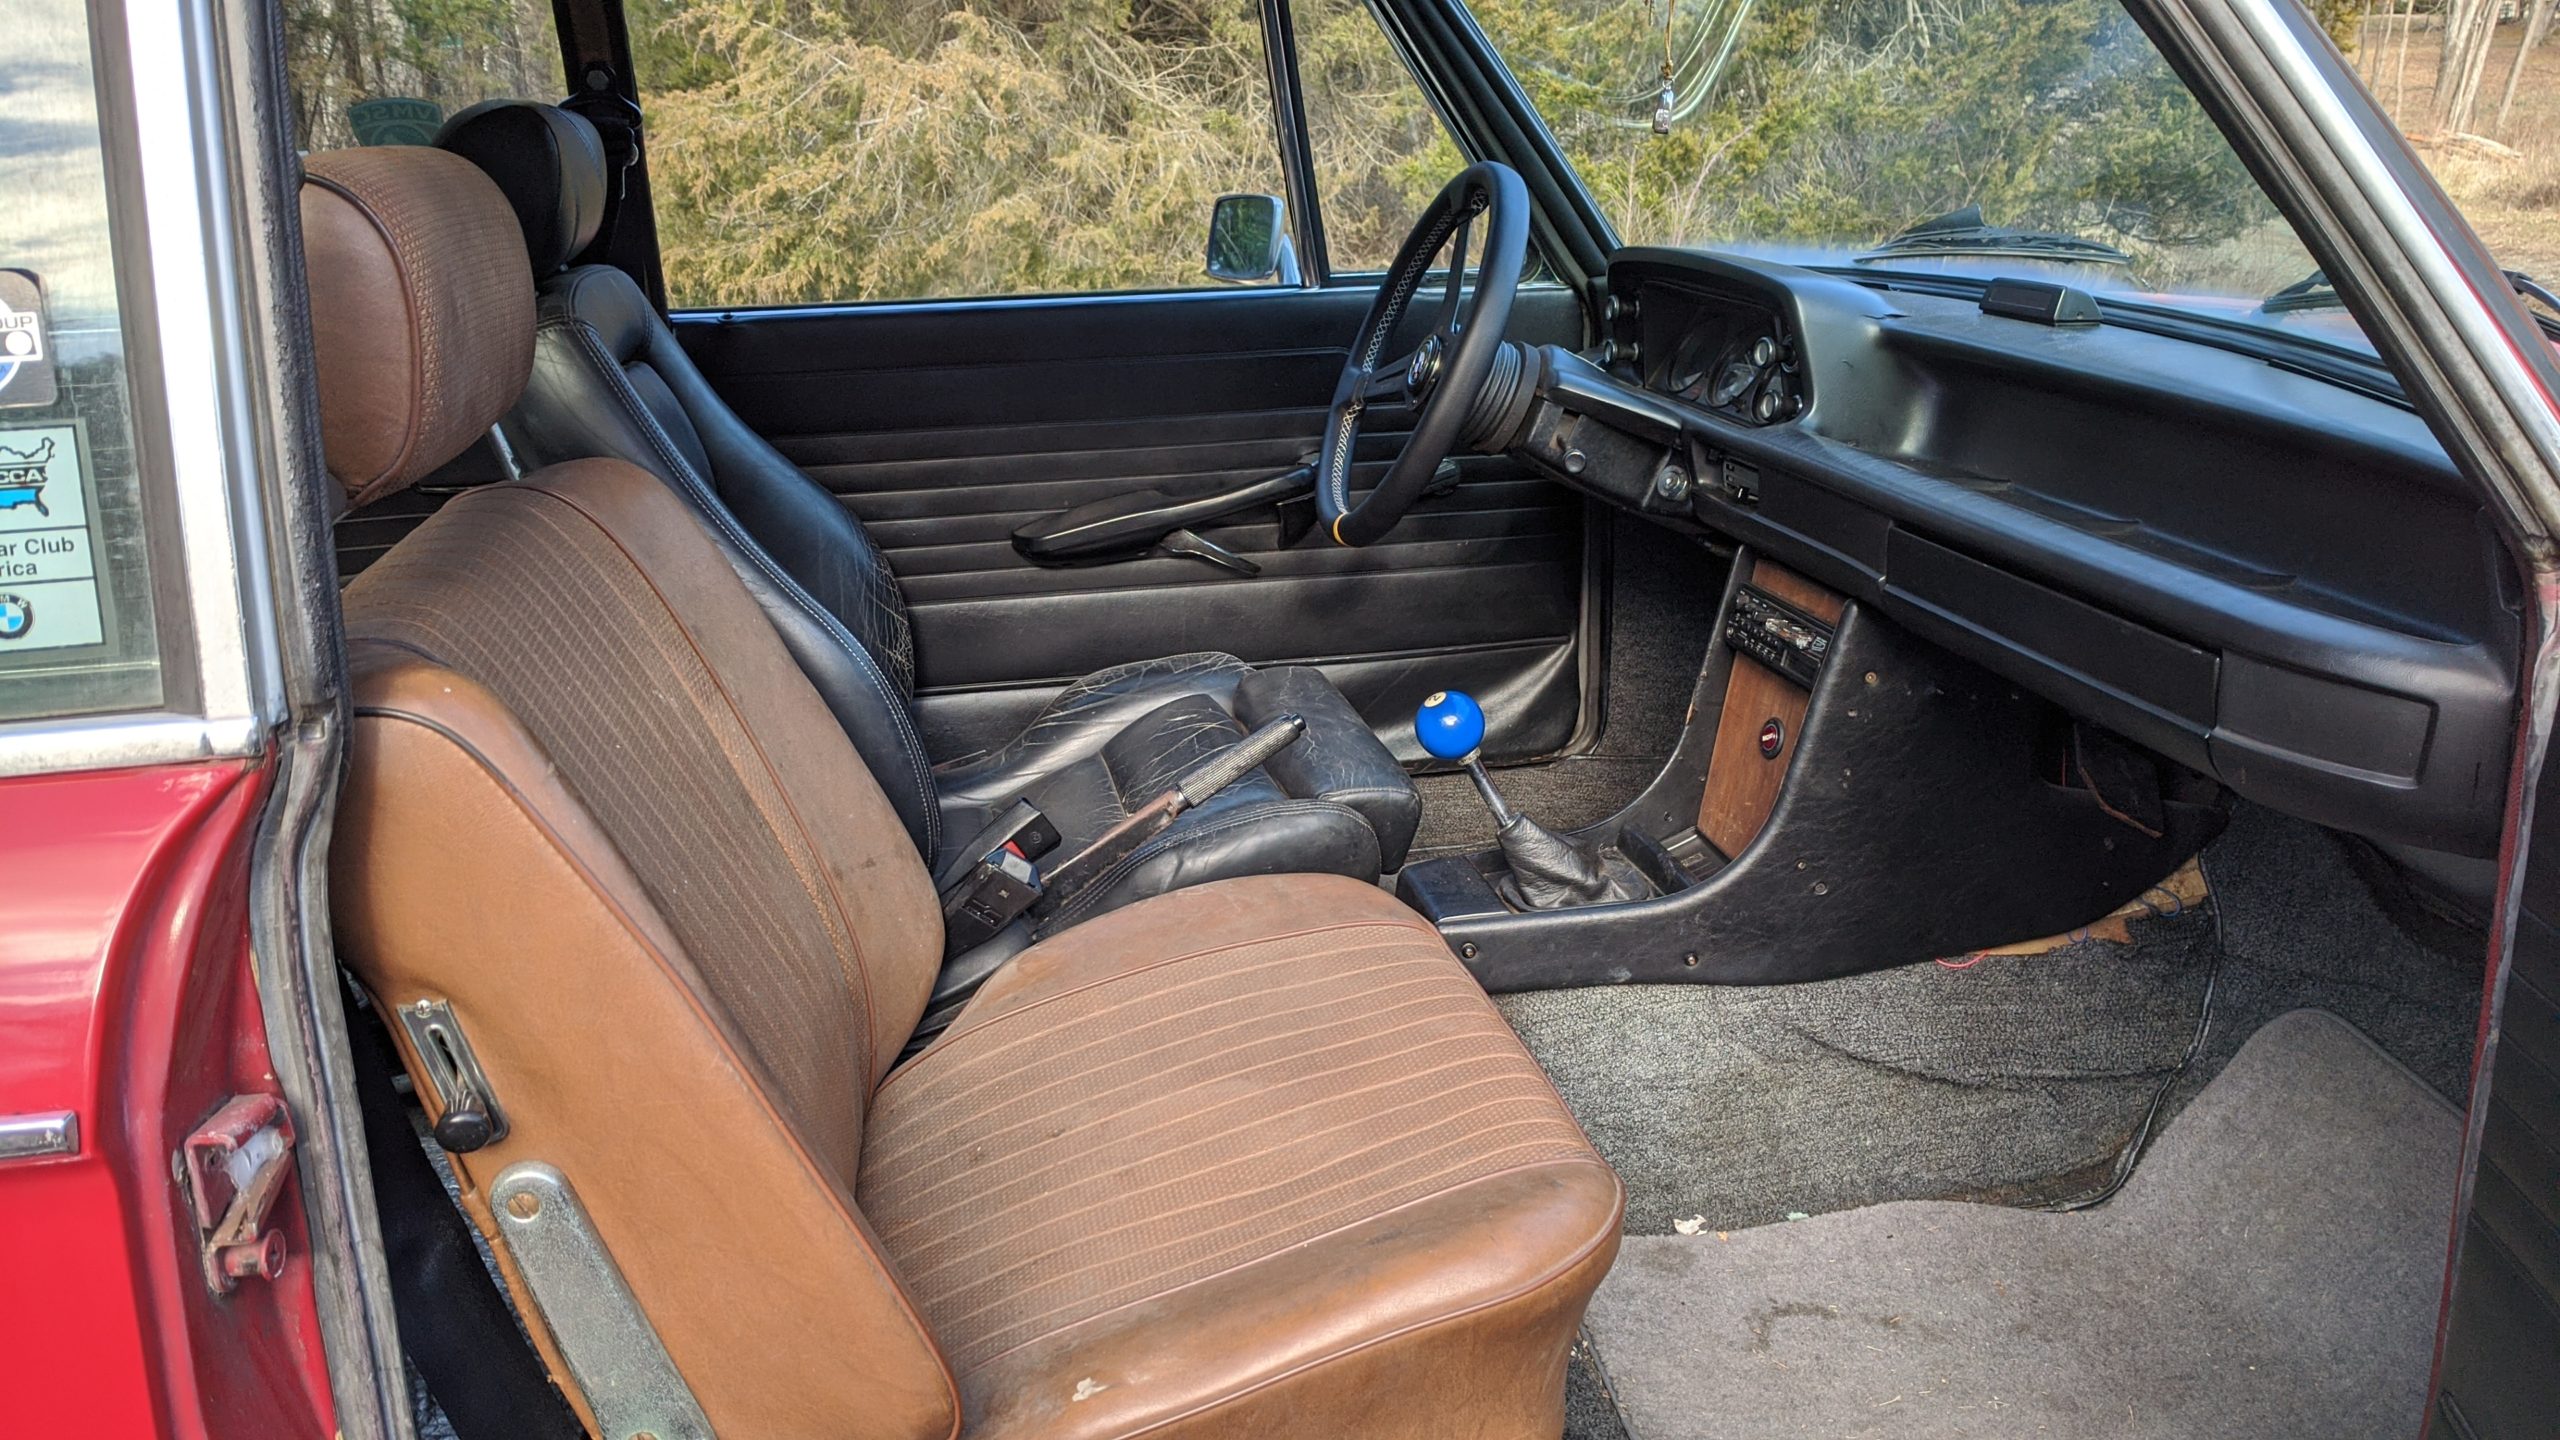
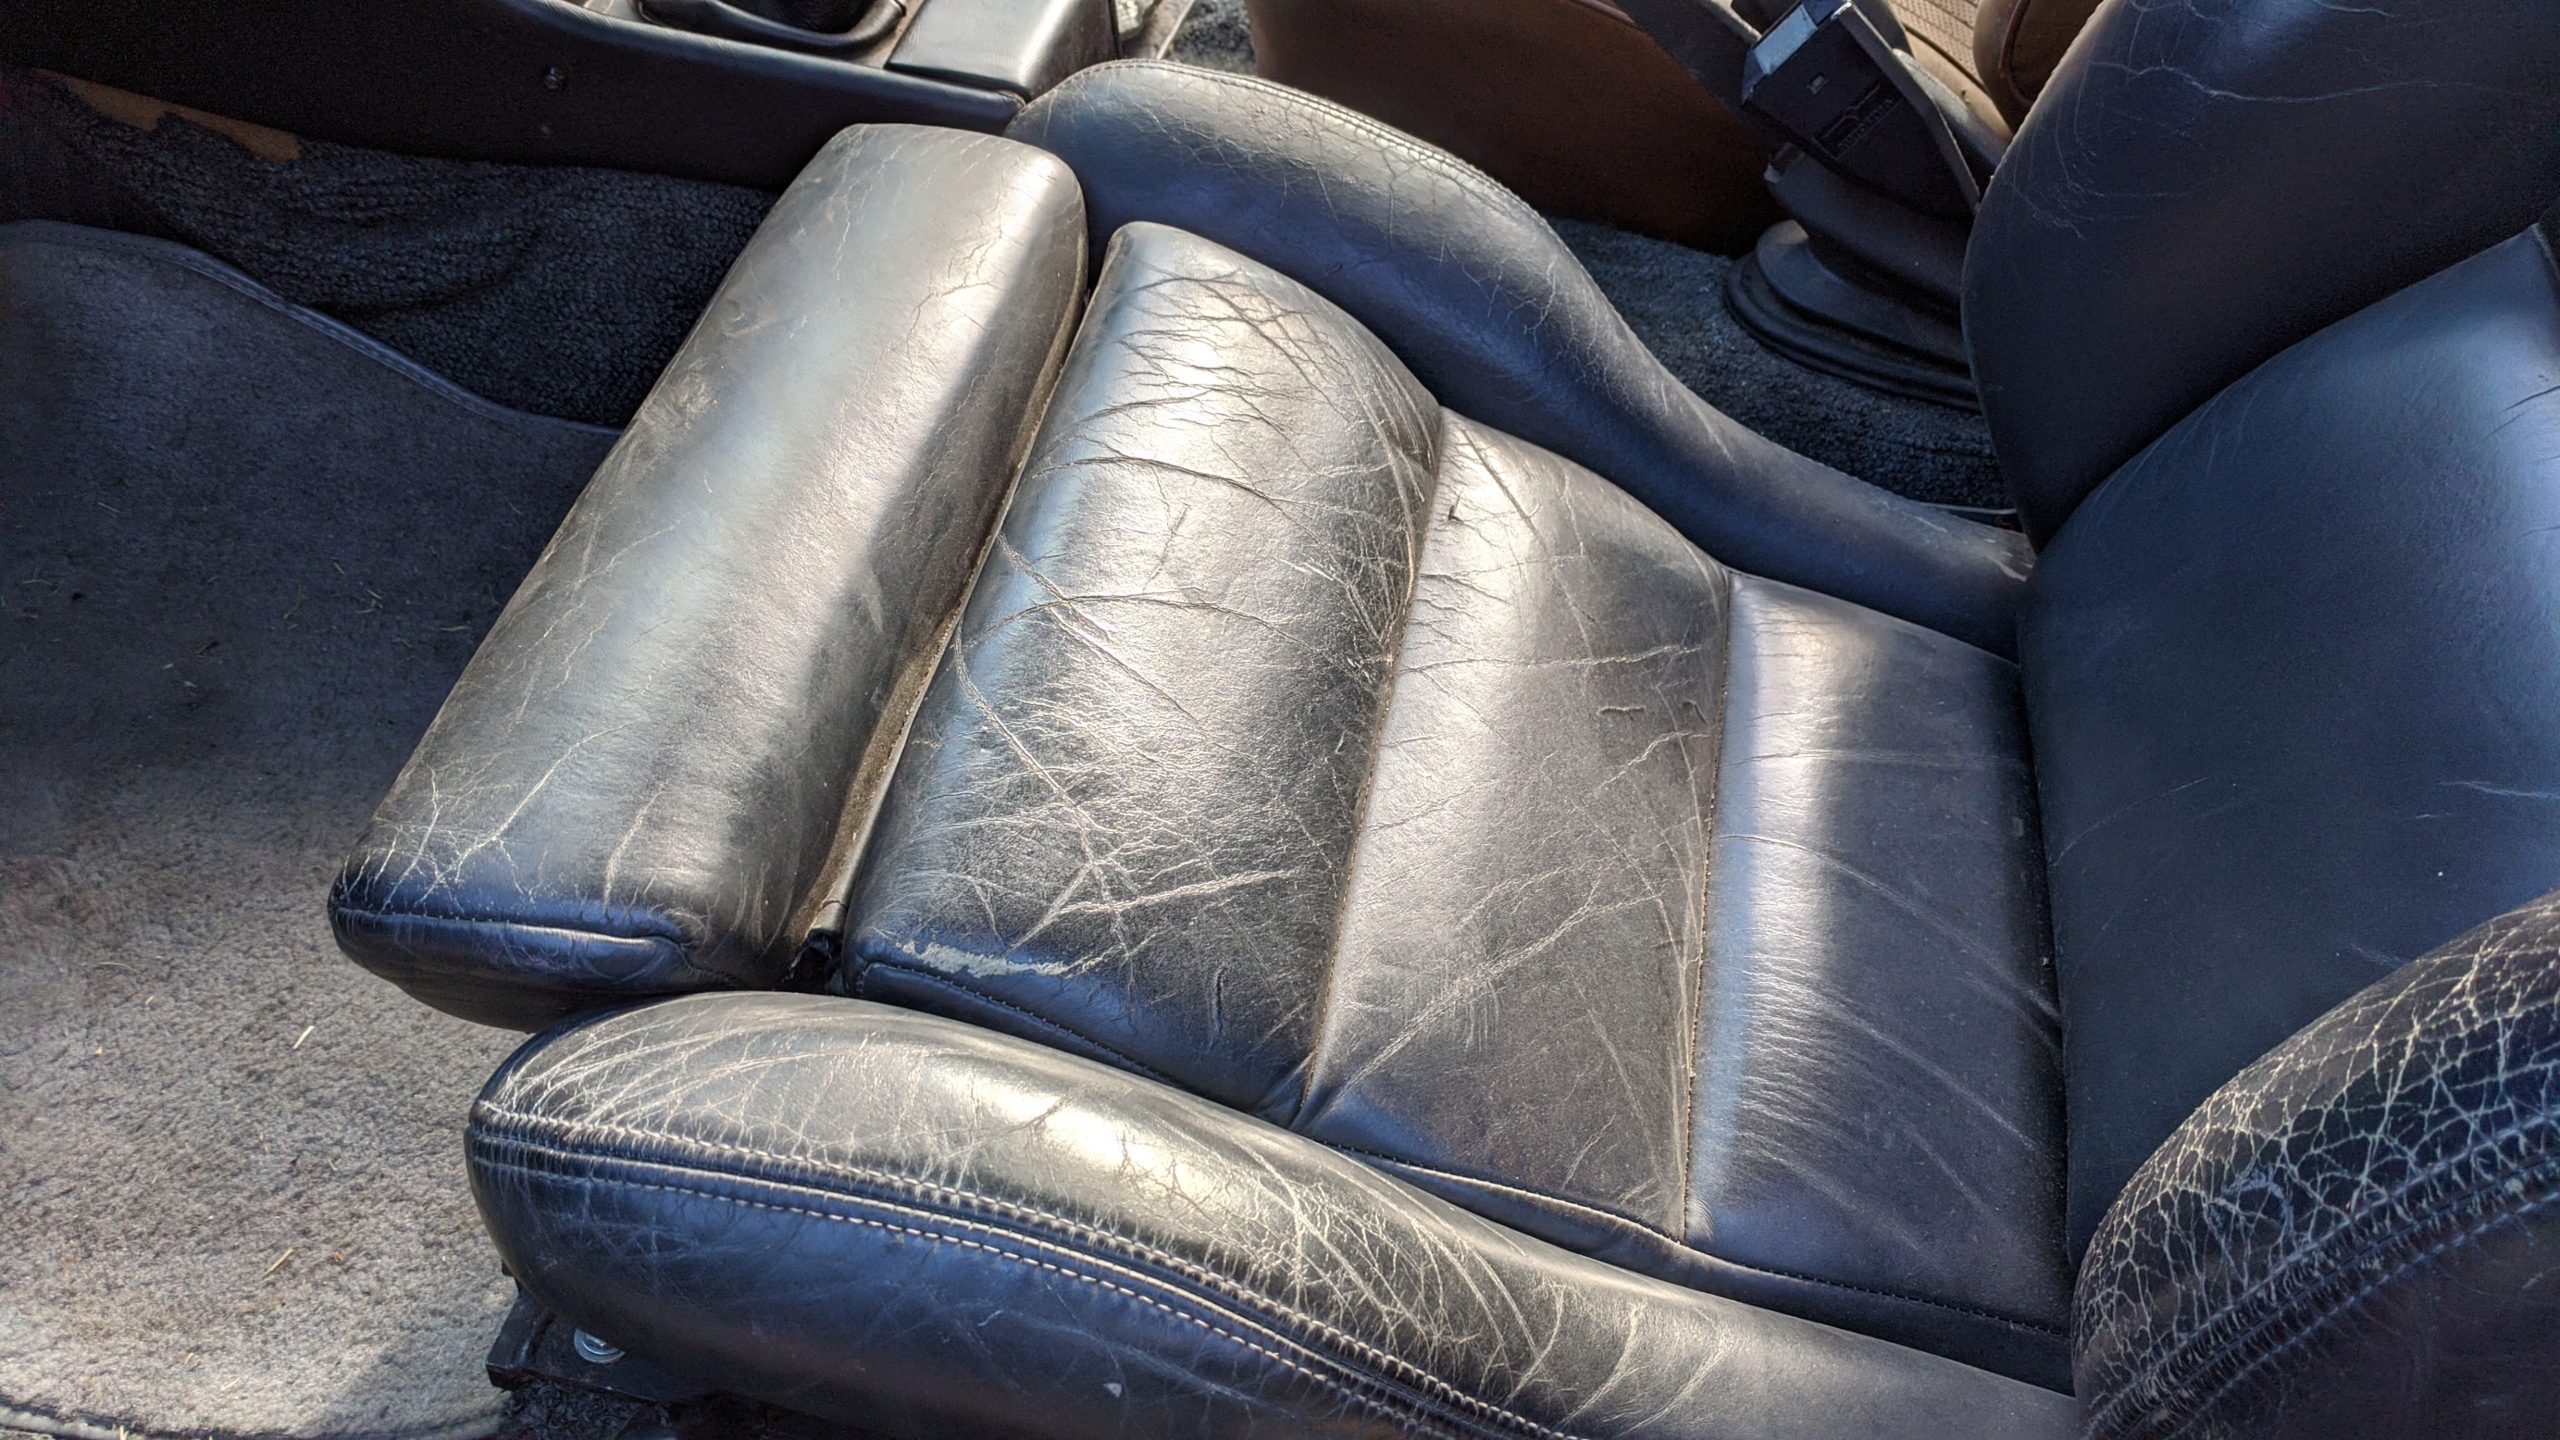
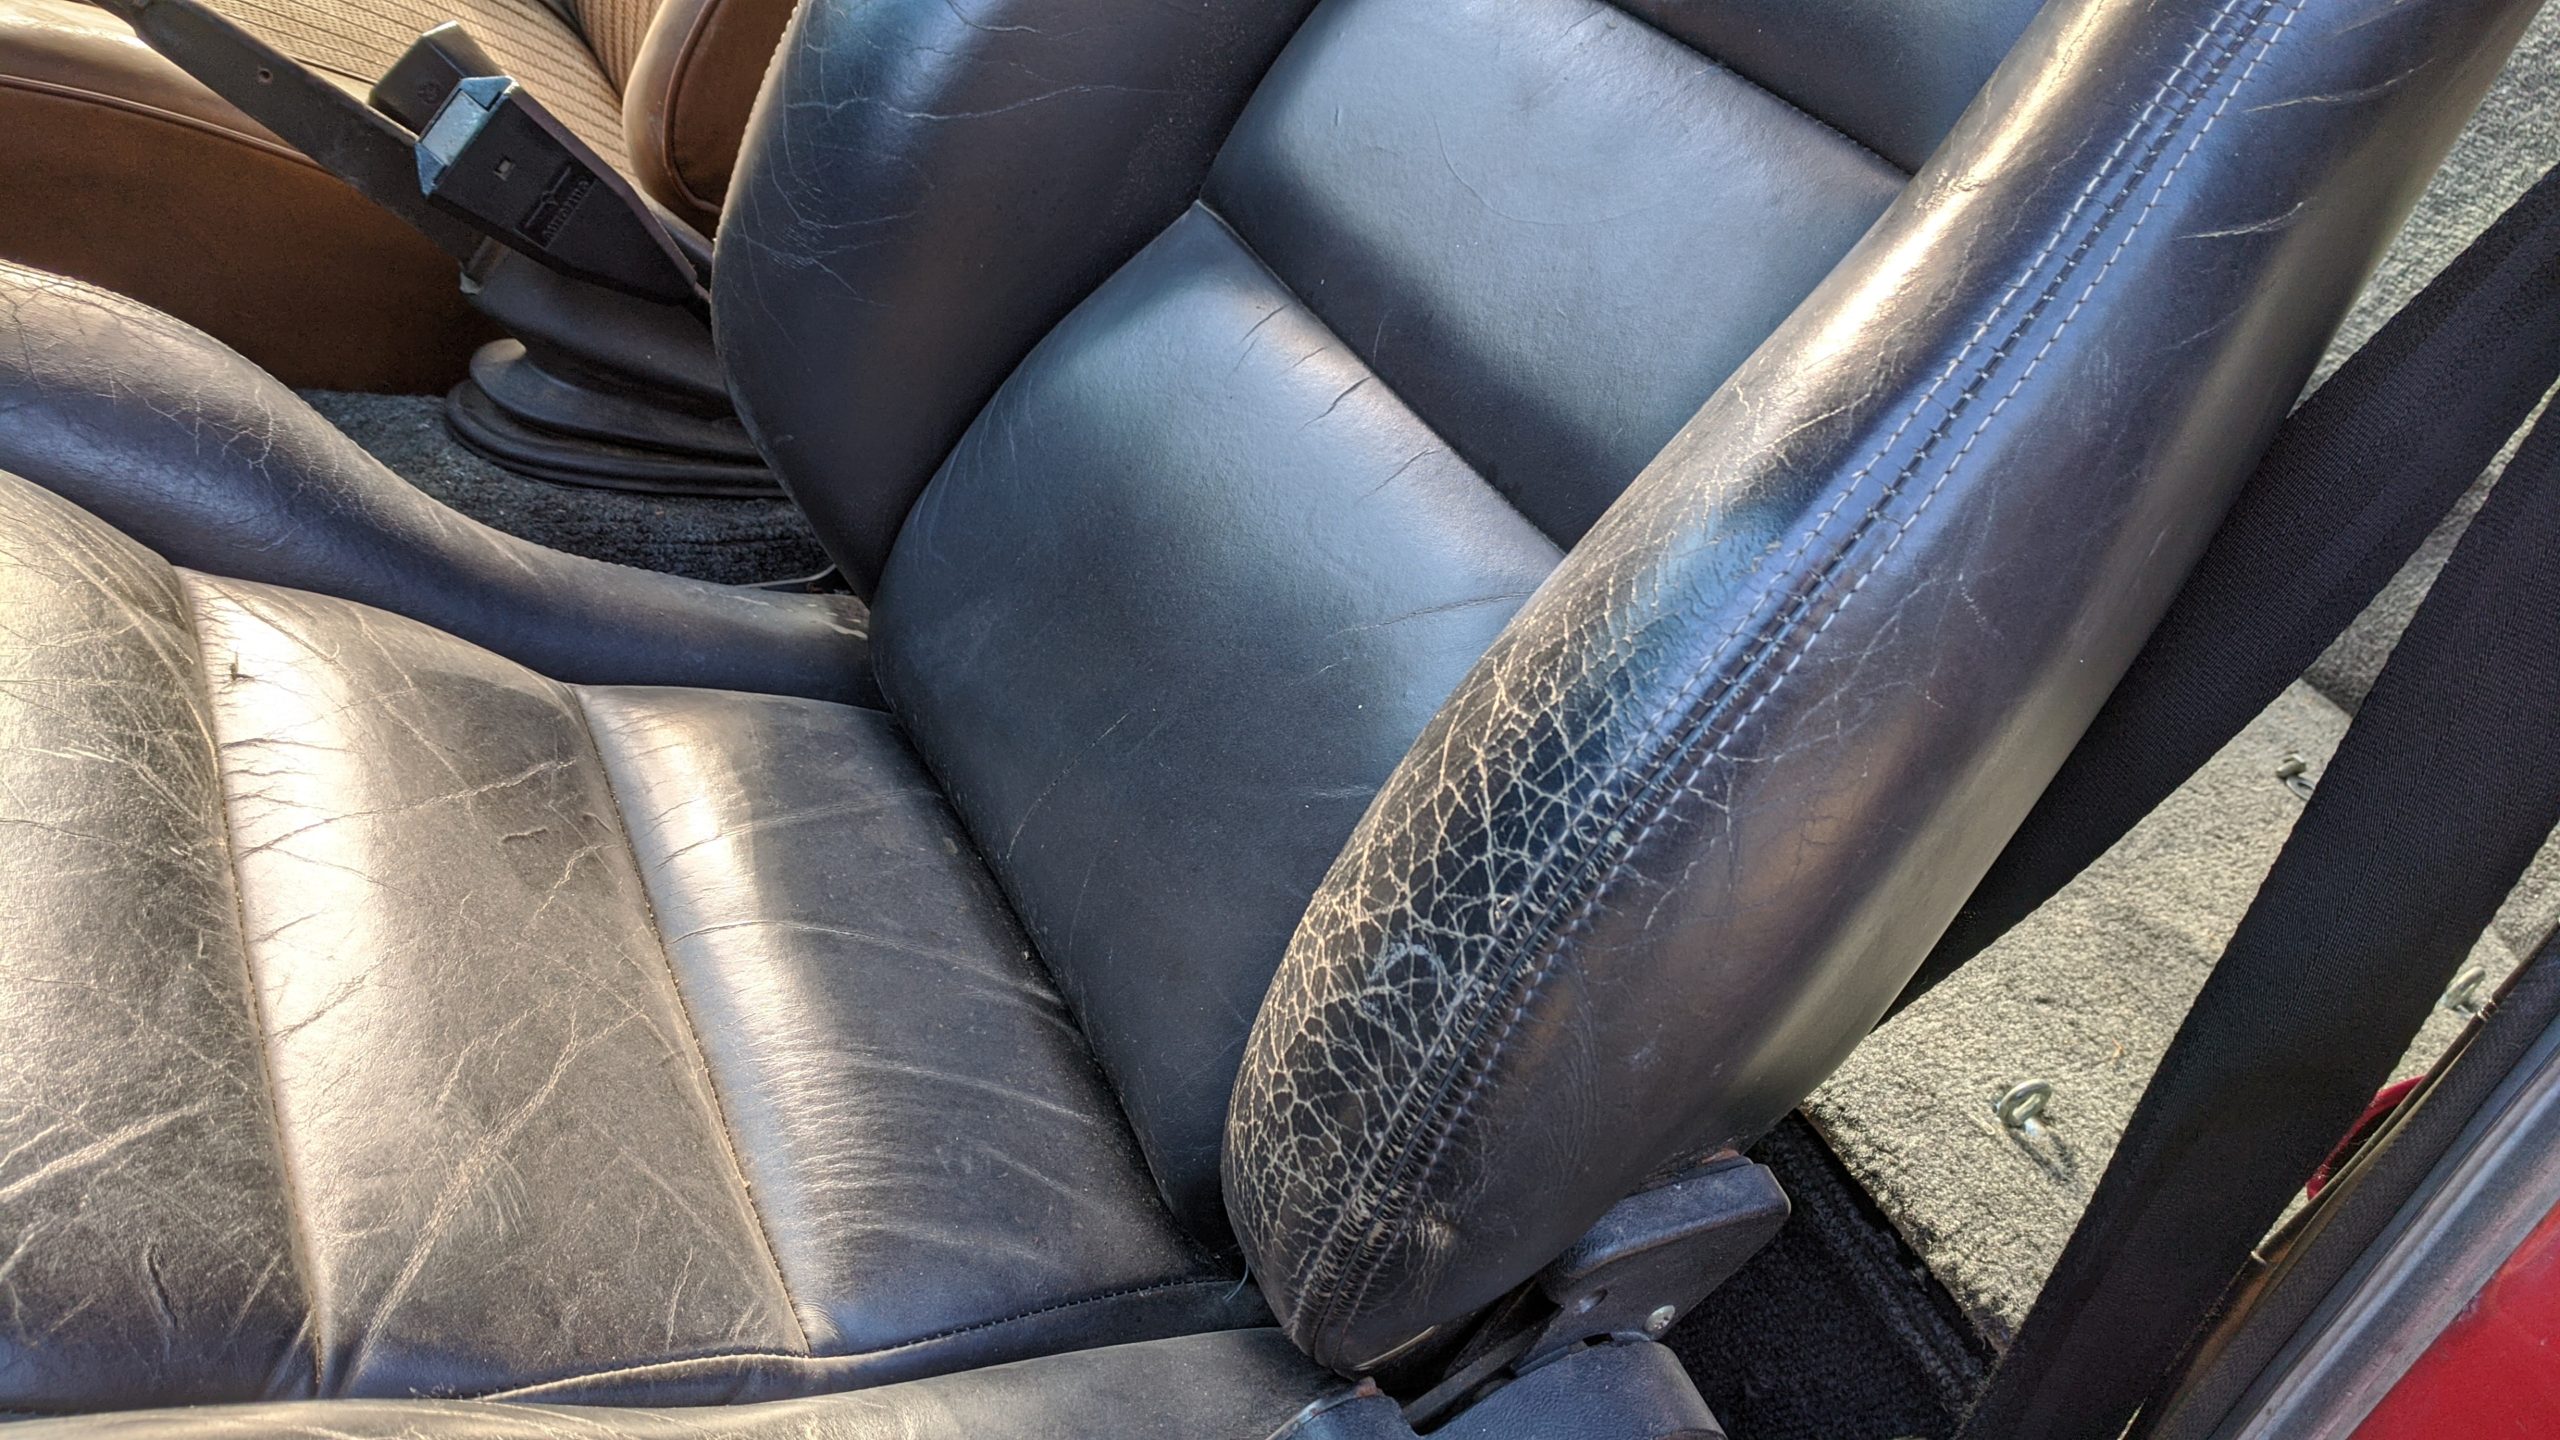
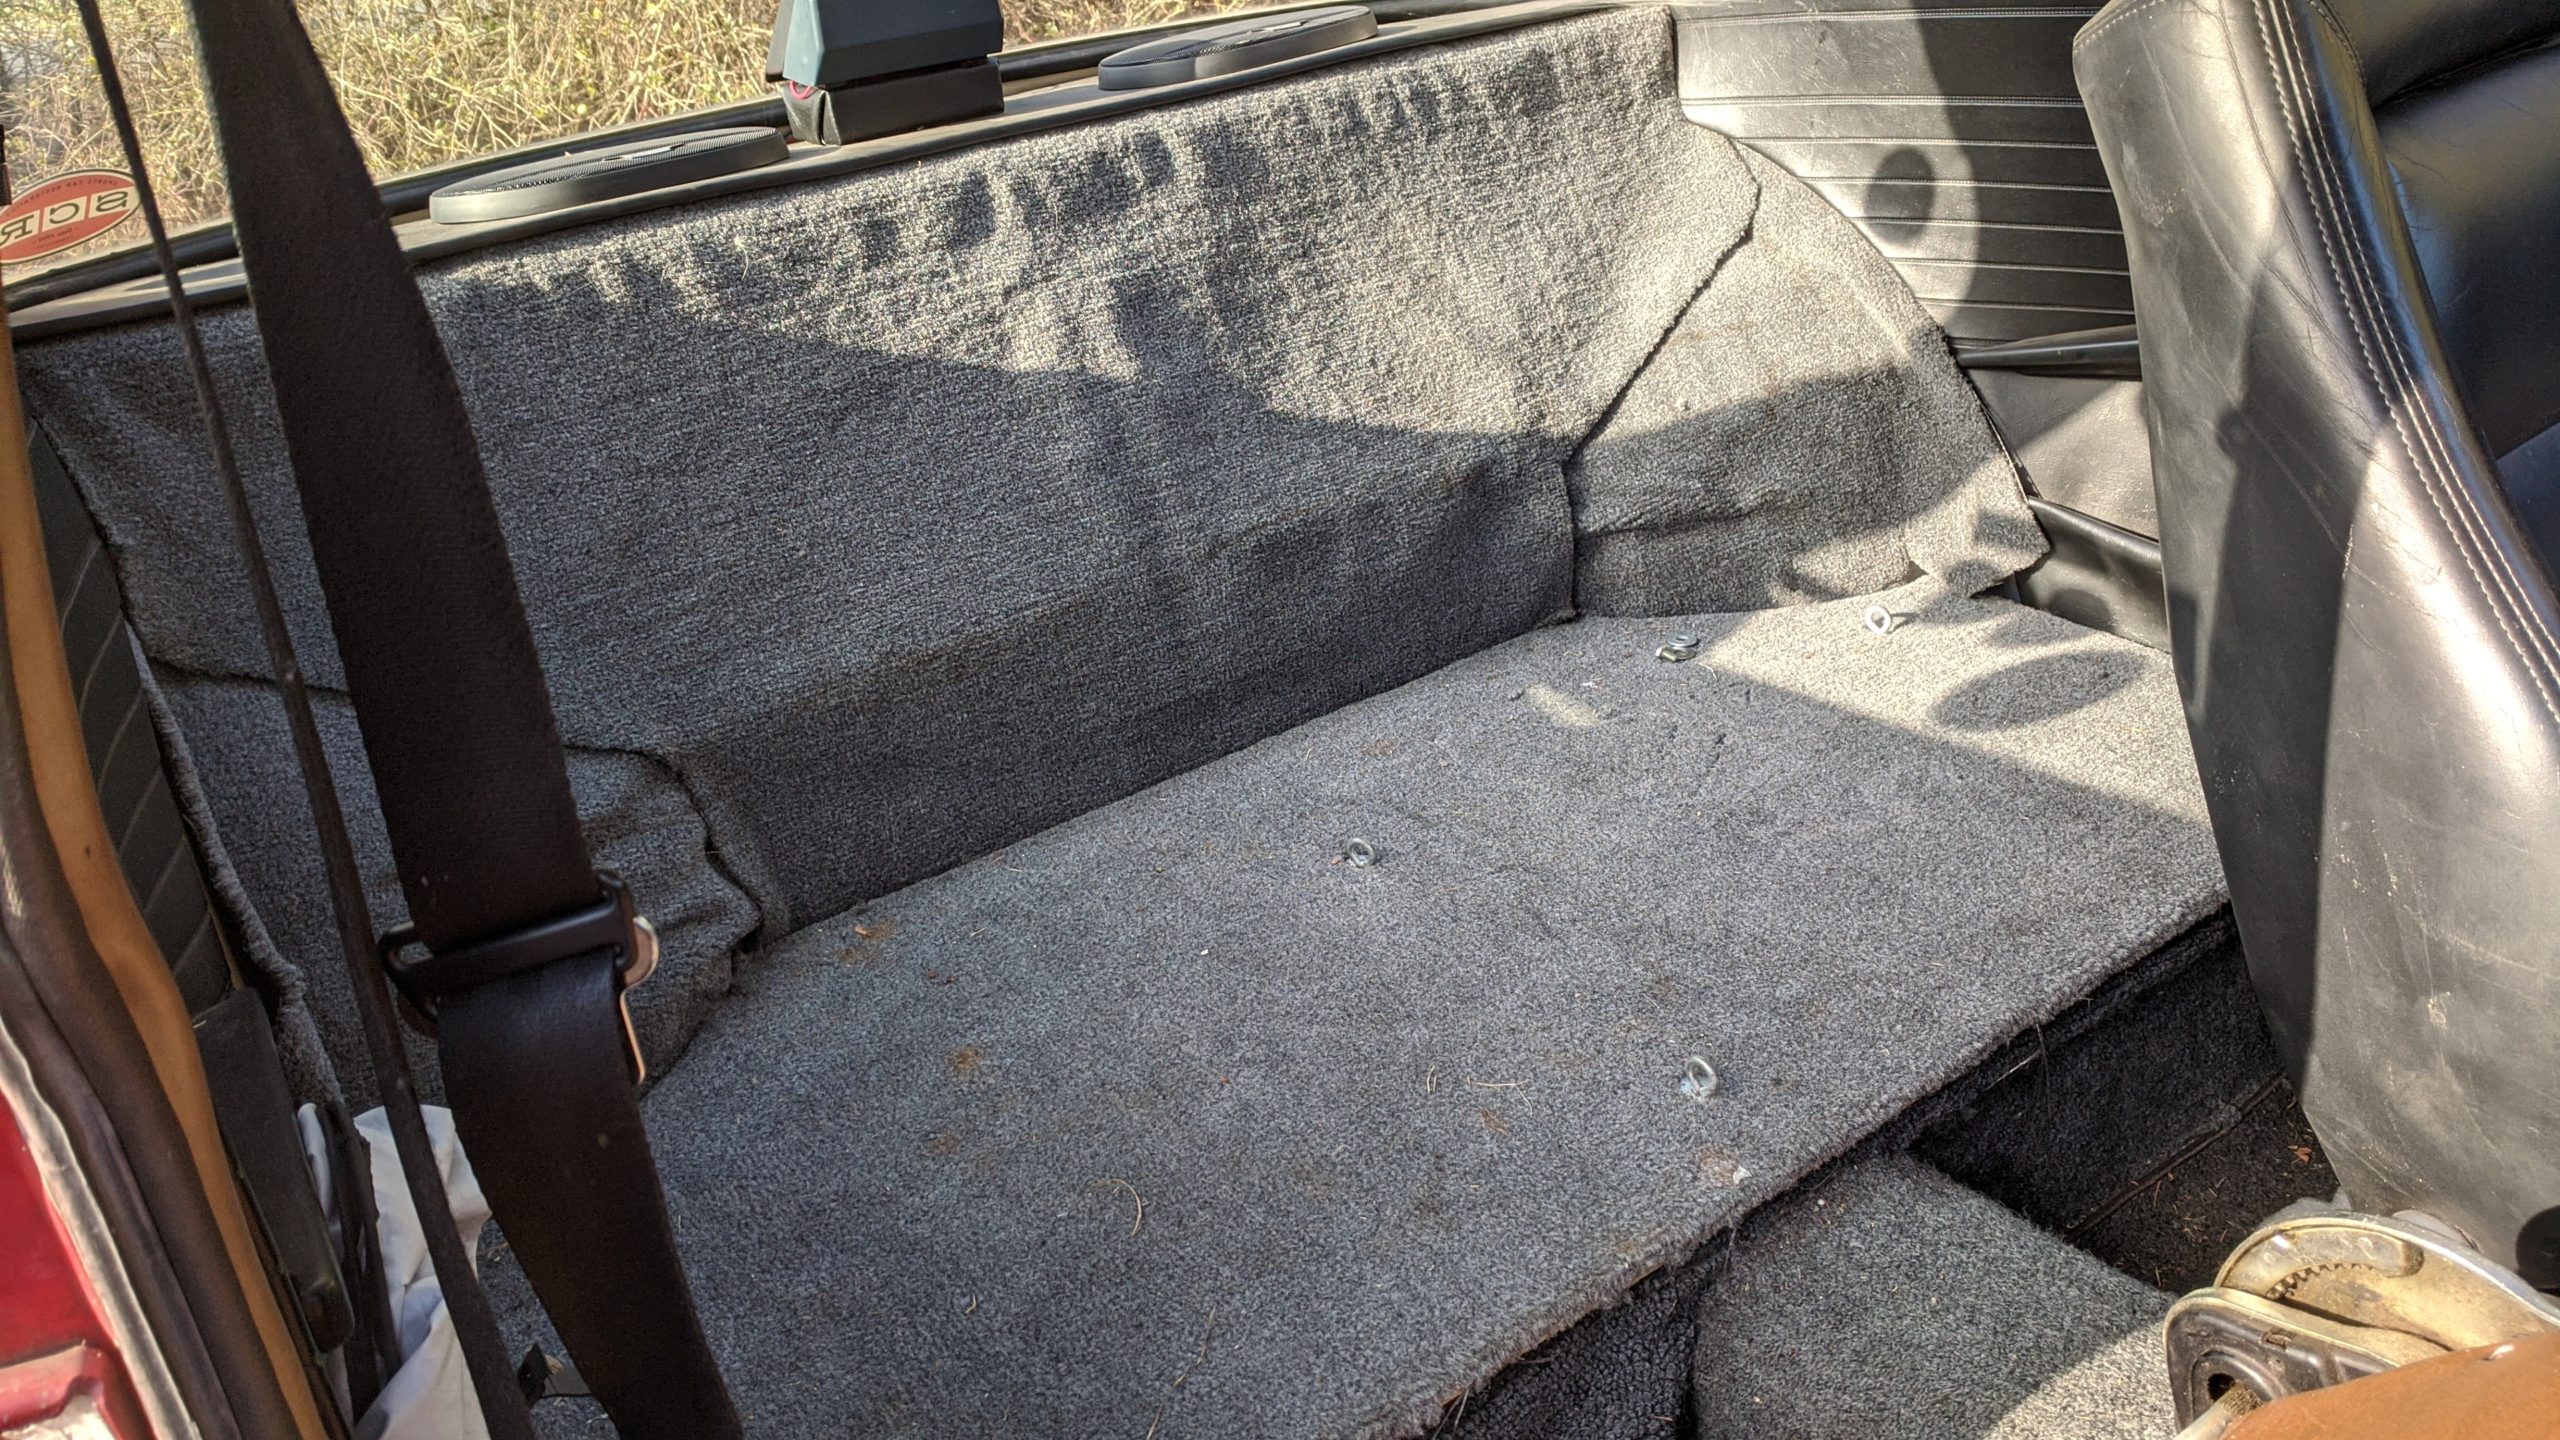
Interior:  Flo-fit driver seat (black), stock passenger seat (brown), door panels dyed black, rear seat deleted.

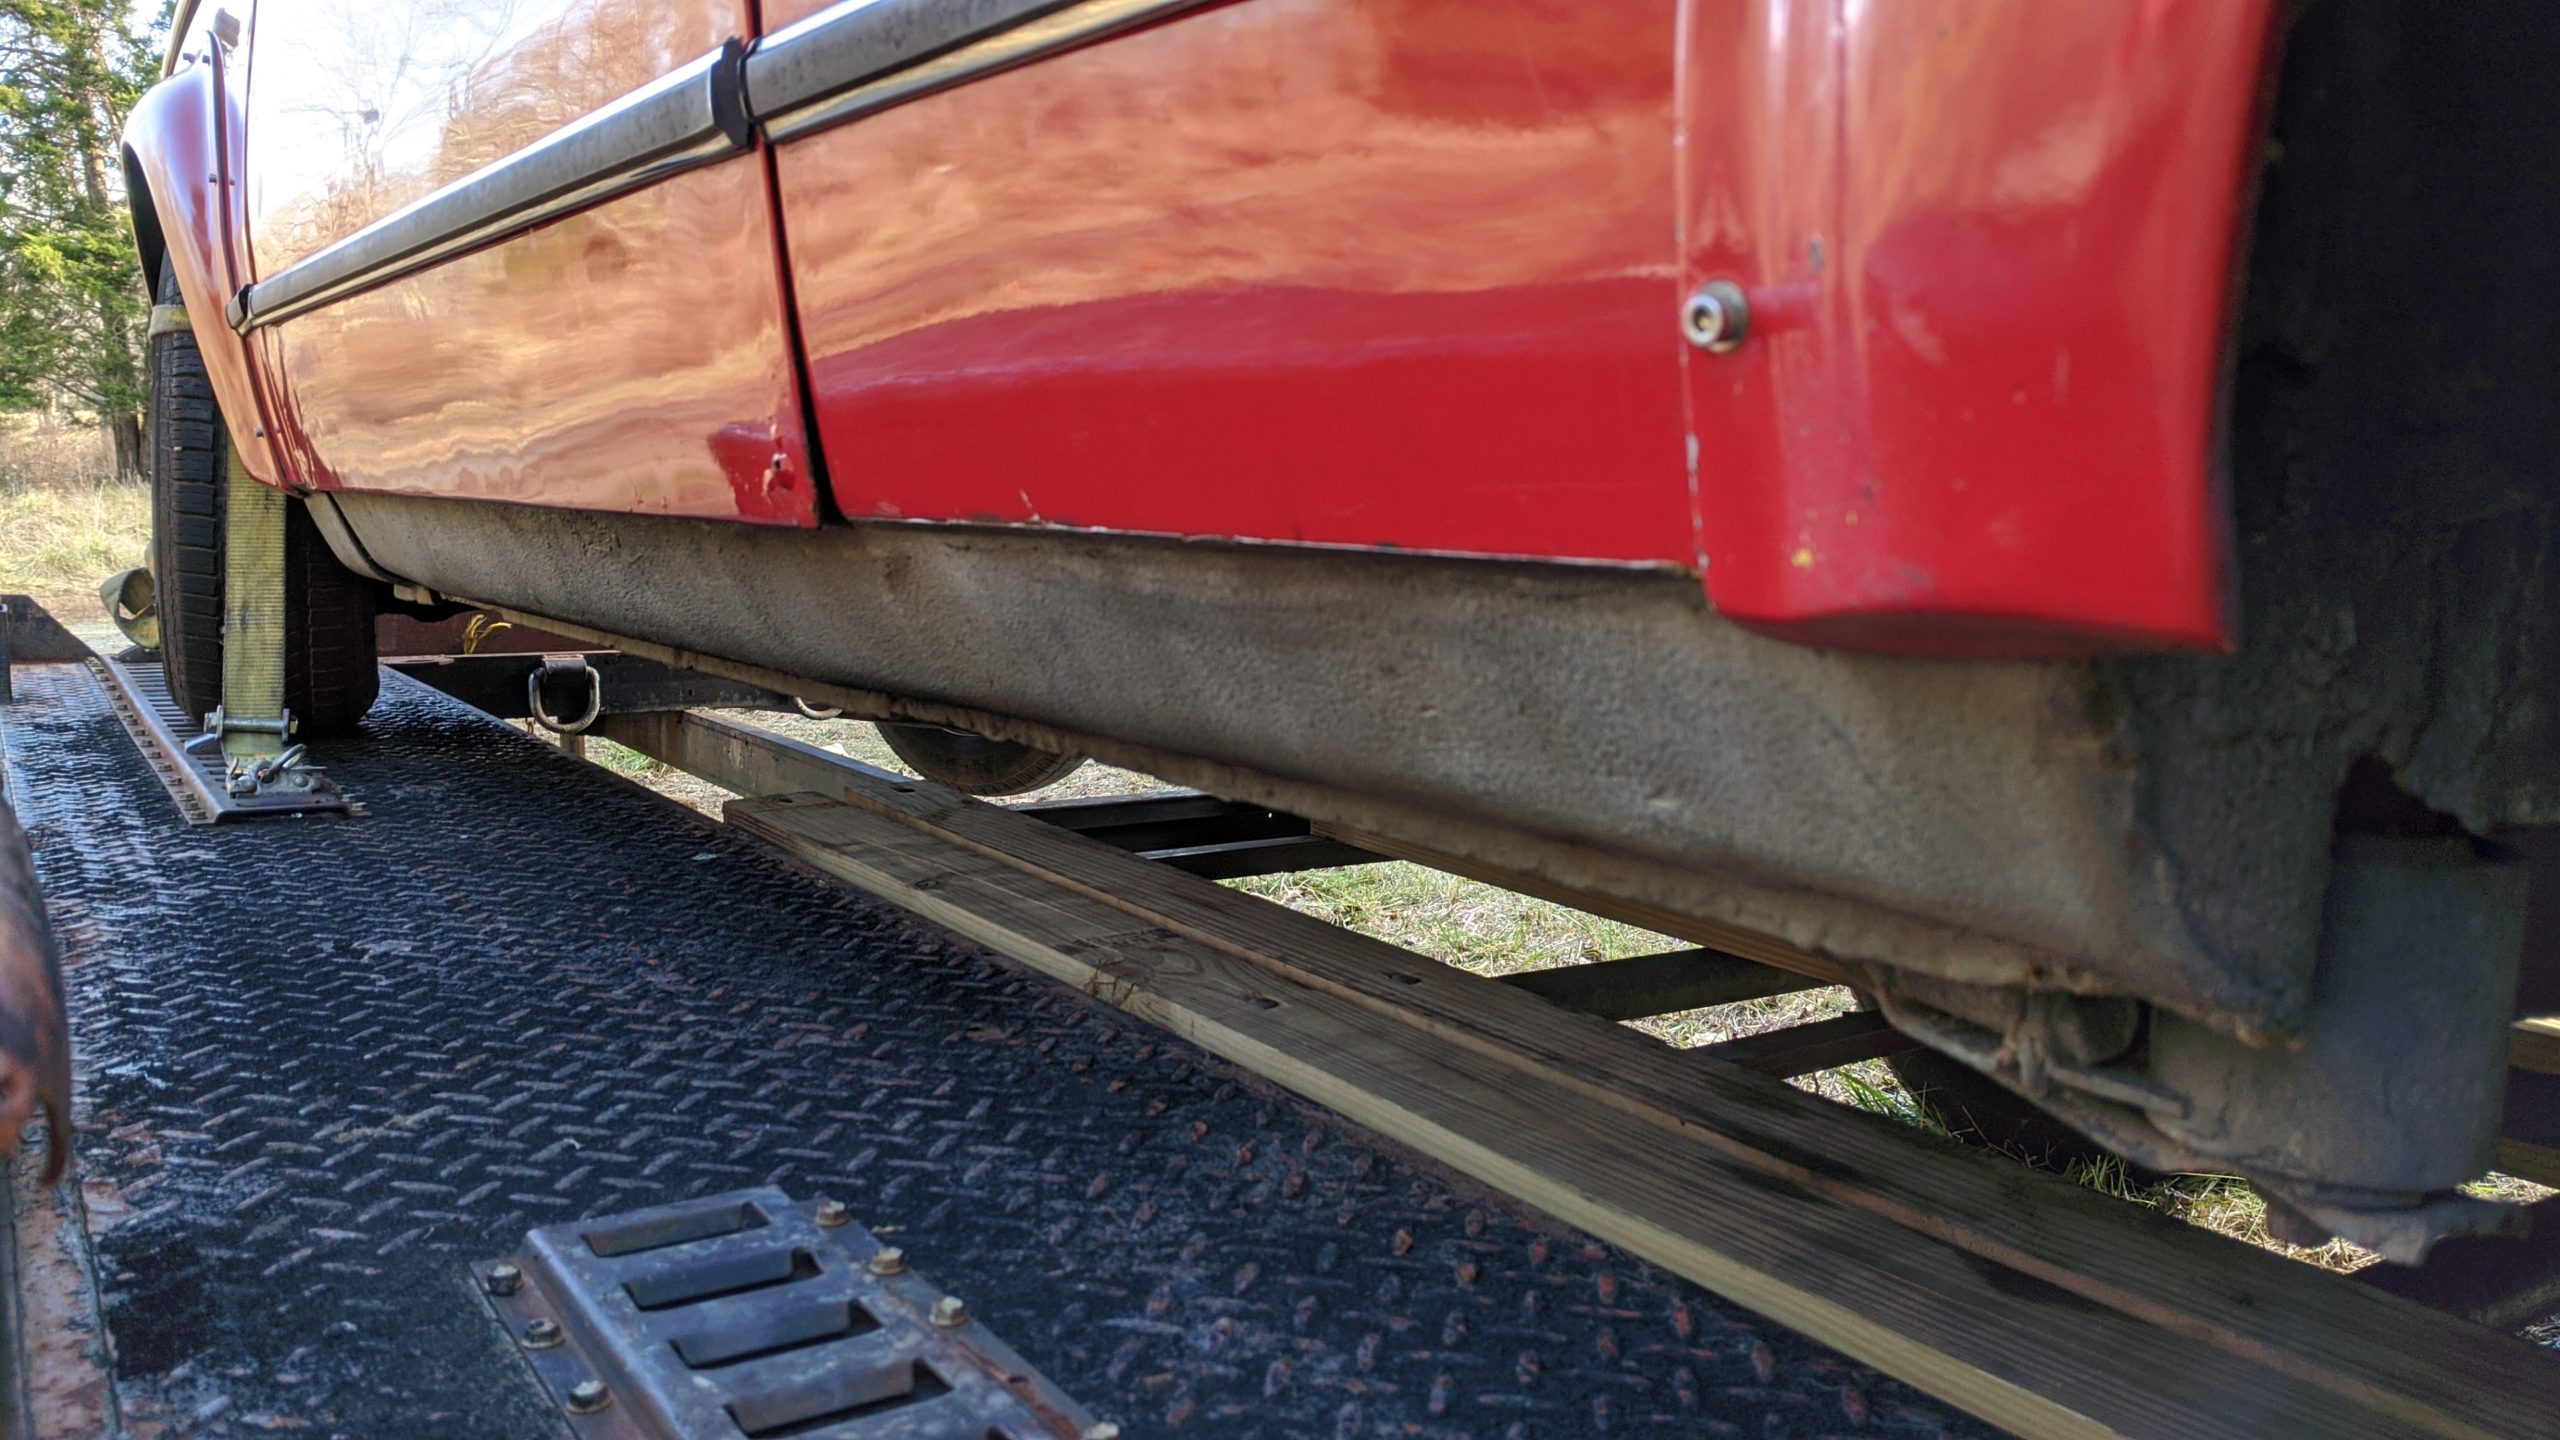
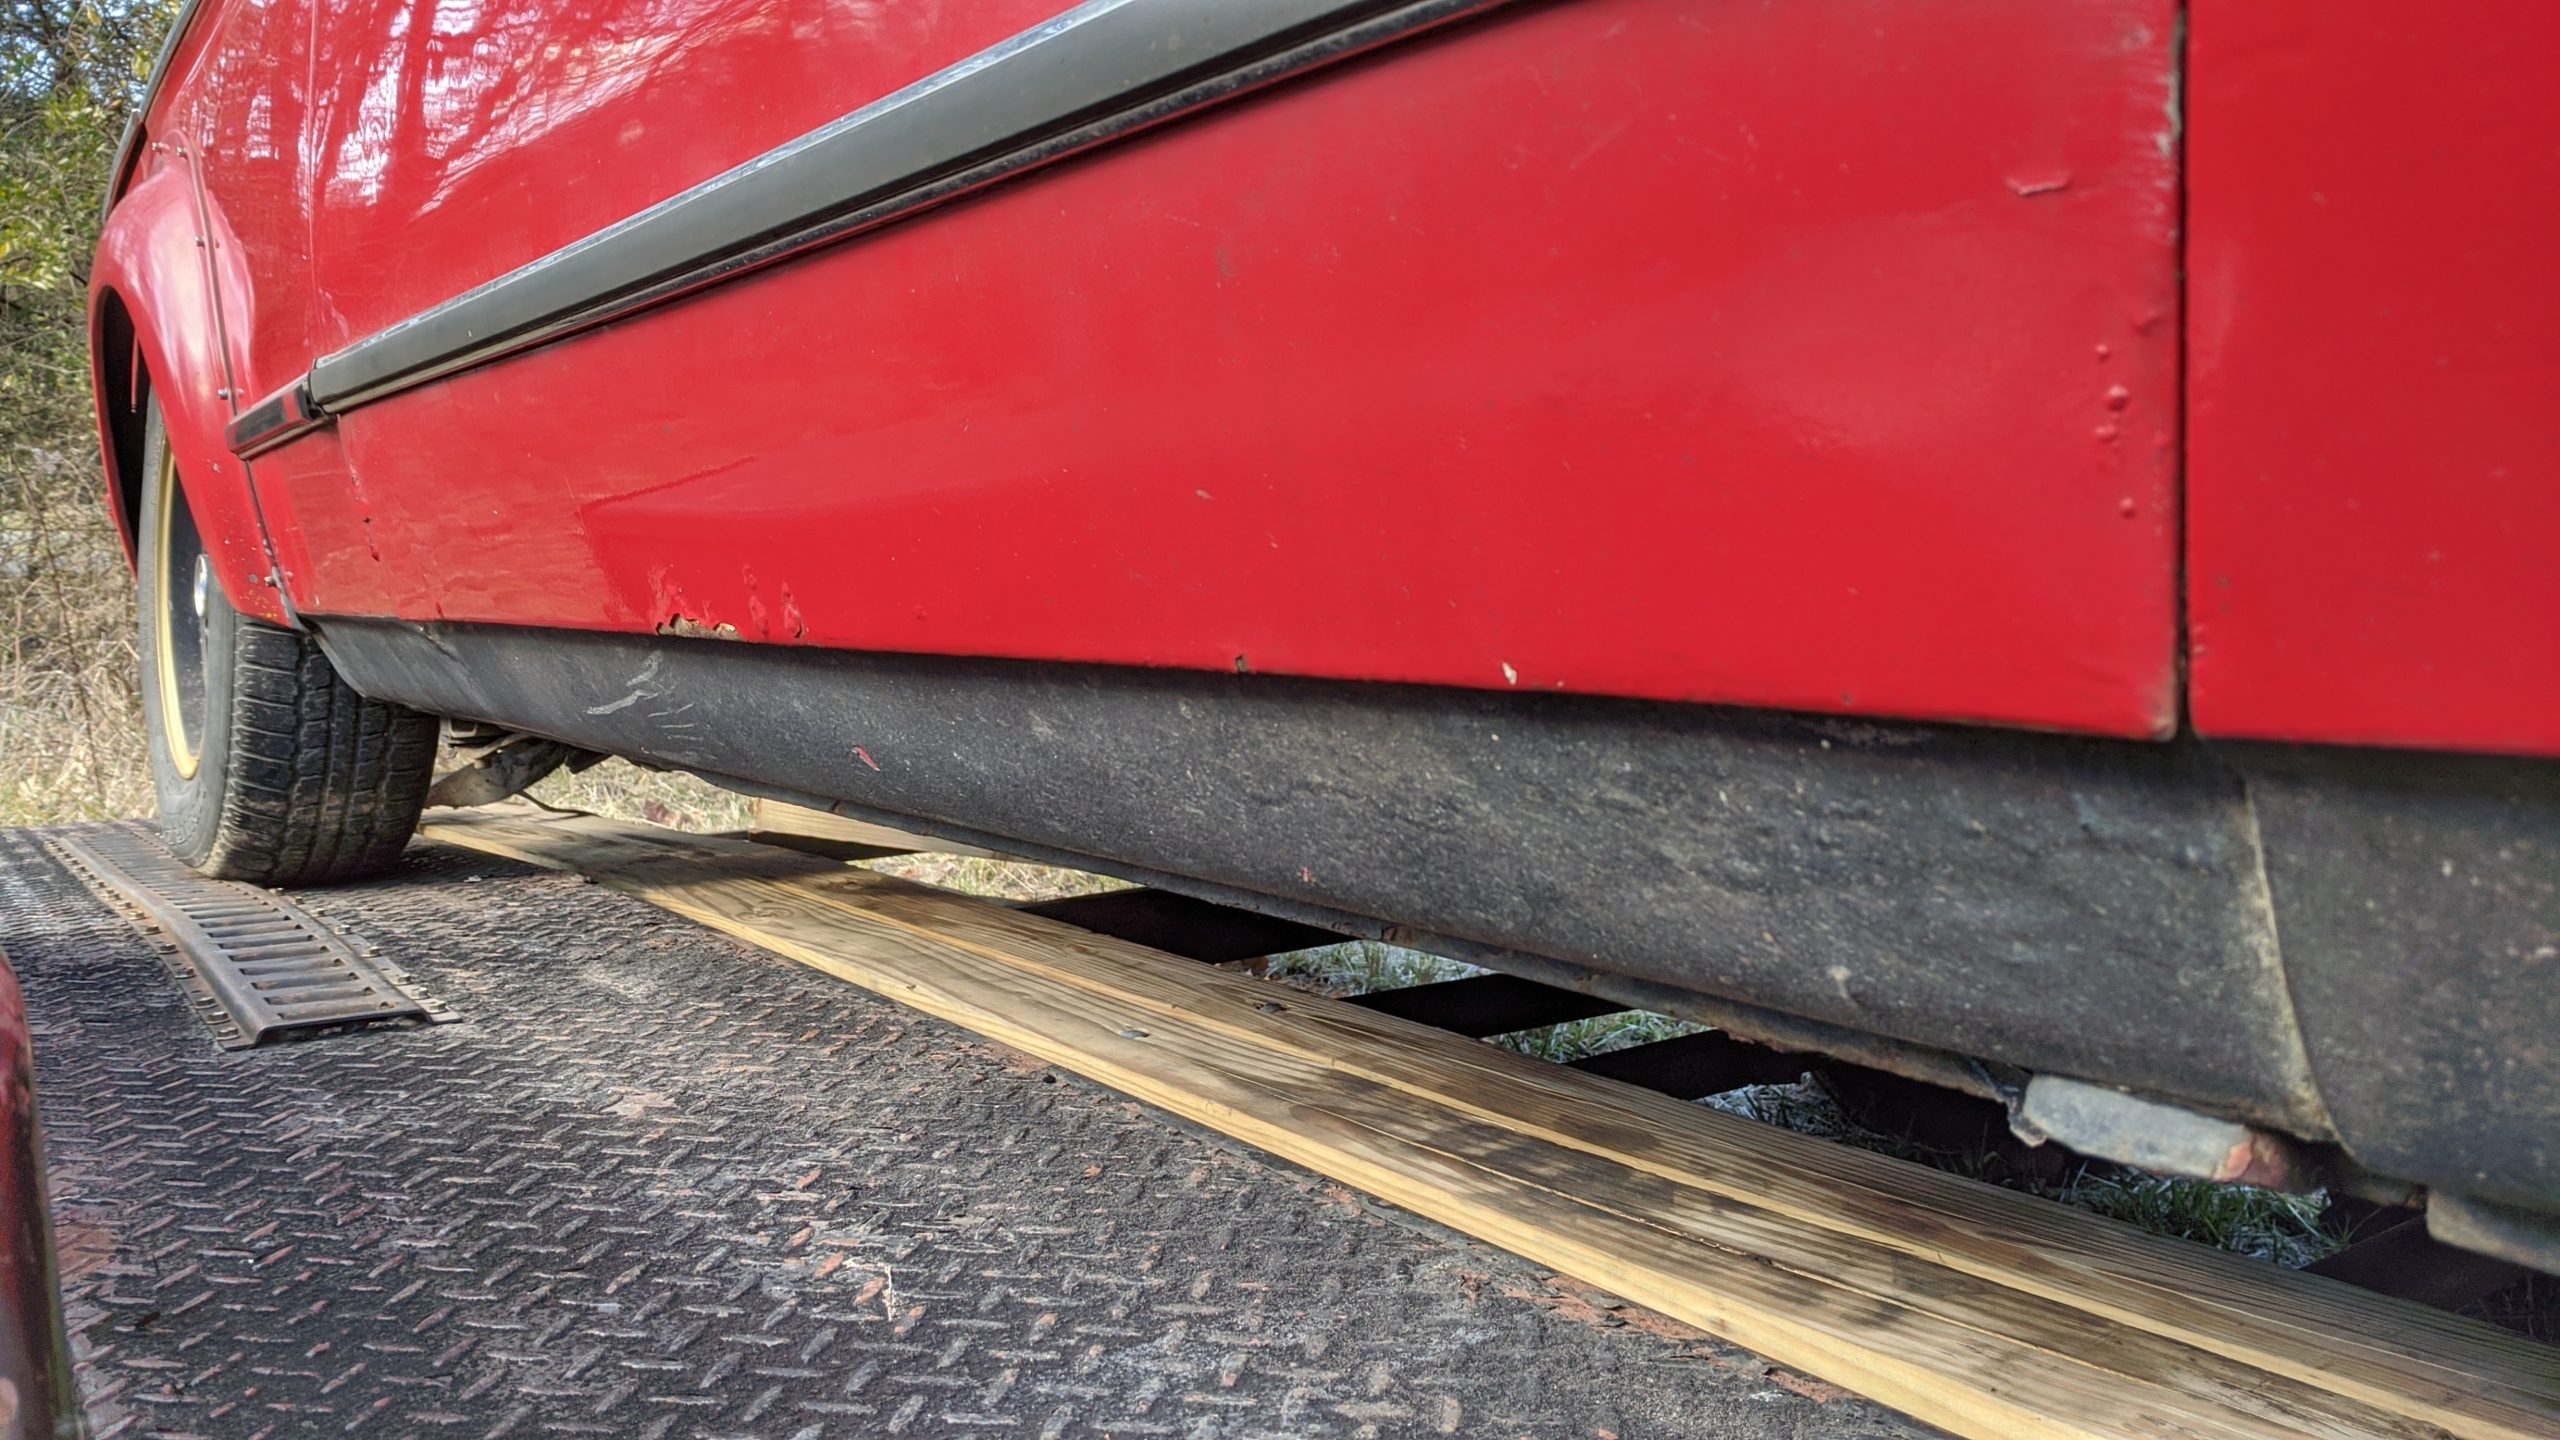
Body work:  Turbo flares added in 2007.  Rear arches were welded and seam sealed.  Chrome bumpers installed and painted body color.  European turn signals.

Repairs:

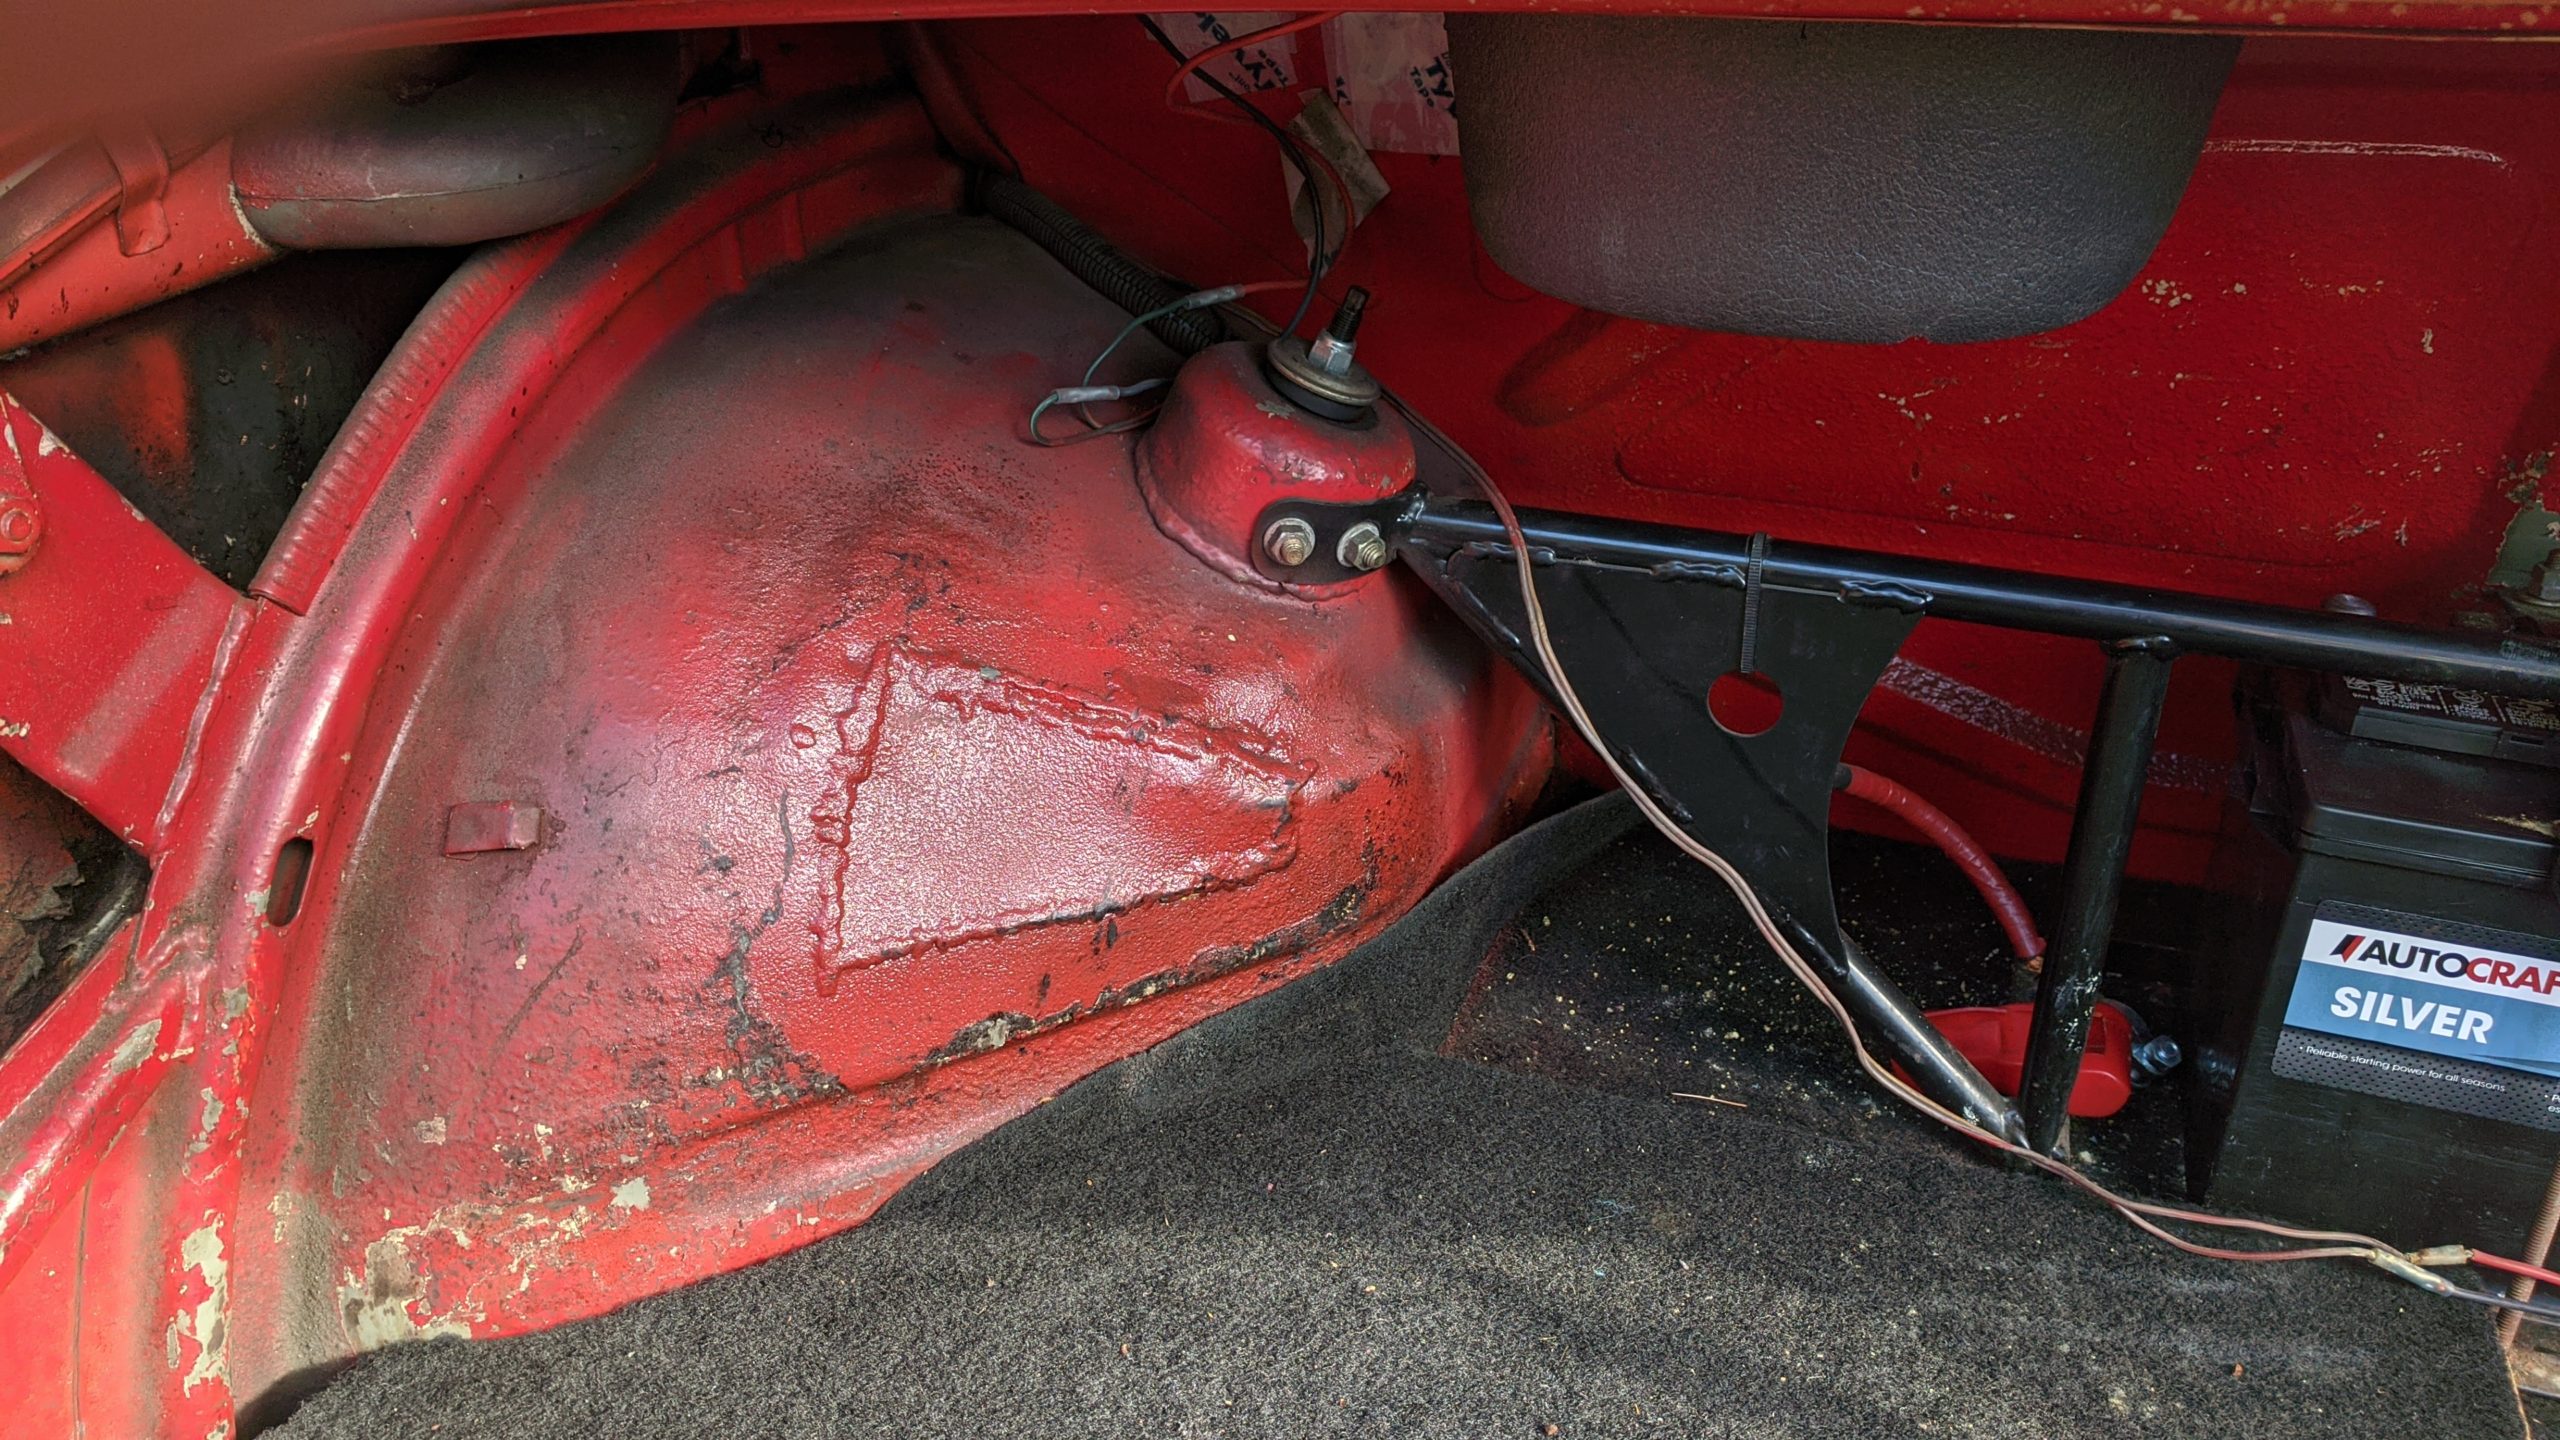
  • 2020 – New battery, replaced driver side frame rail portion, tacked in lower nose panel patch
  • 2016 – New hazard switch
  • 2012 – New center support bearing, new shifter linkage and tower, new strut bearings
  • 2011 – New guibo, 320i radiator installed, new thermostat
  • 2009 – rear shock tower welded, new alternator and voltage regulator installed, welded driver side rocker panel patches, new 38/38 Weber carburetor installed, new E12 brake master cylinder installed, new under hood rubber seals installed, new fuel line installed
  • 2007 – welded passenger side rocker panel patch
  • 2005 – installed Volvo brake upgrade, new clutch master and slave cylinders, pedal box repaired,

Known issues:

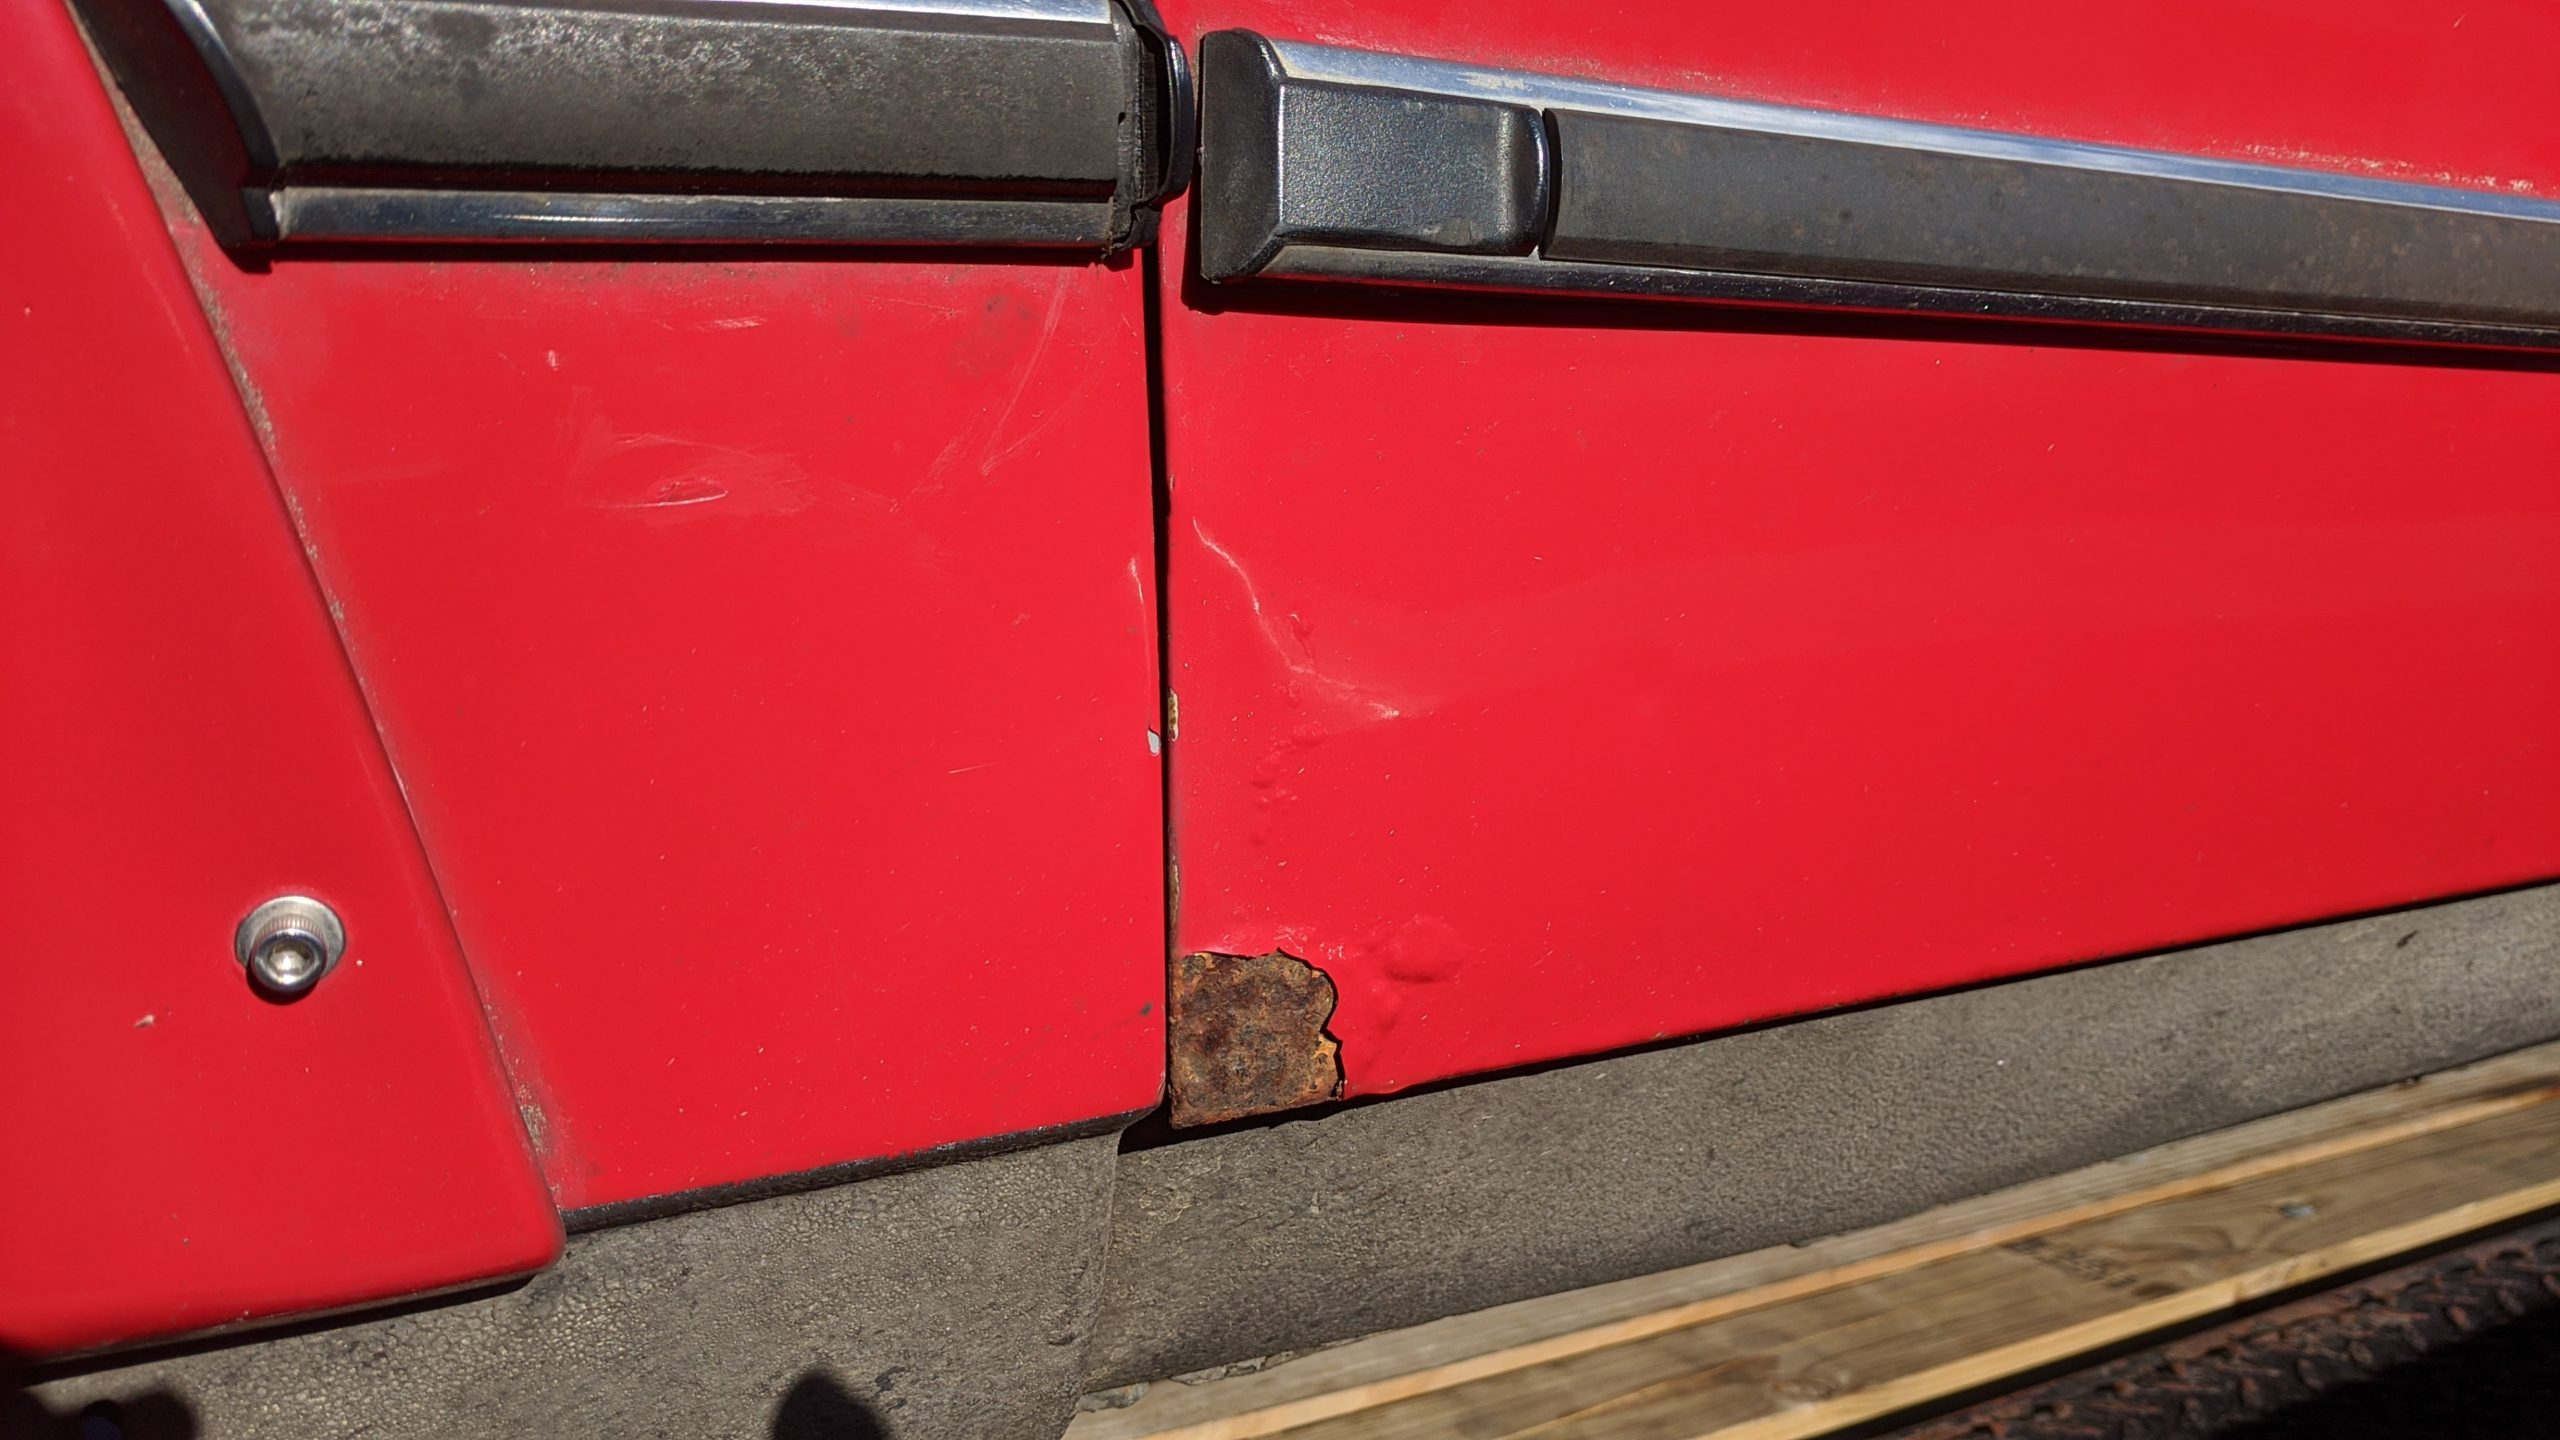
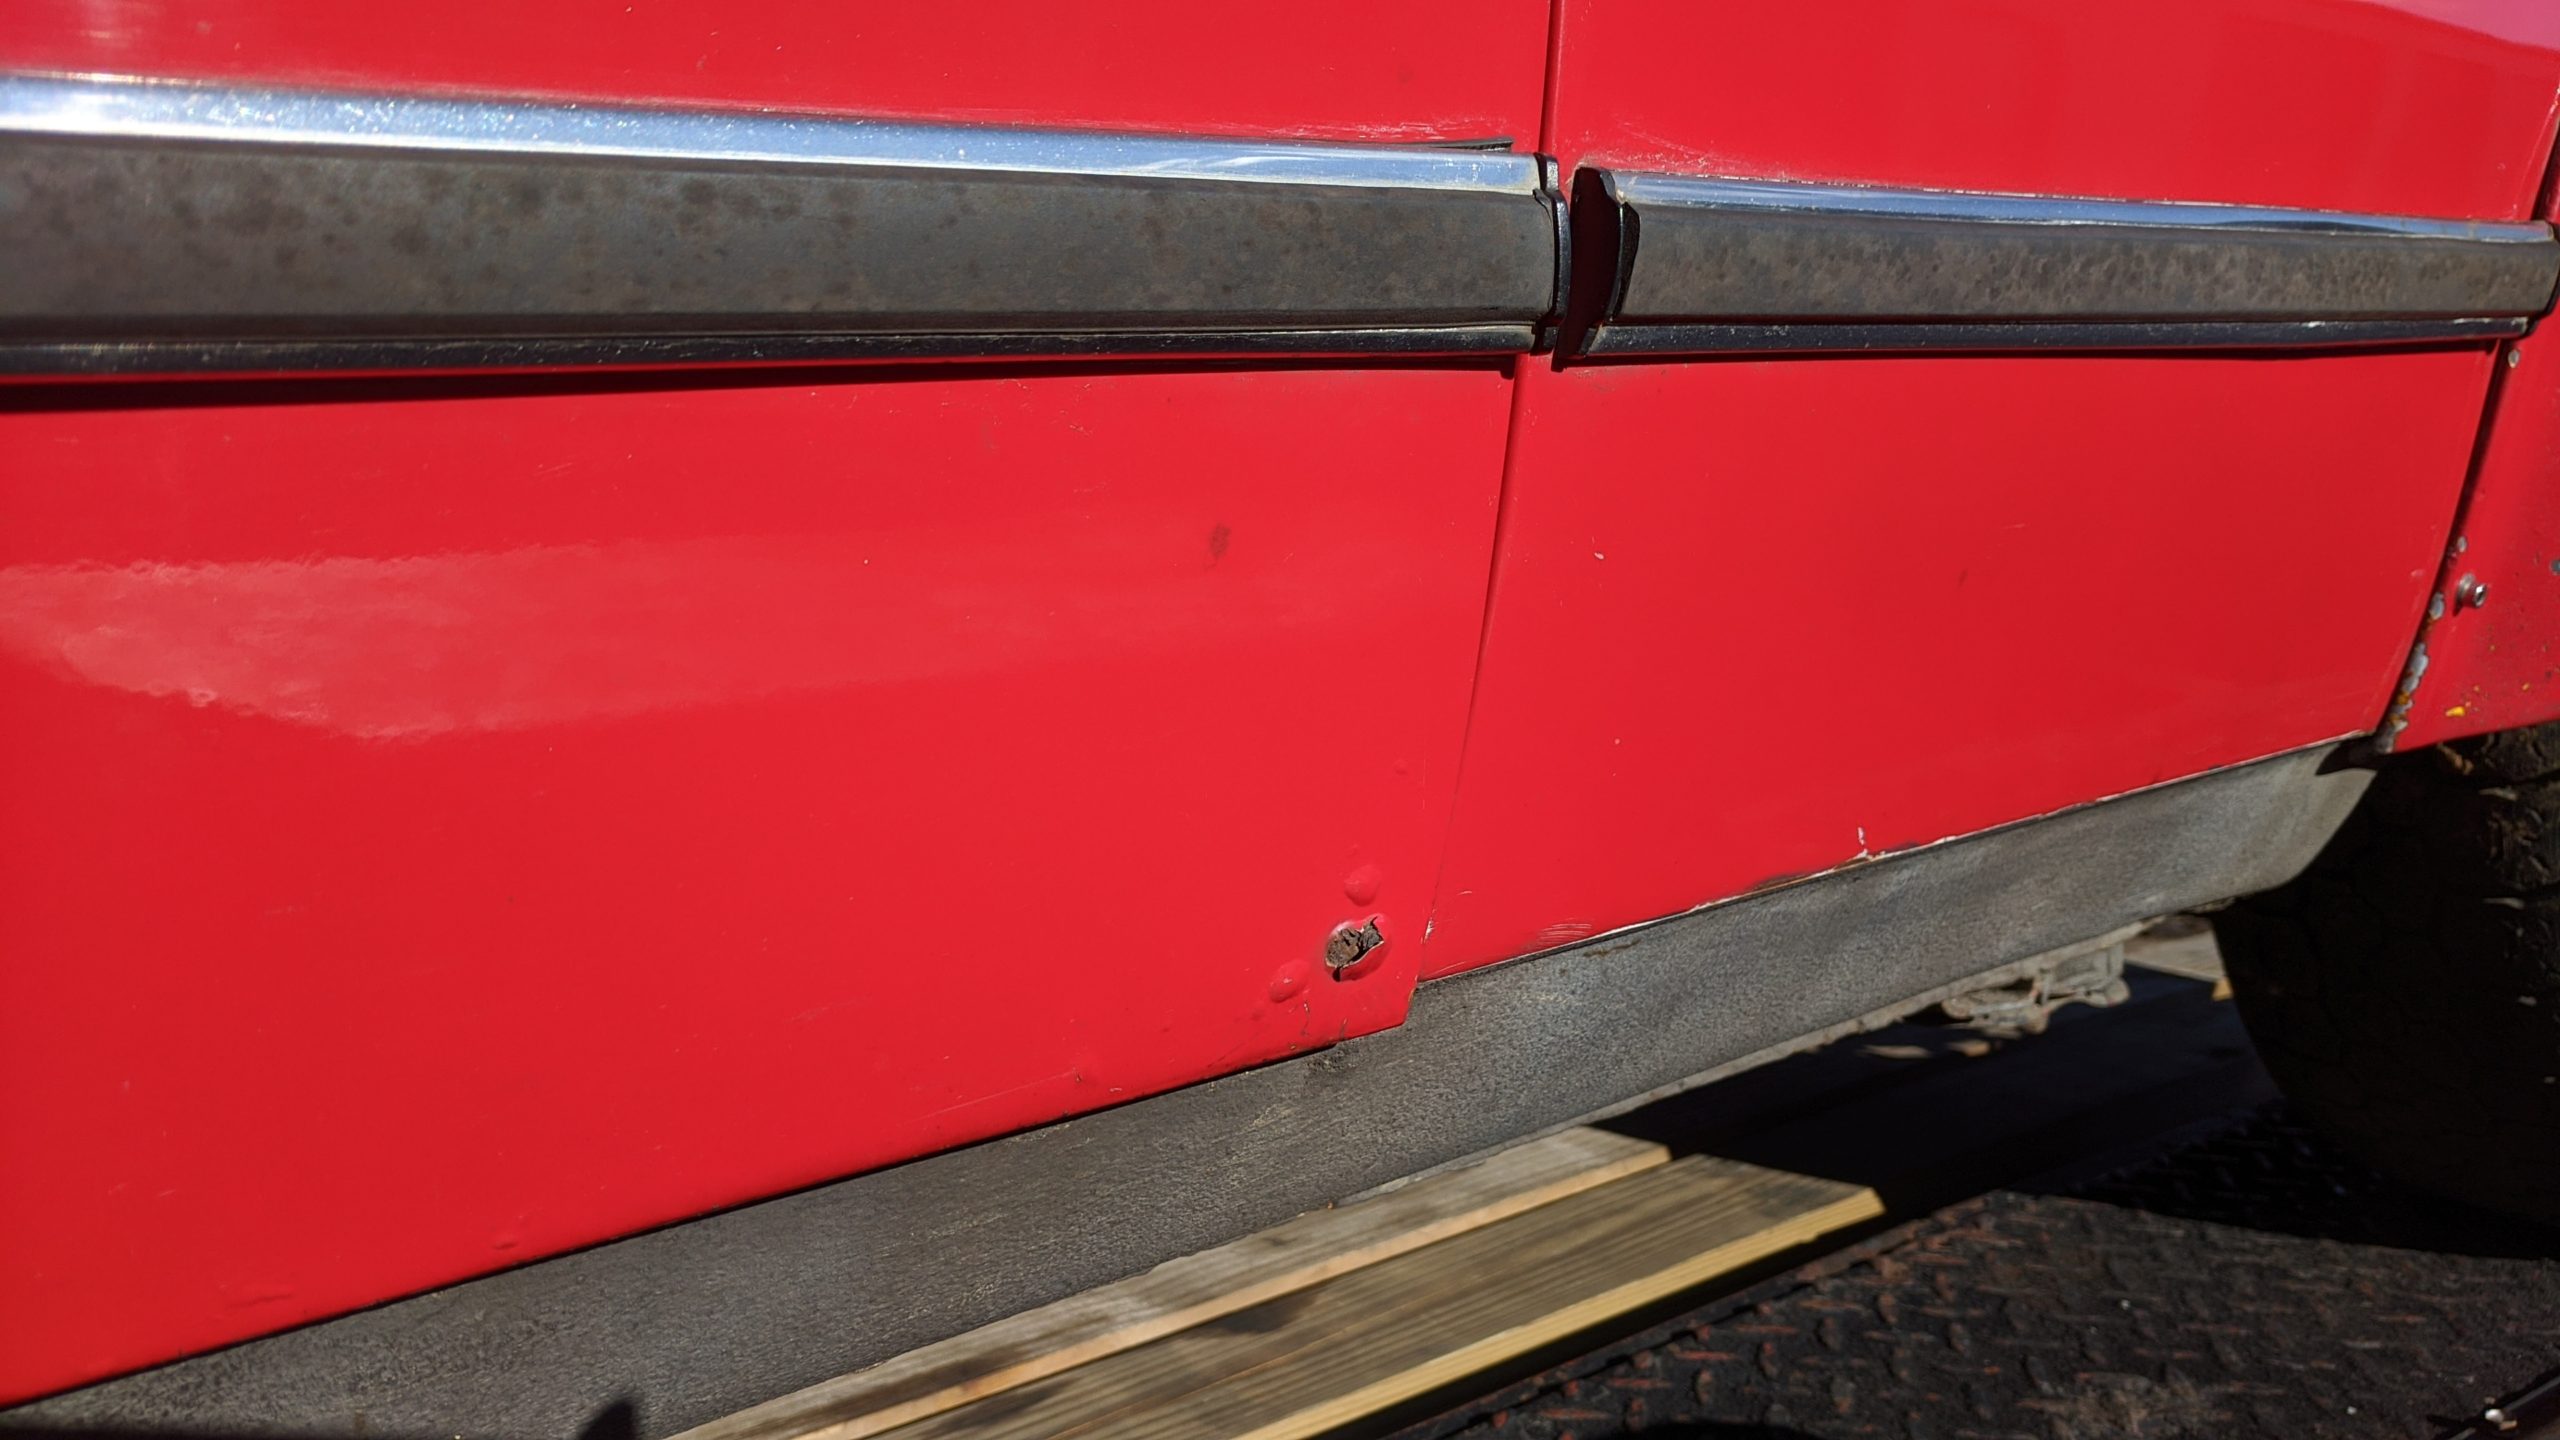
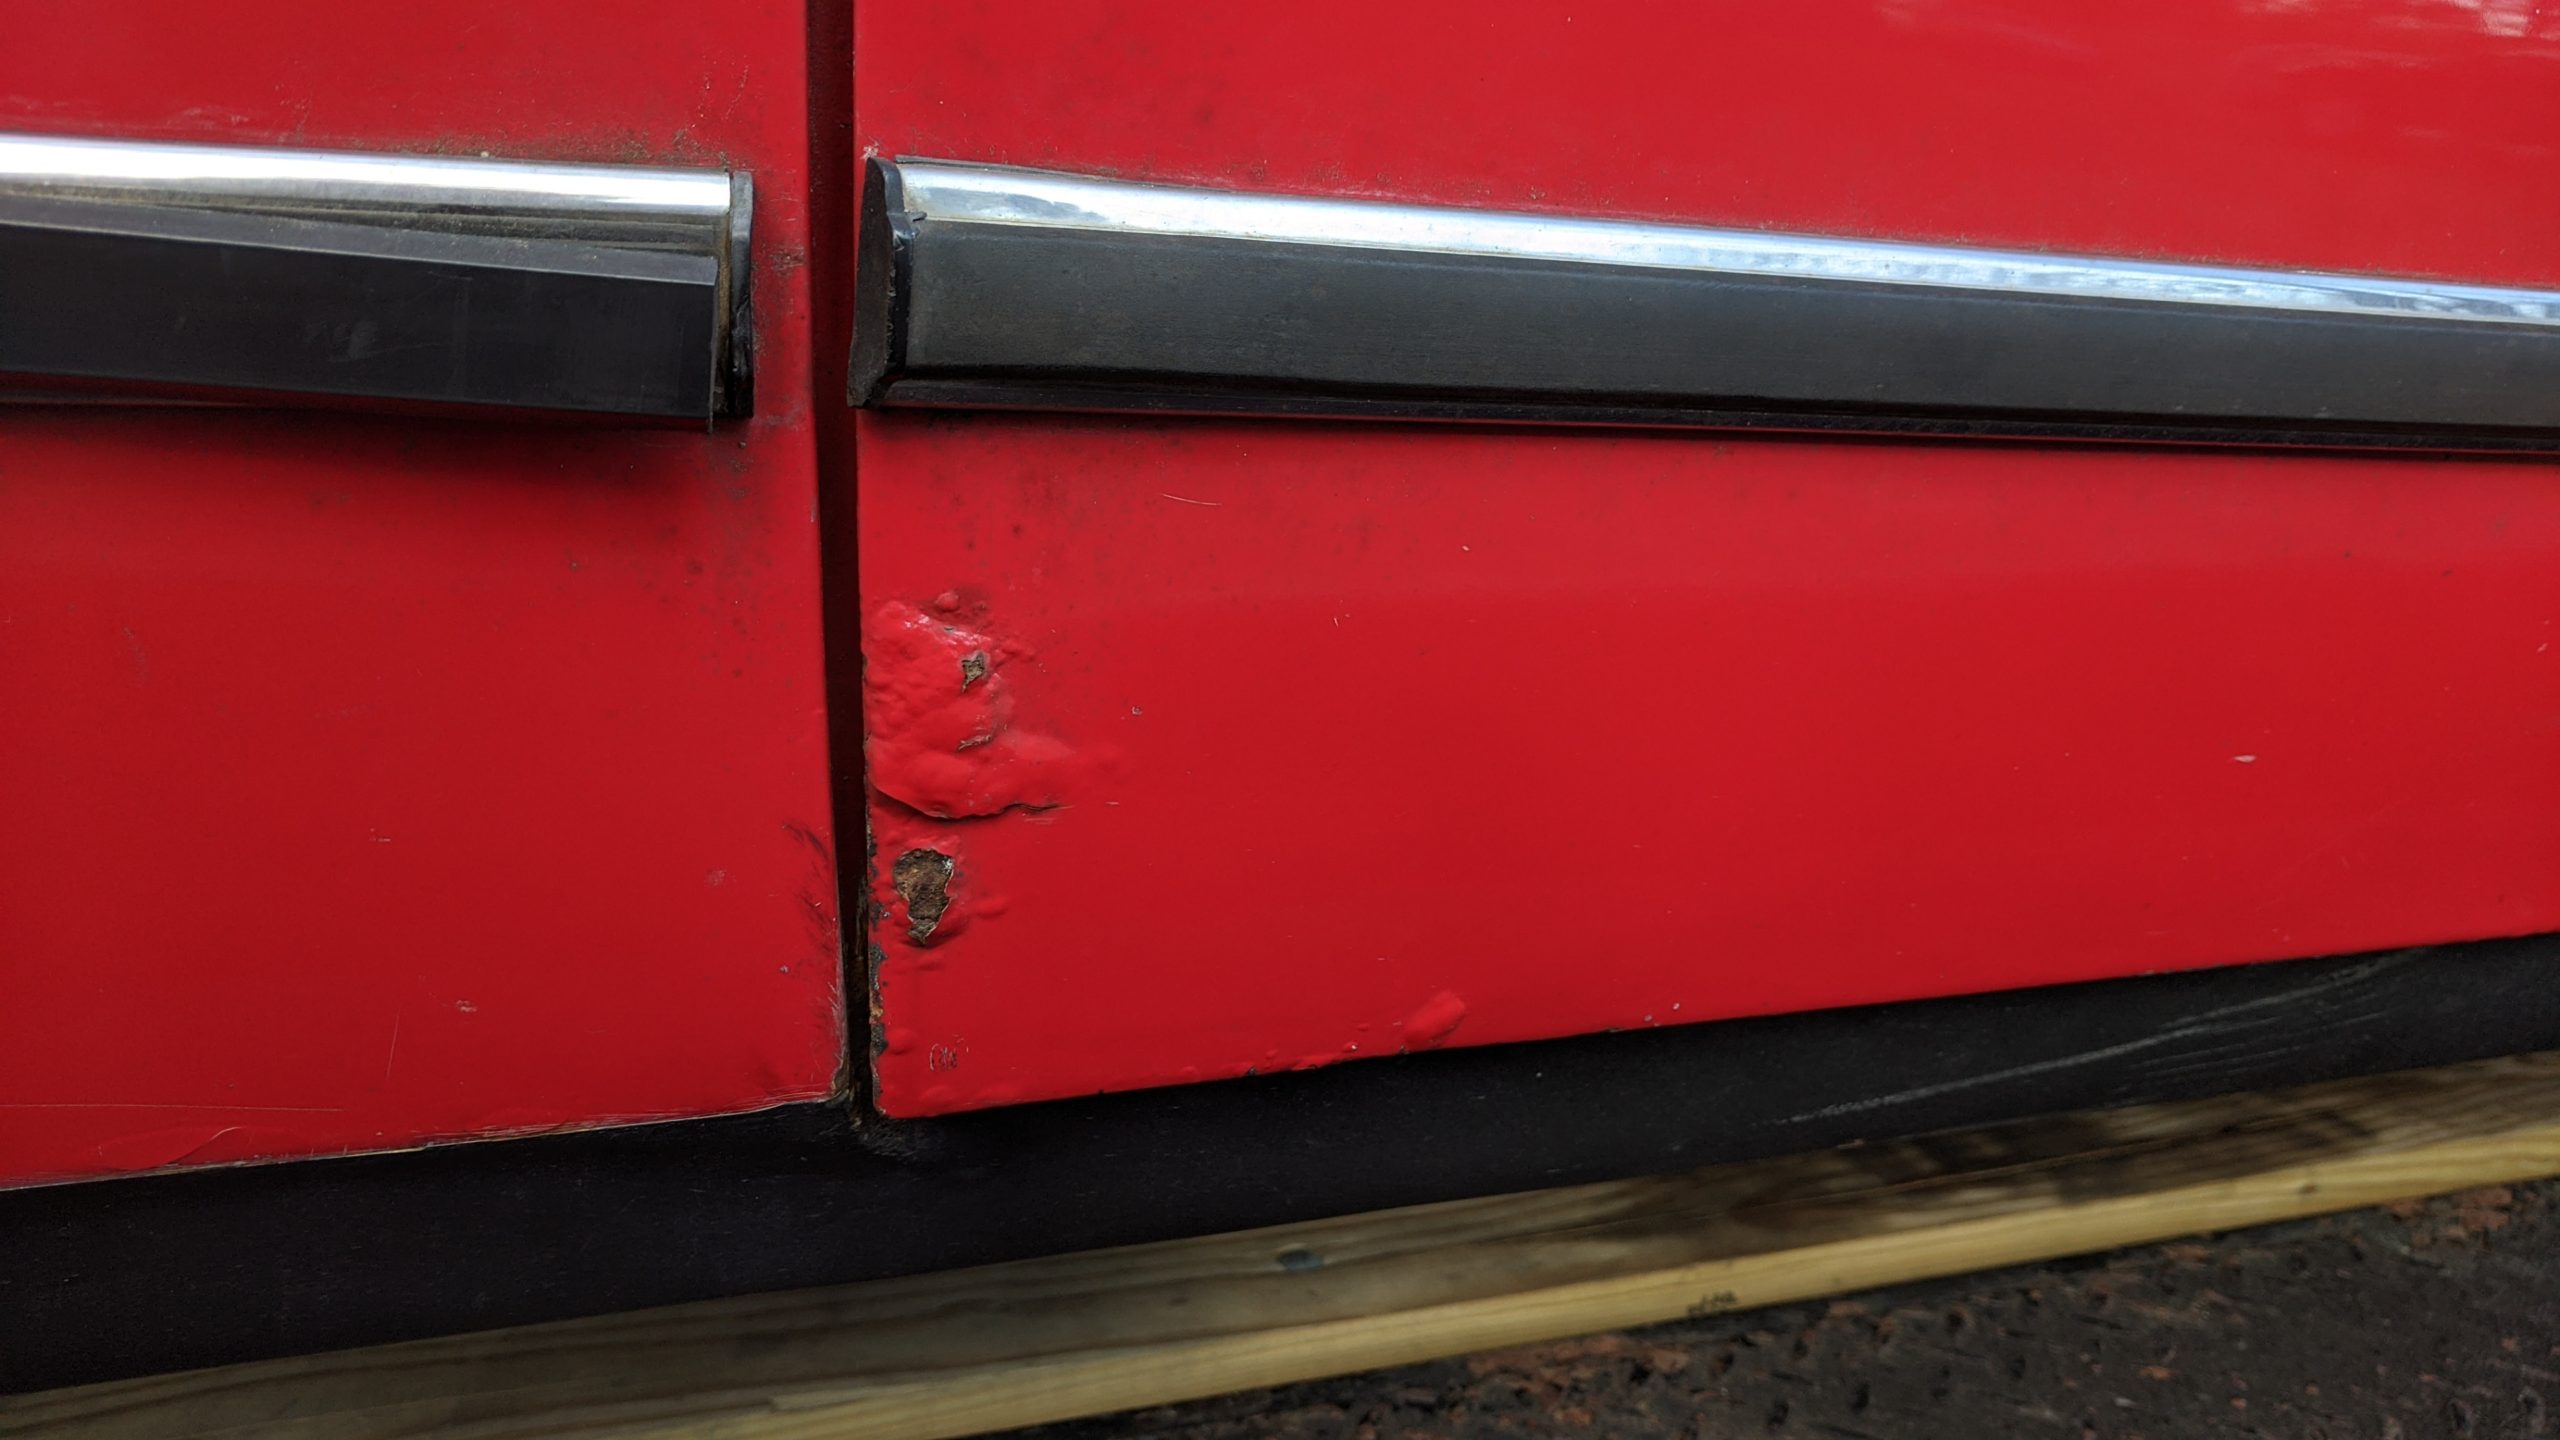
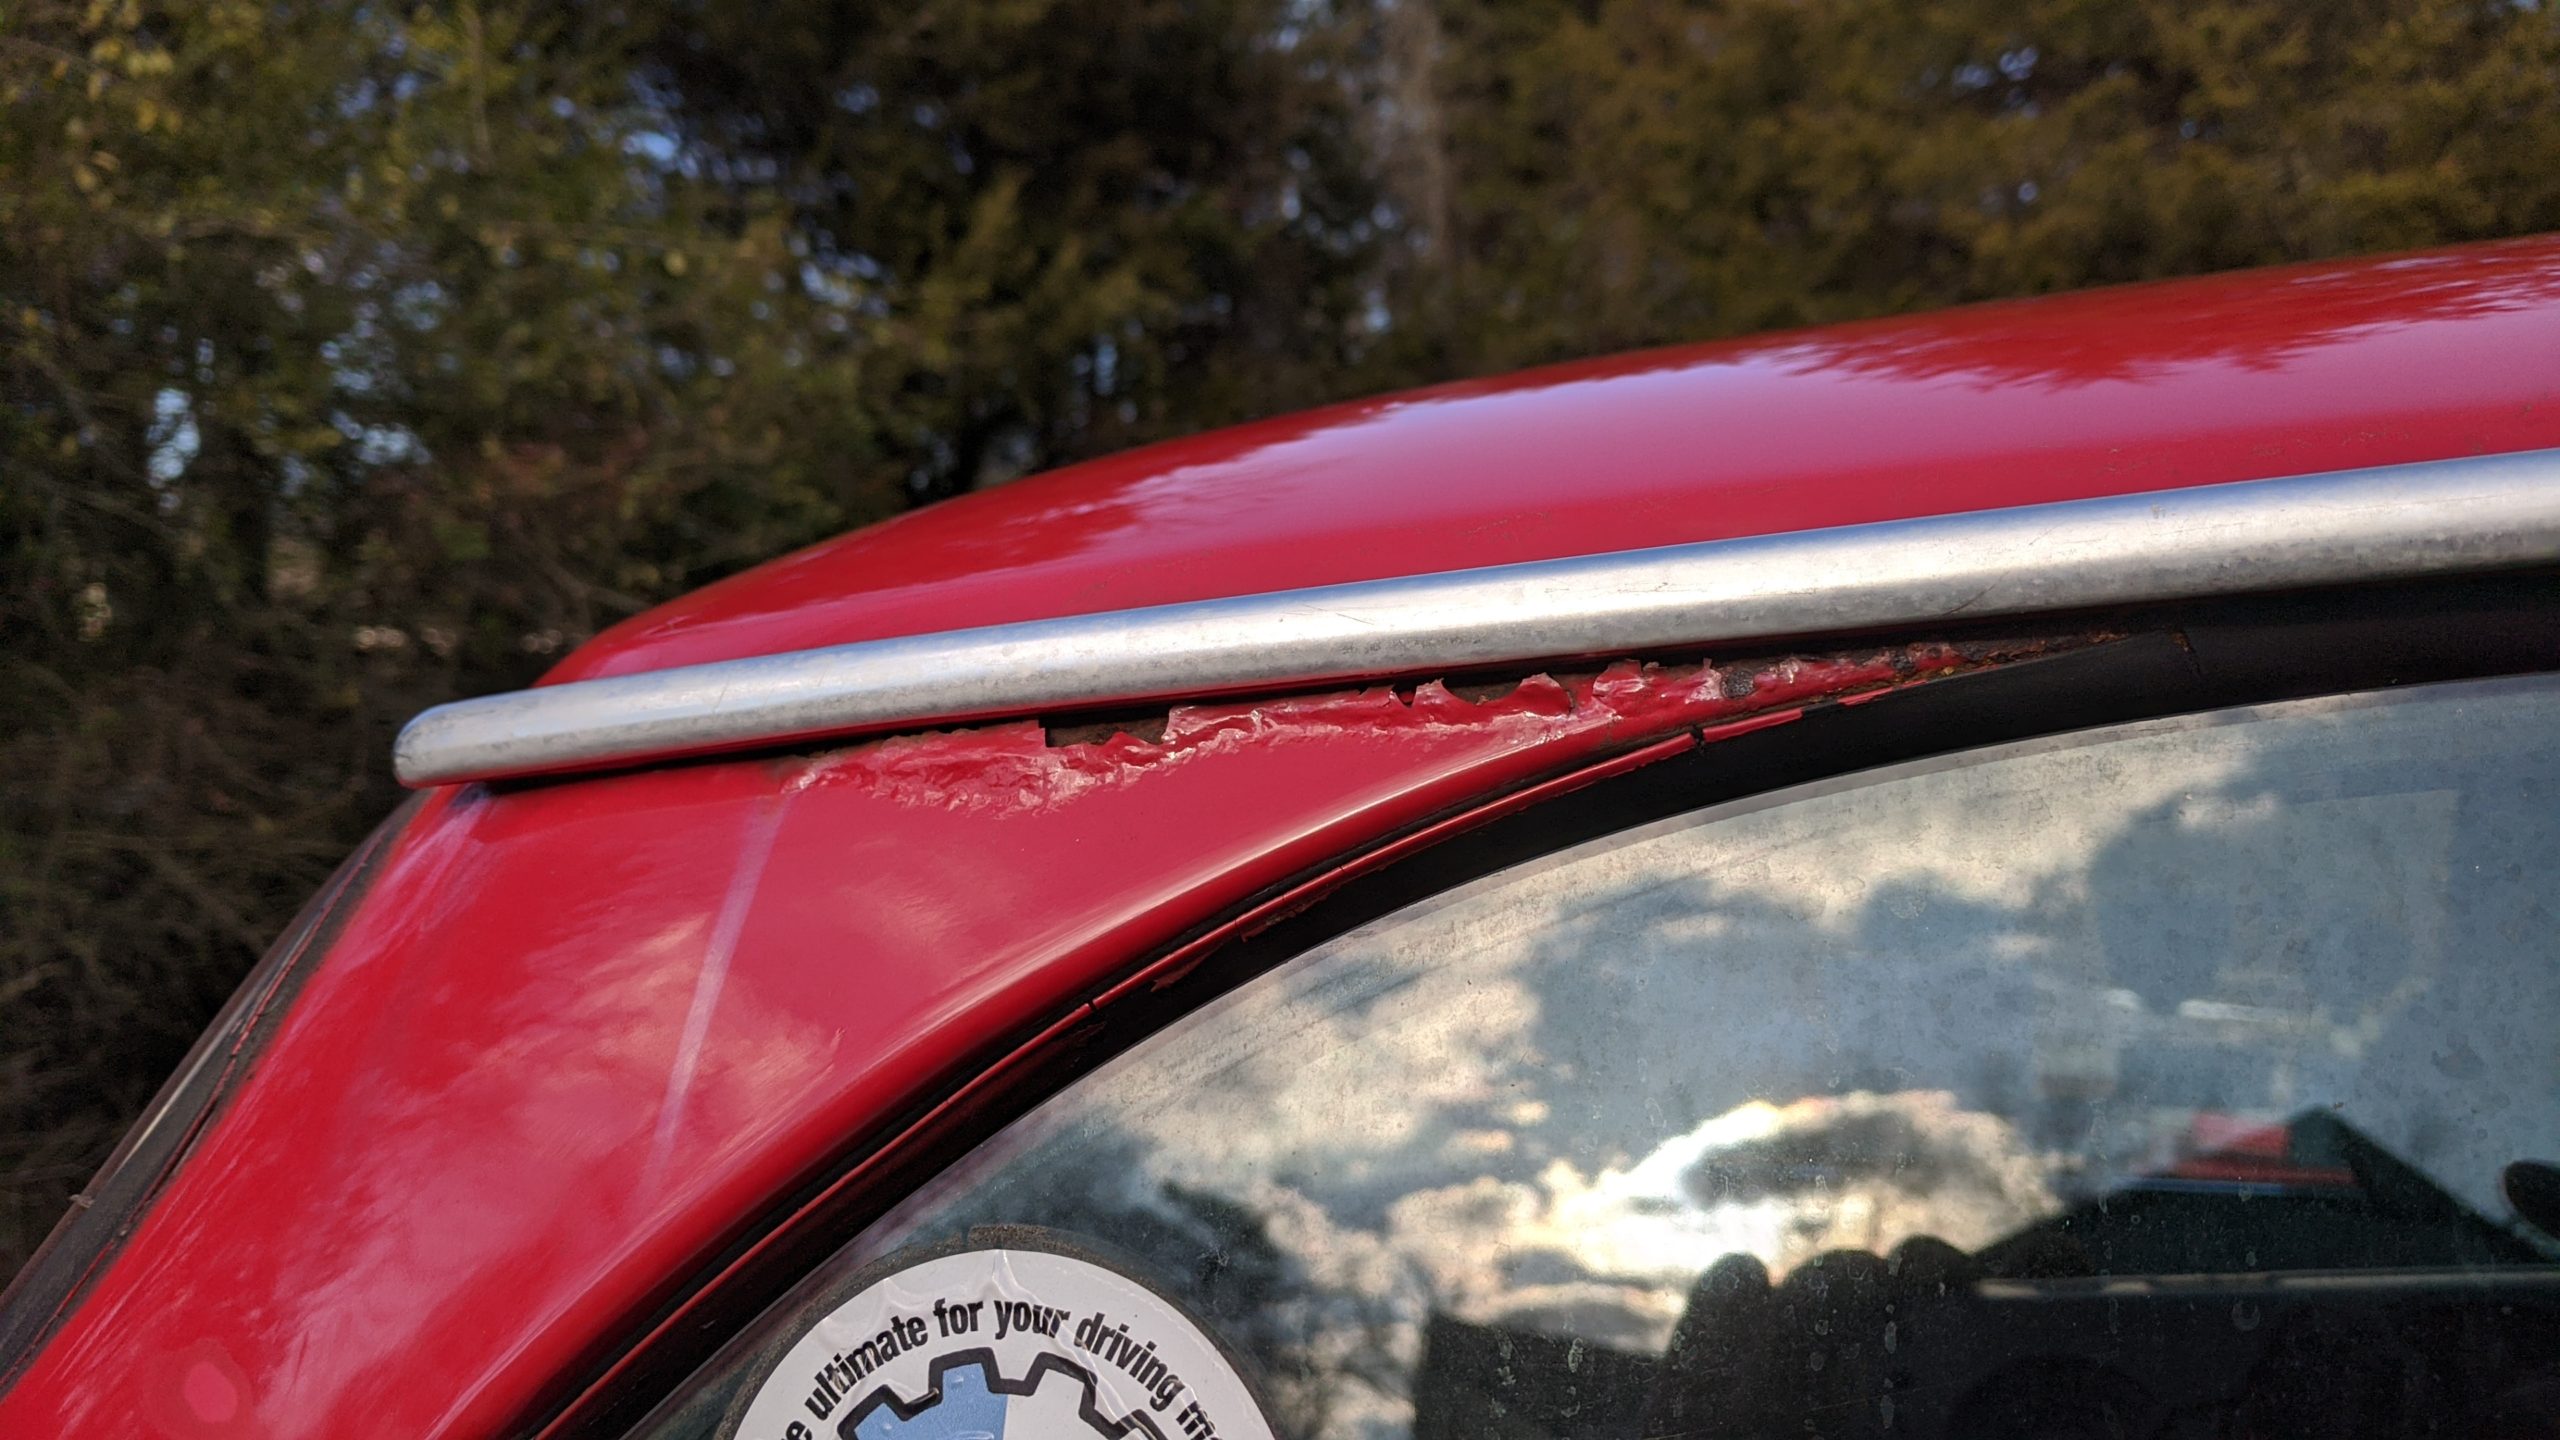
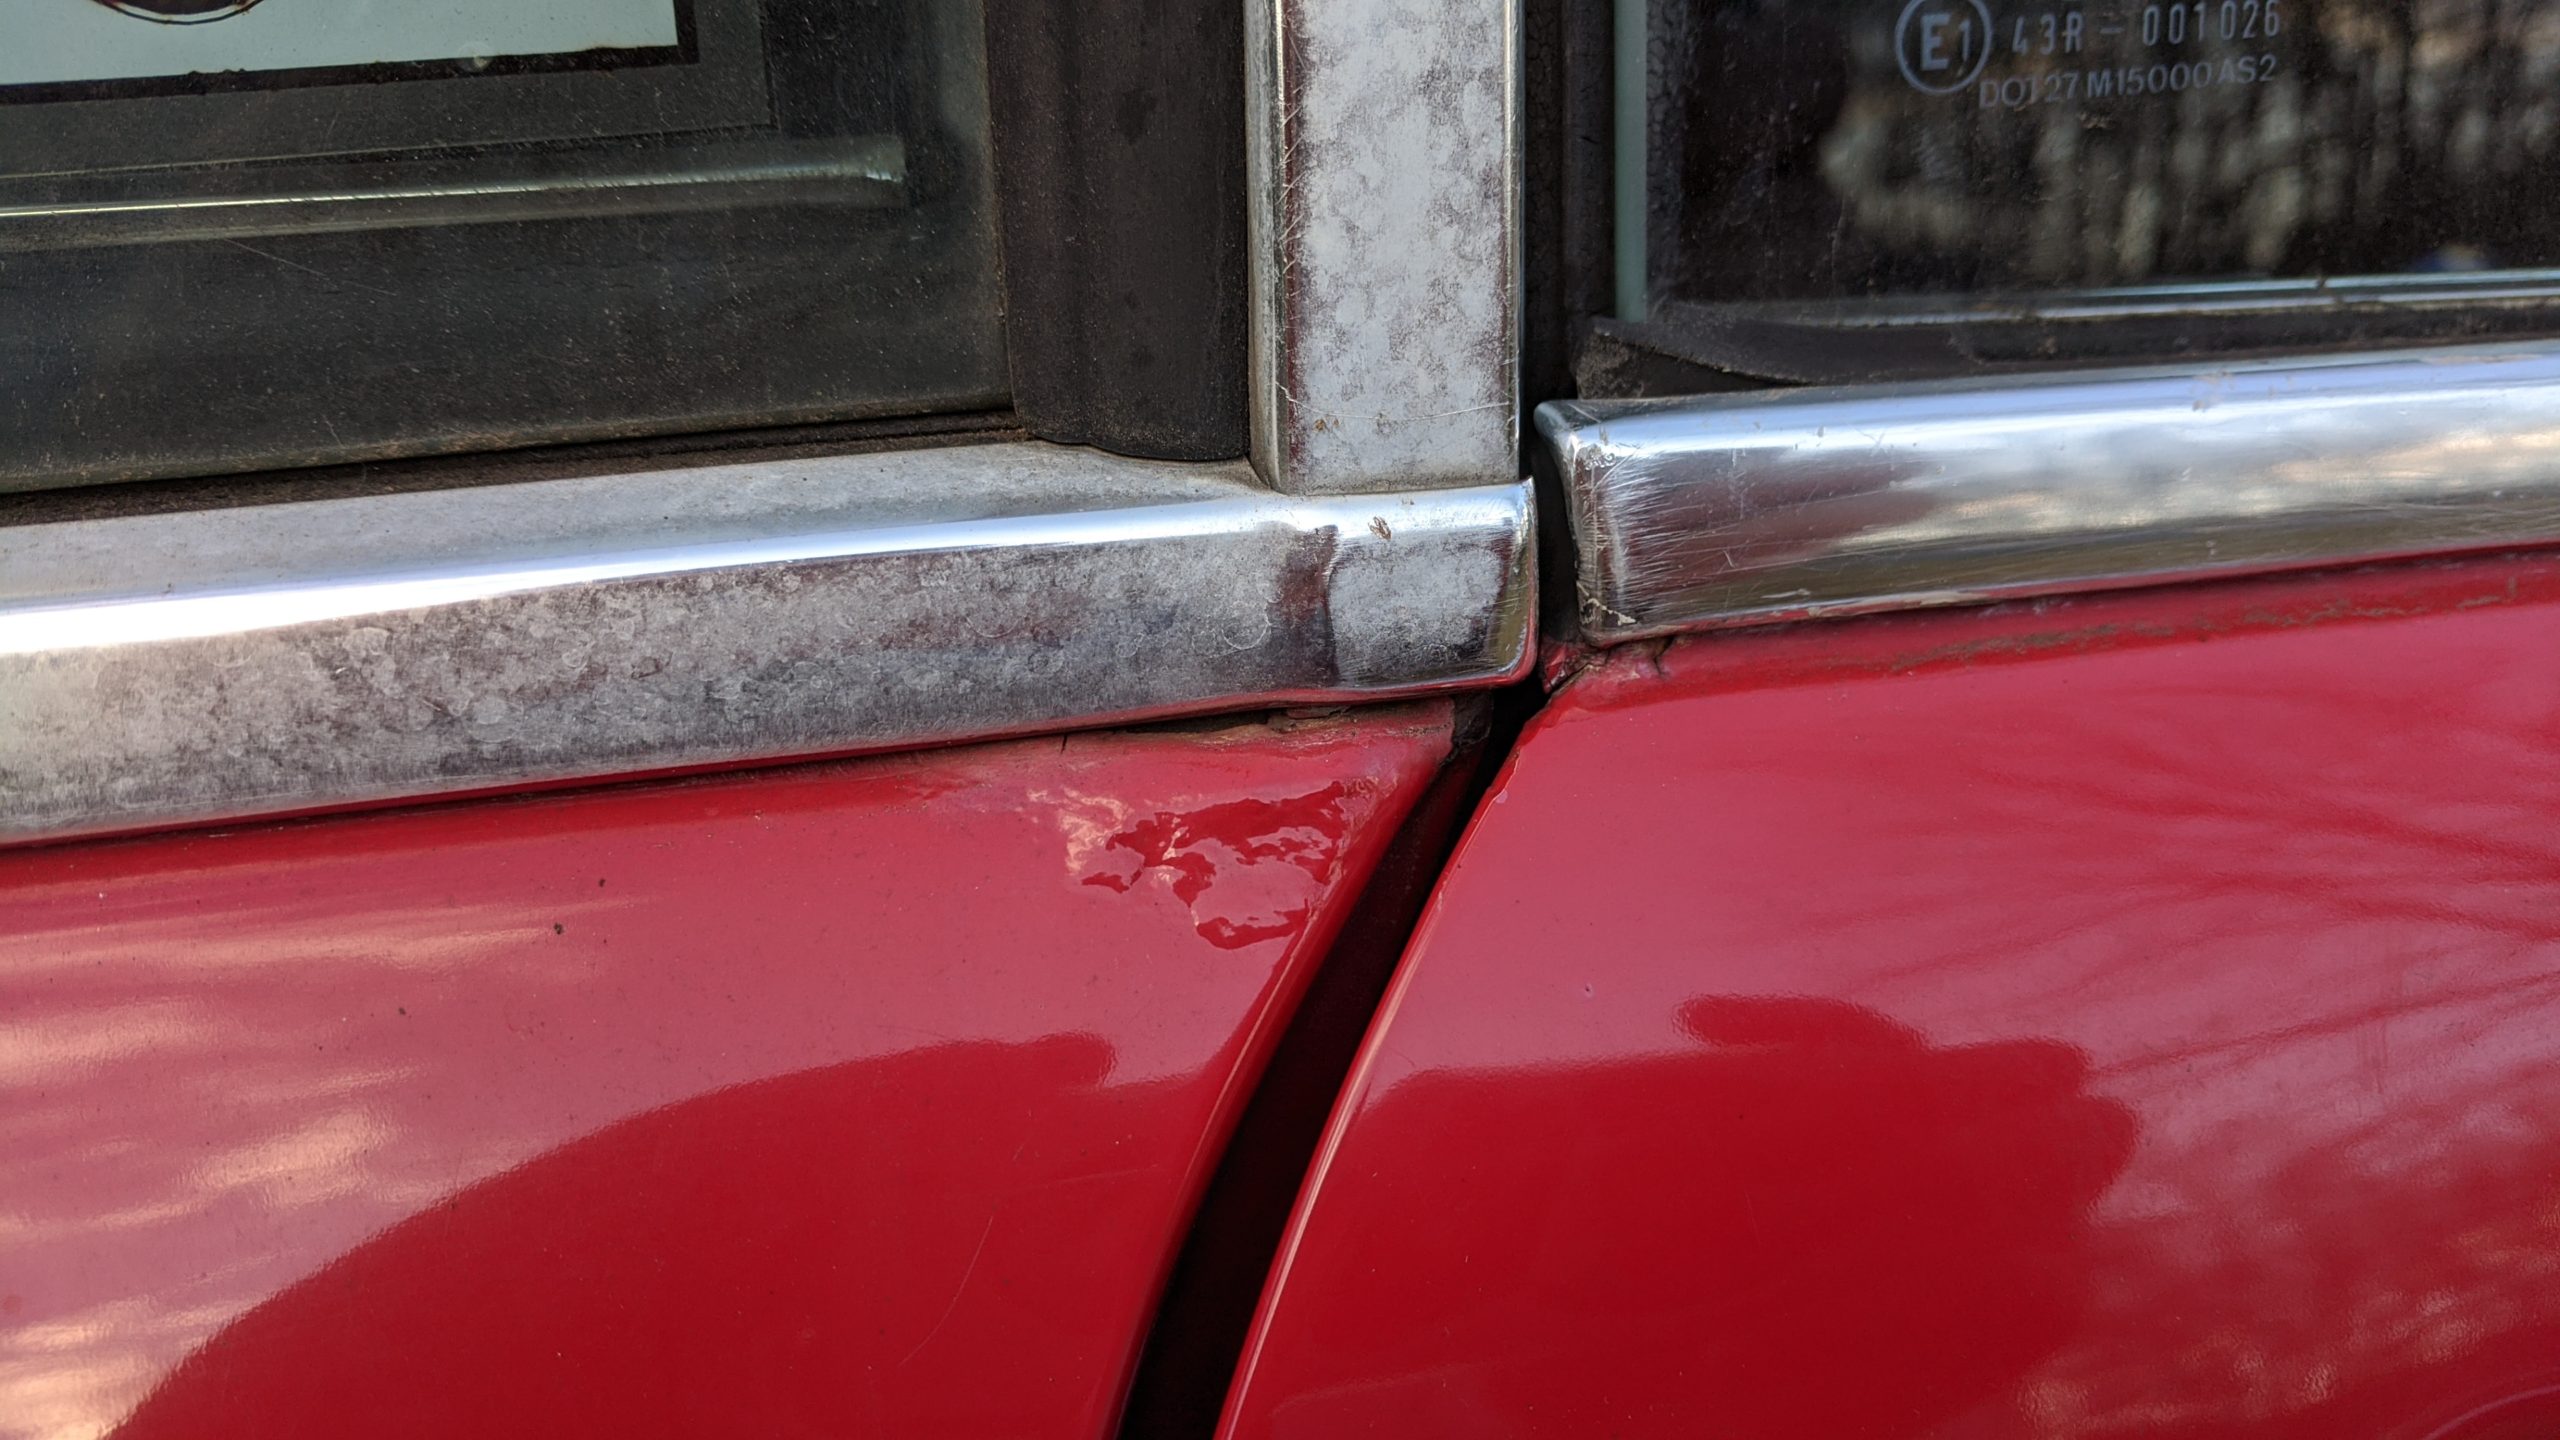
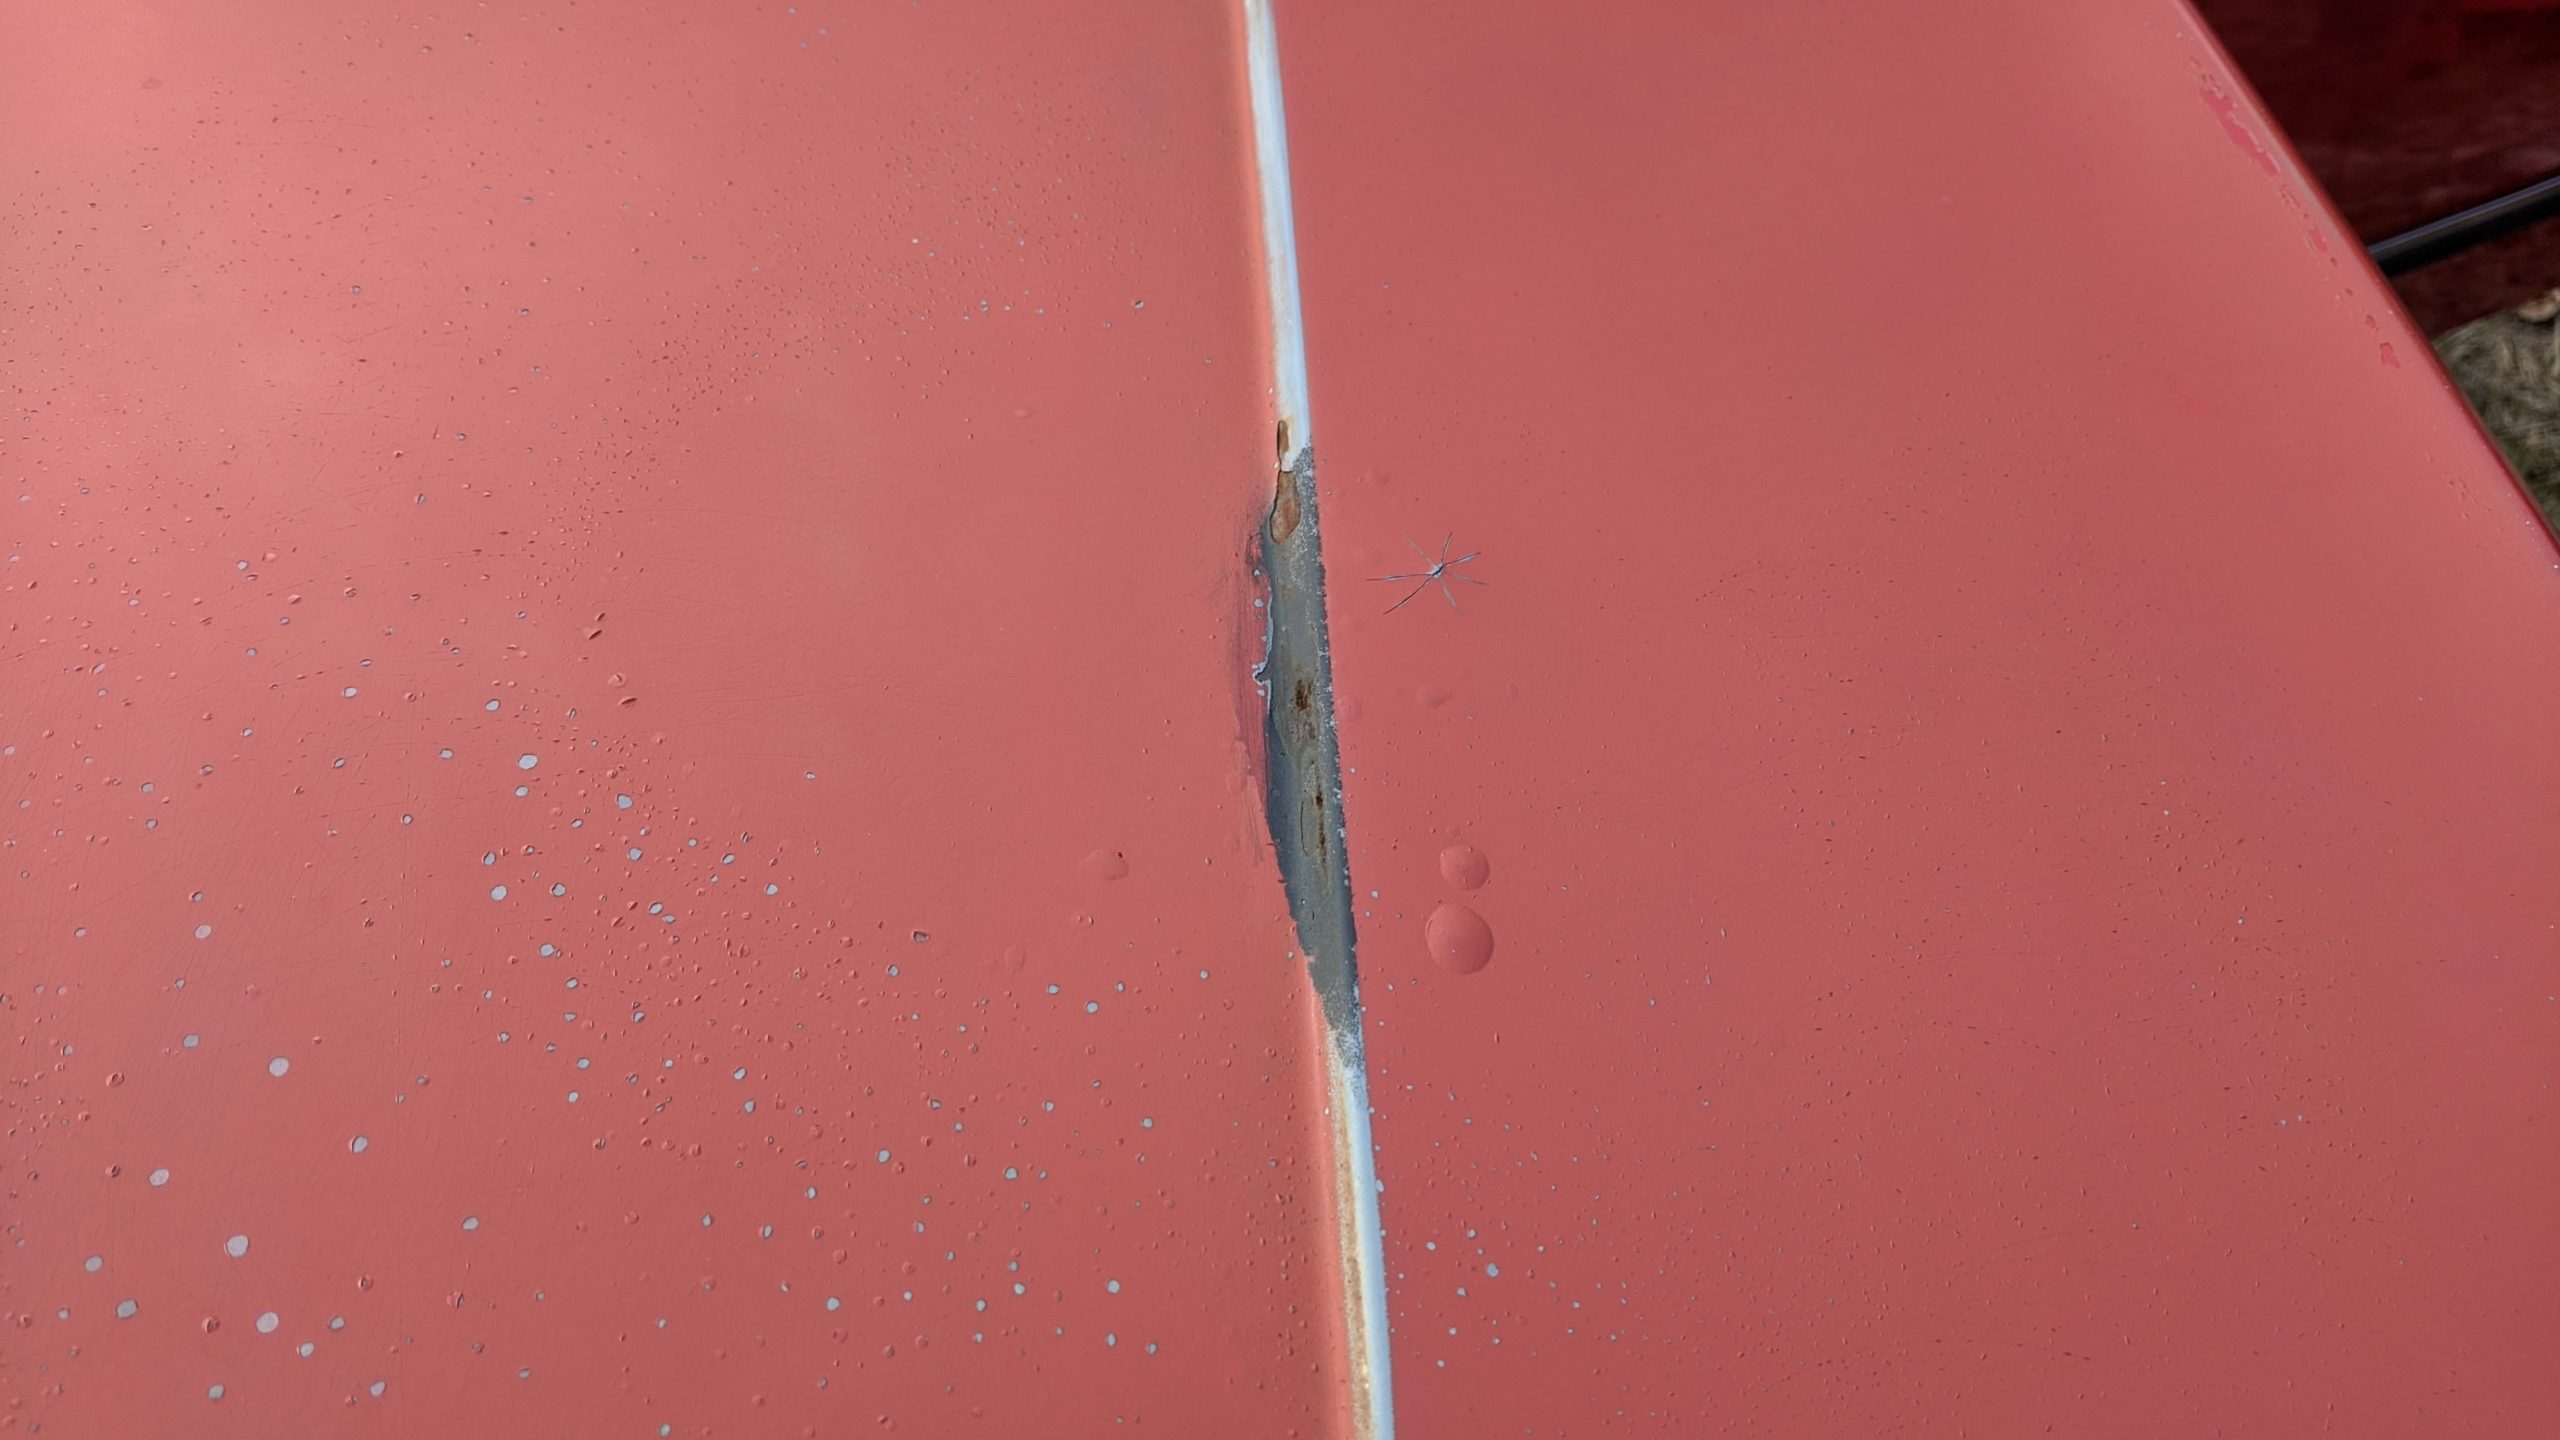
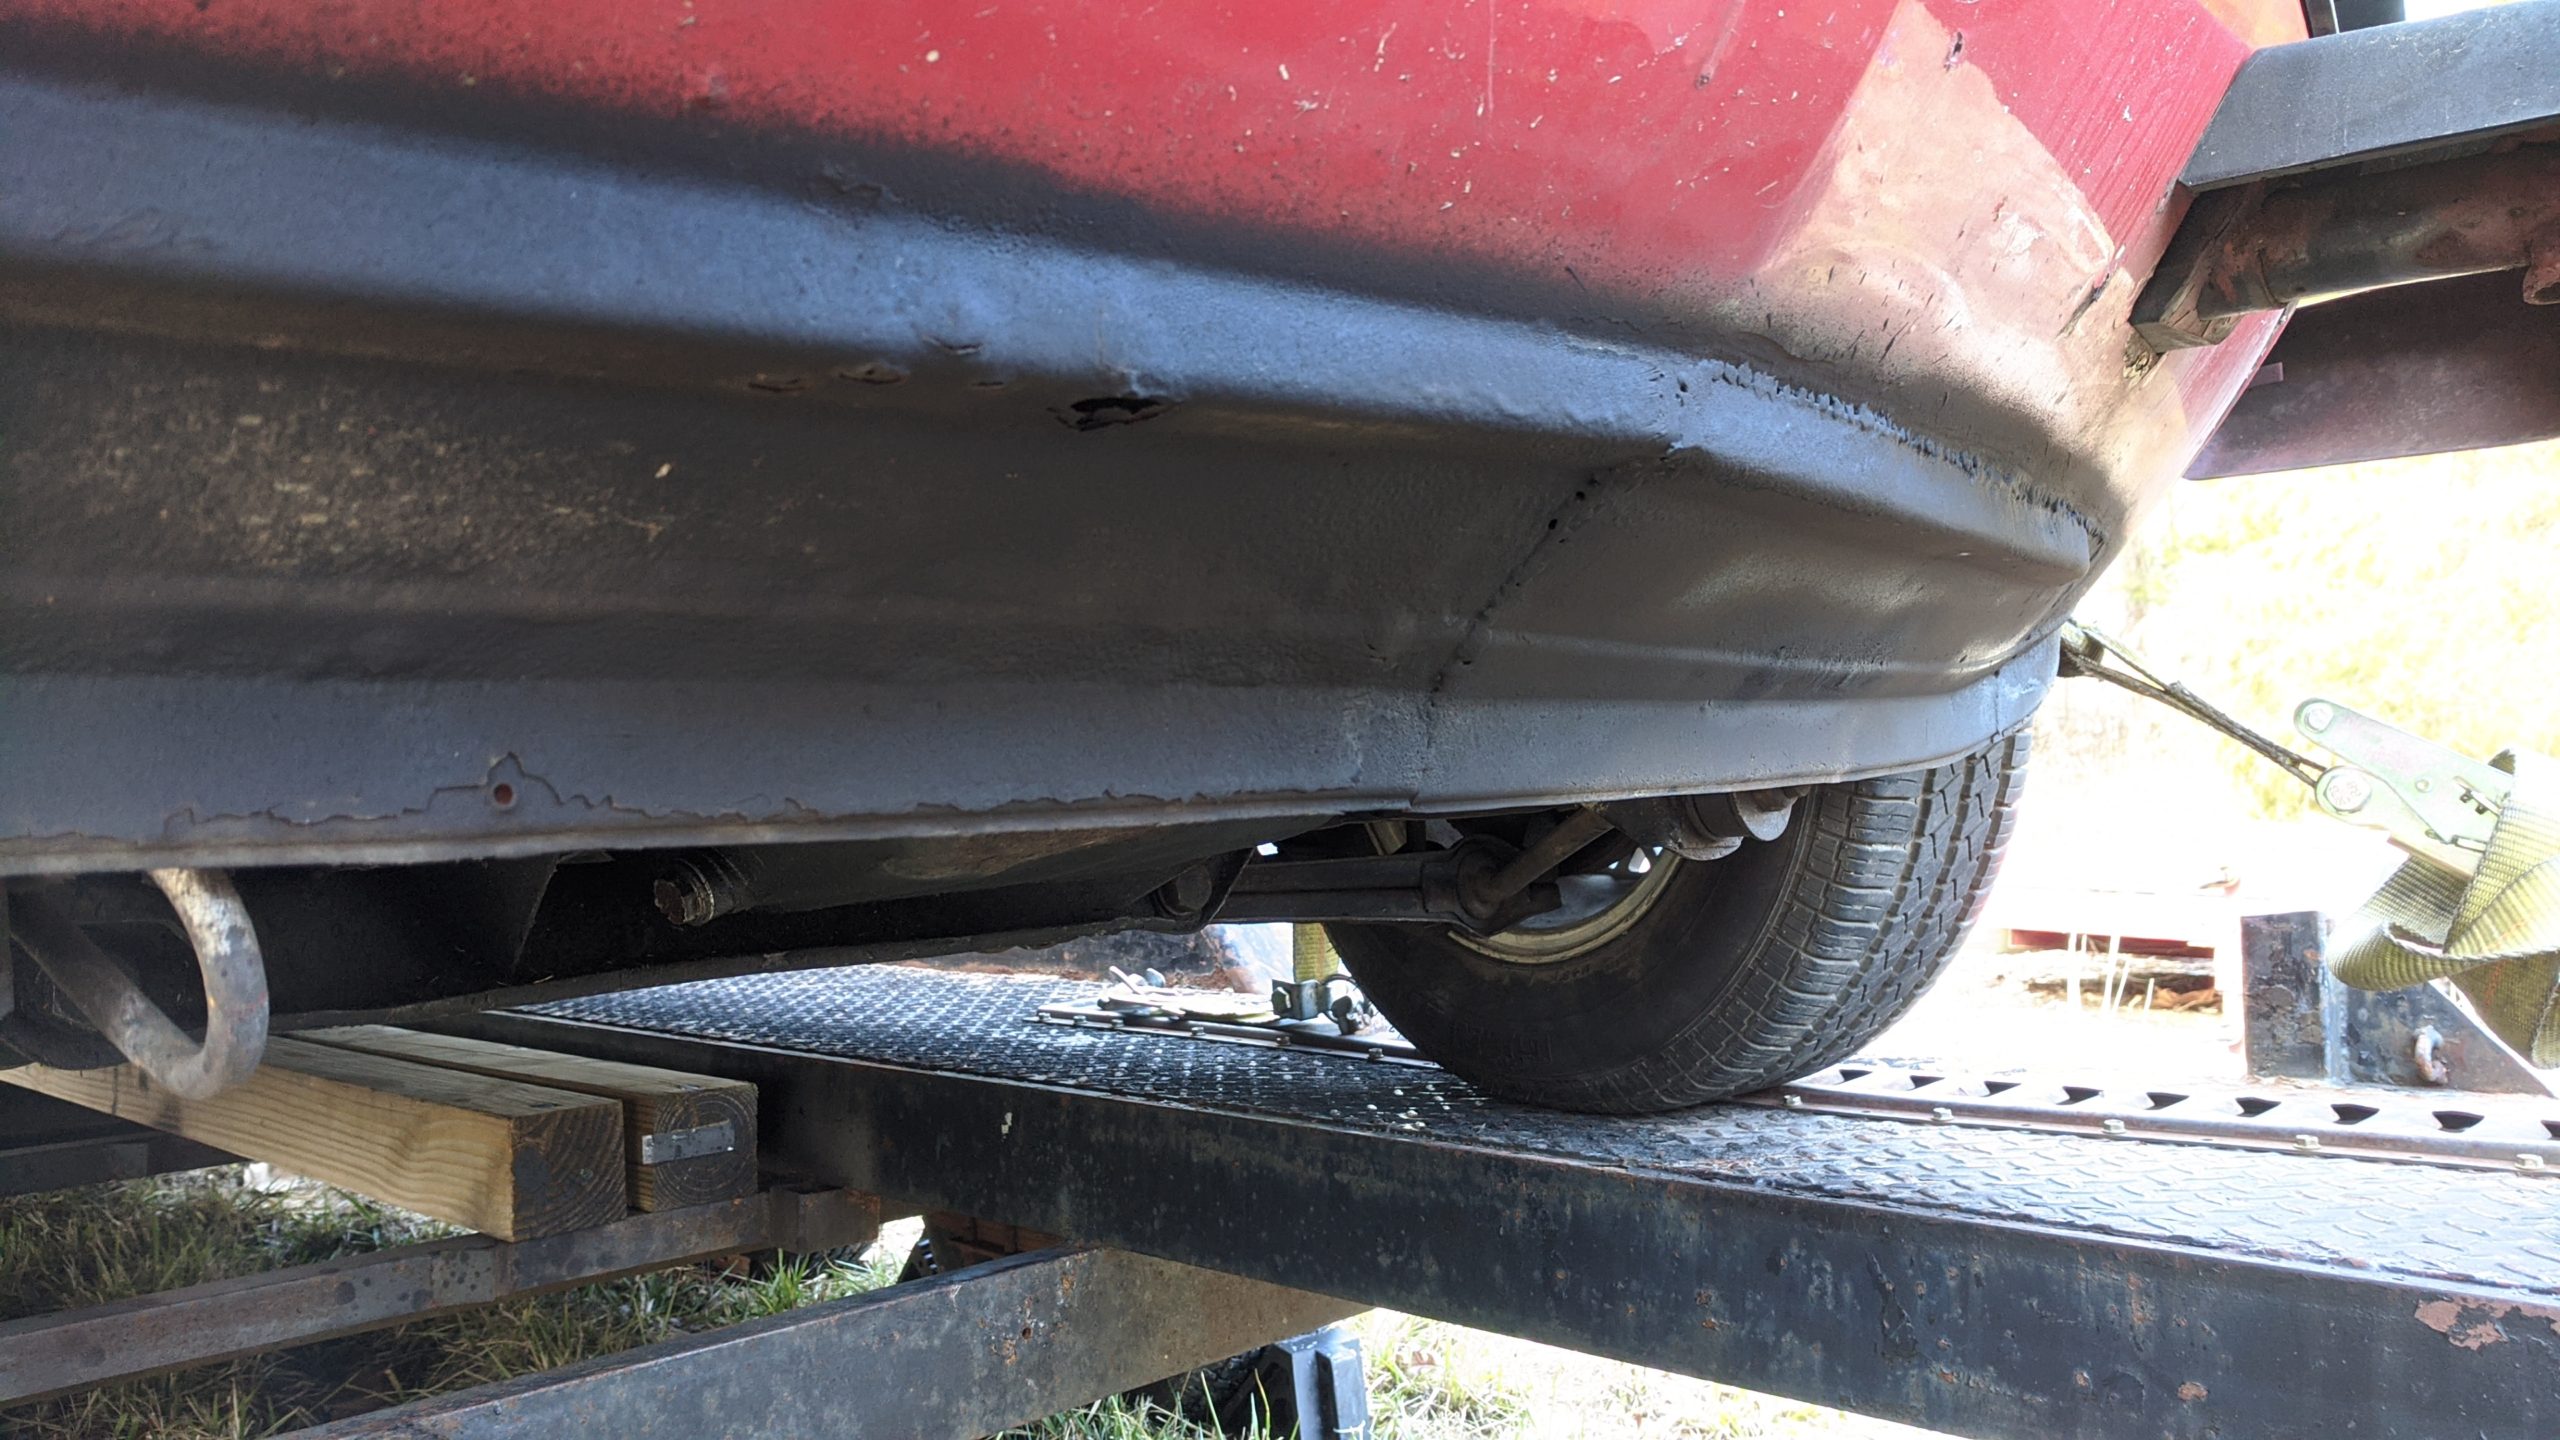
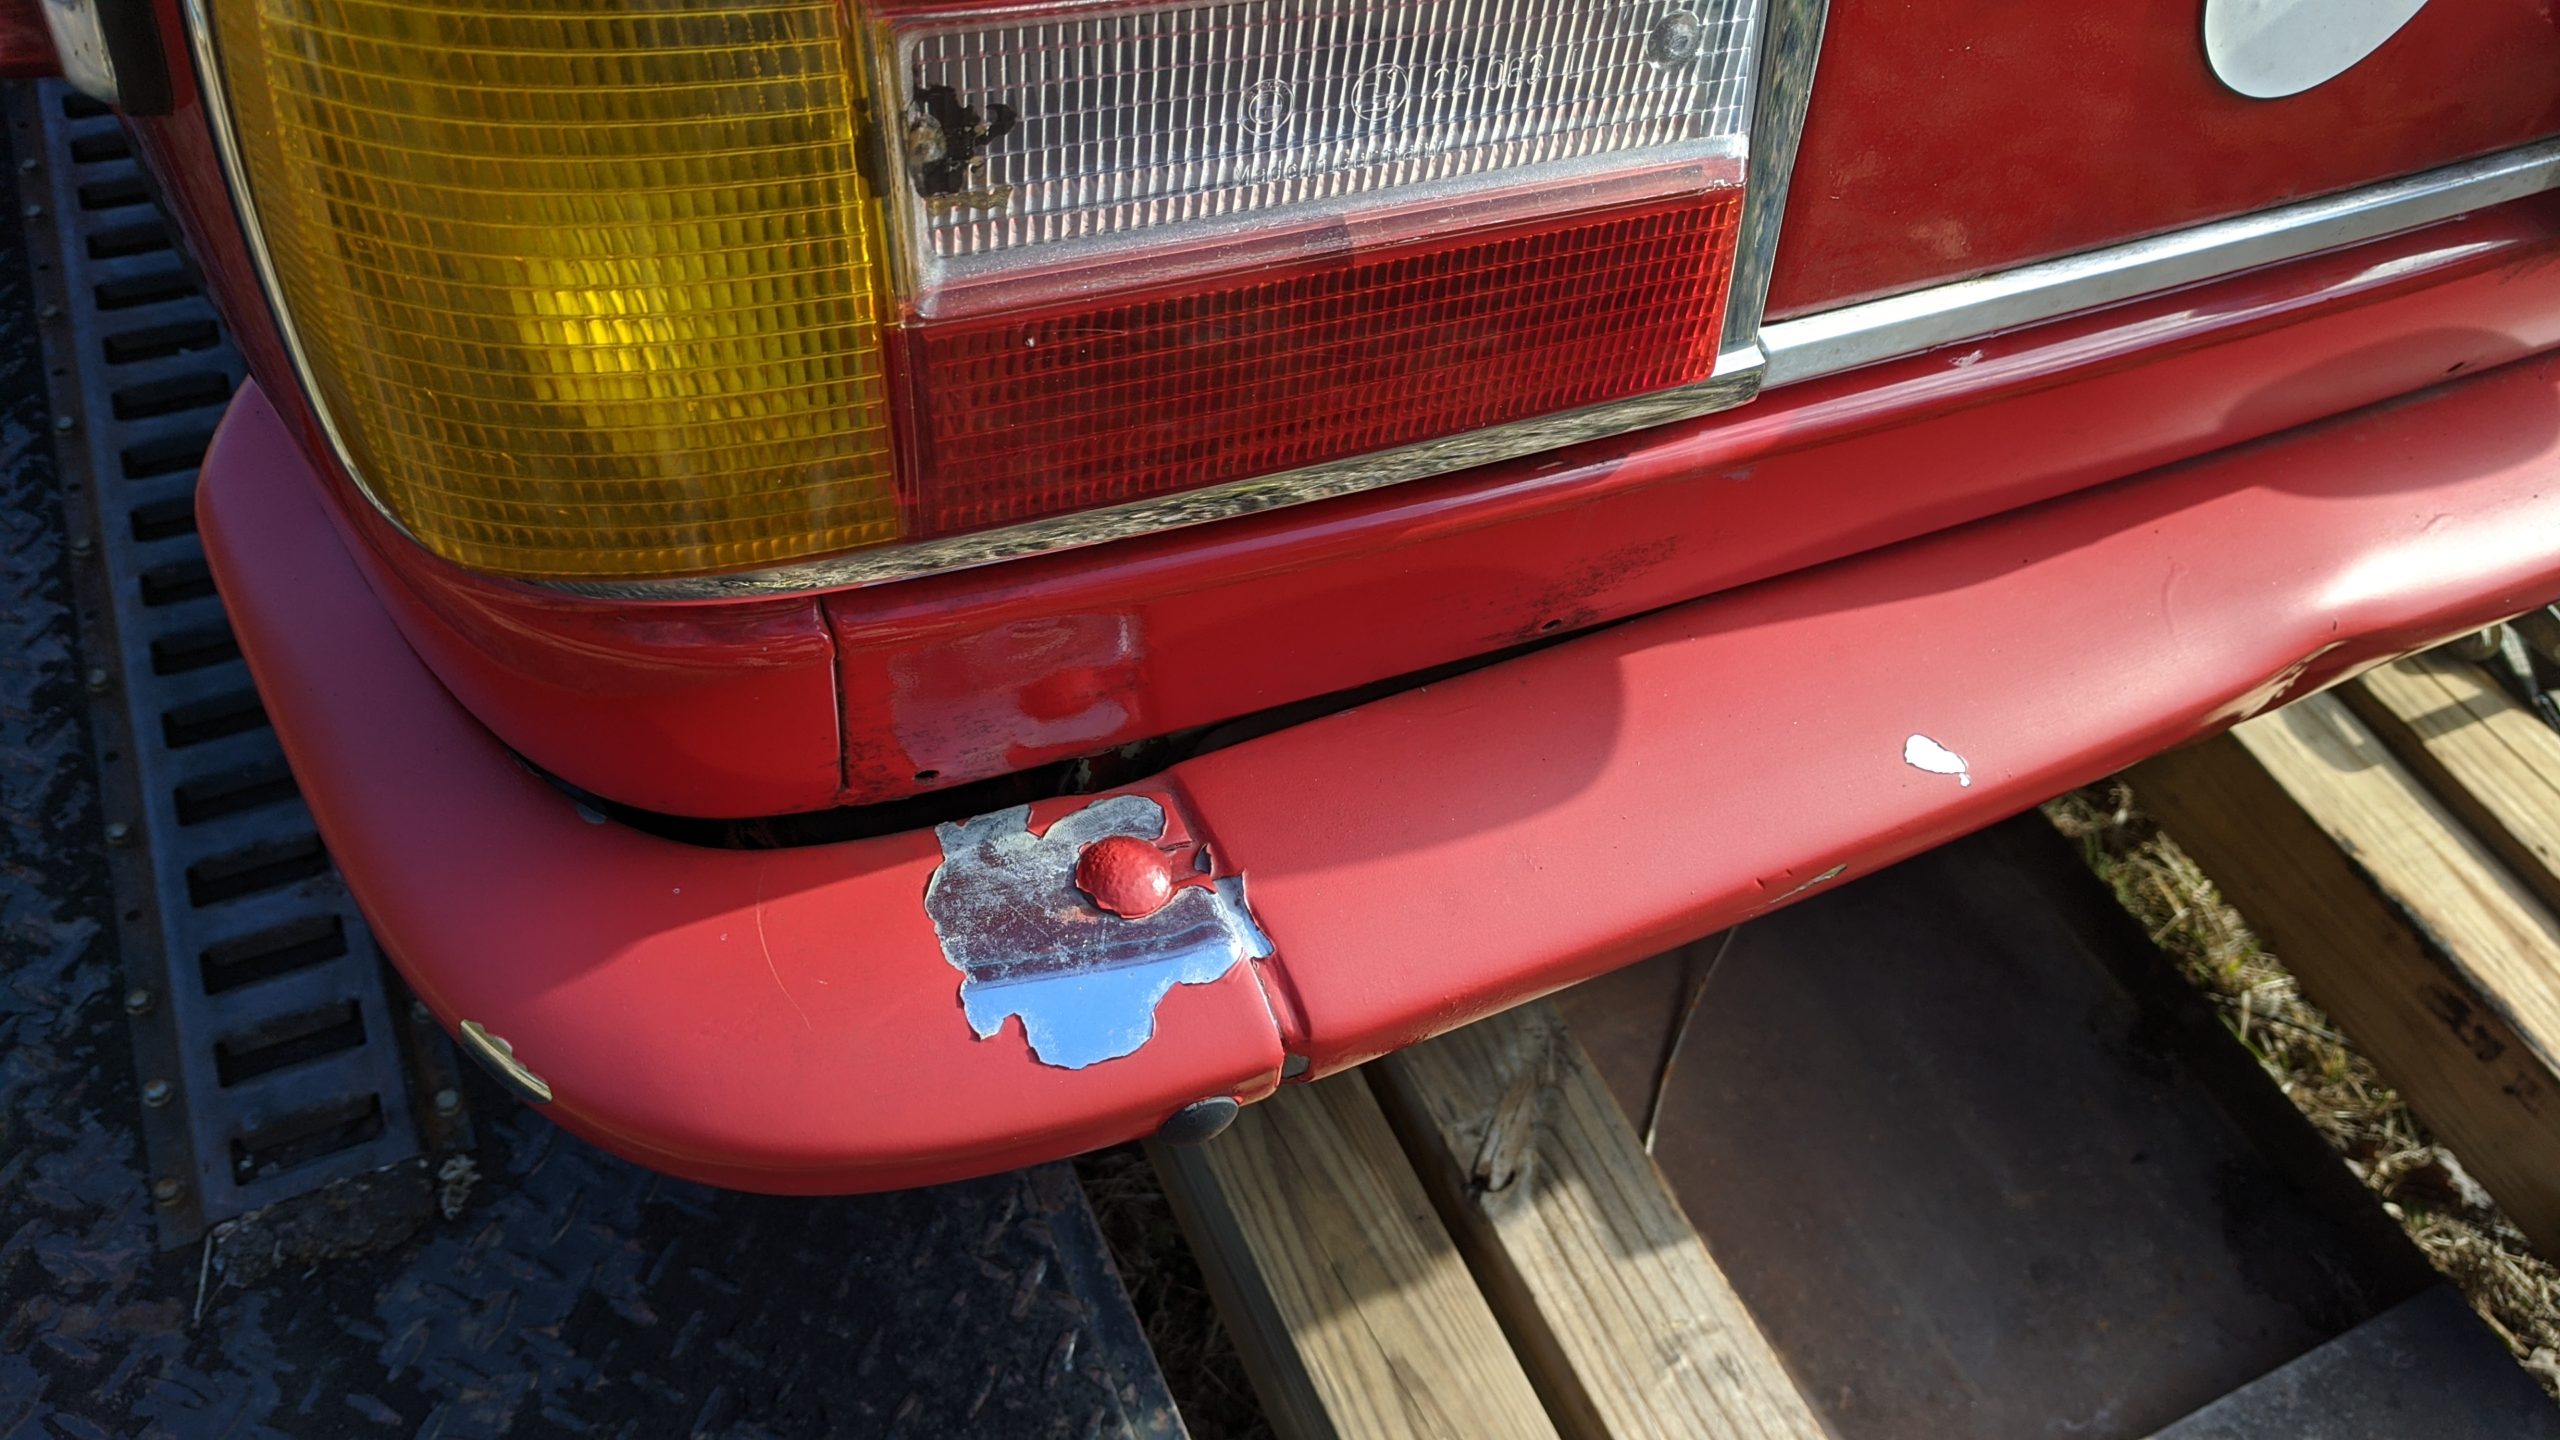
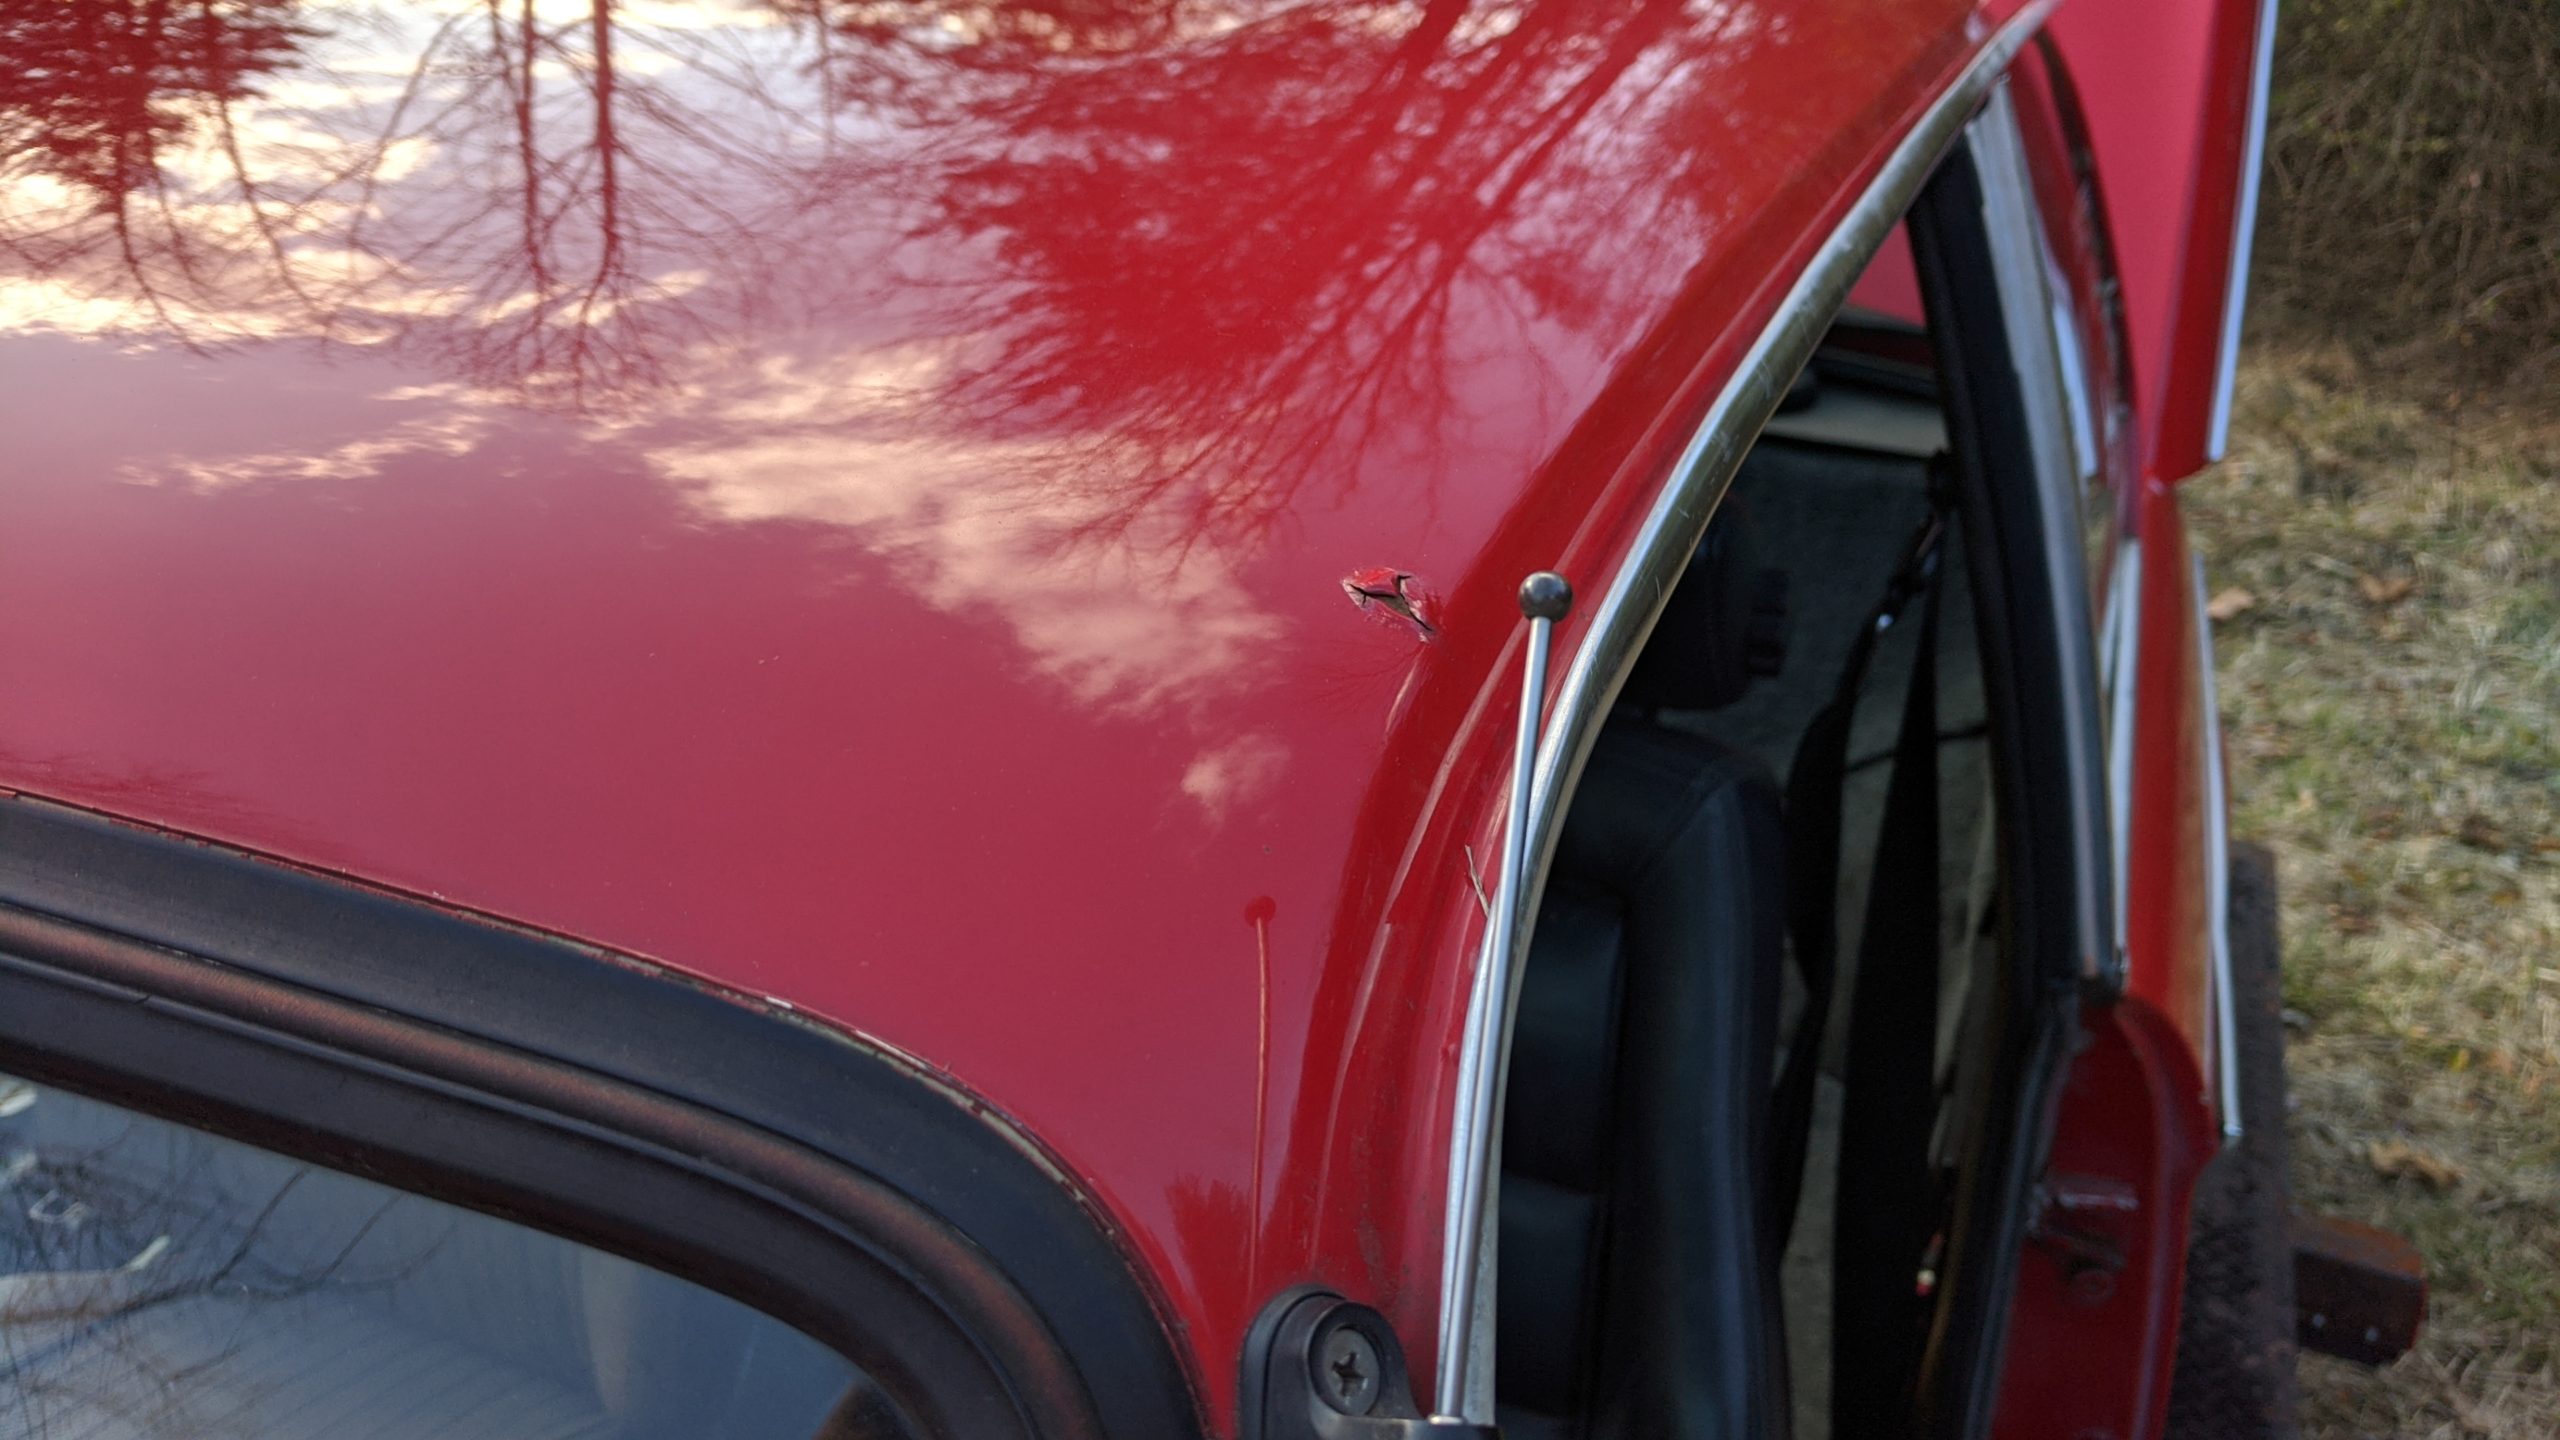
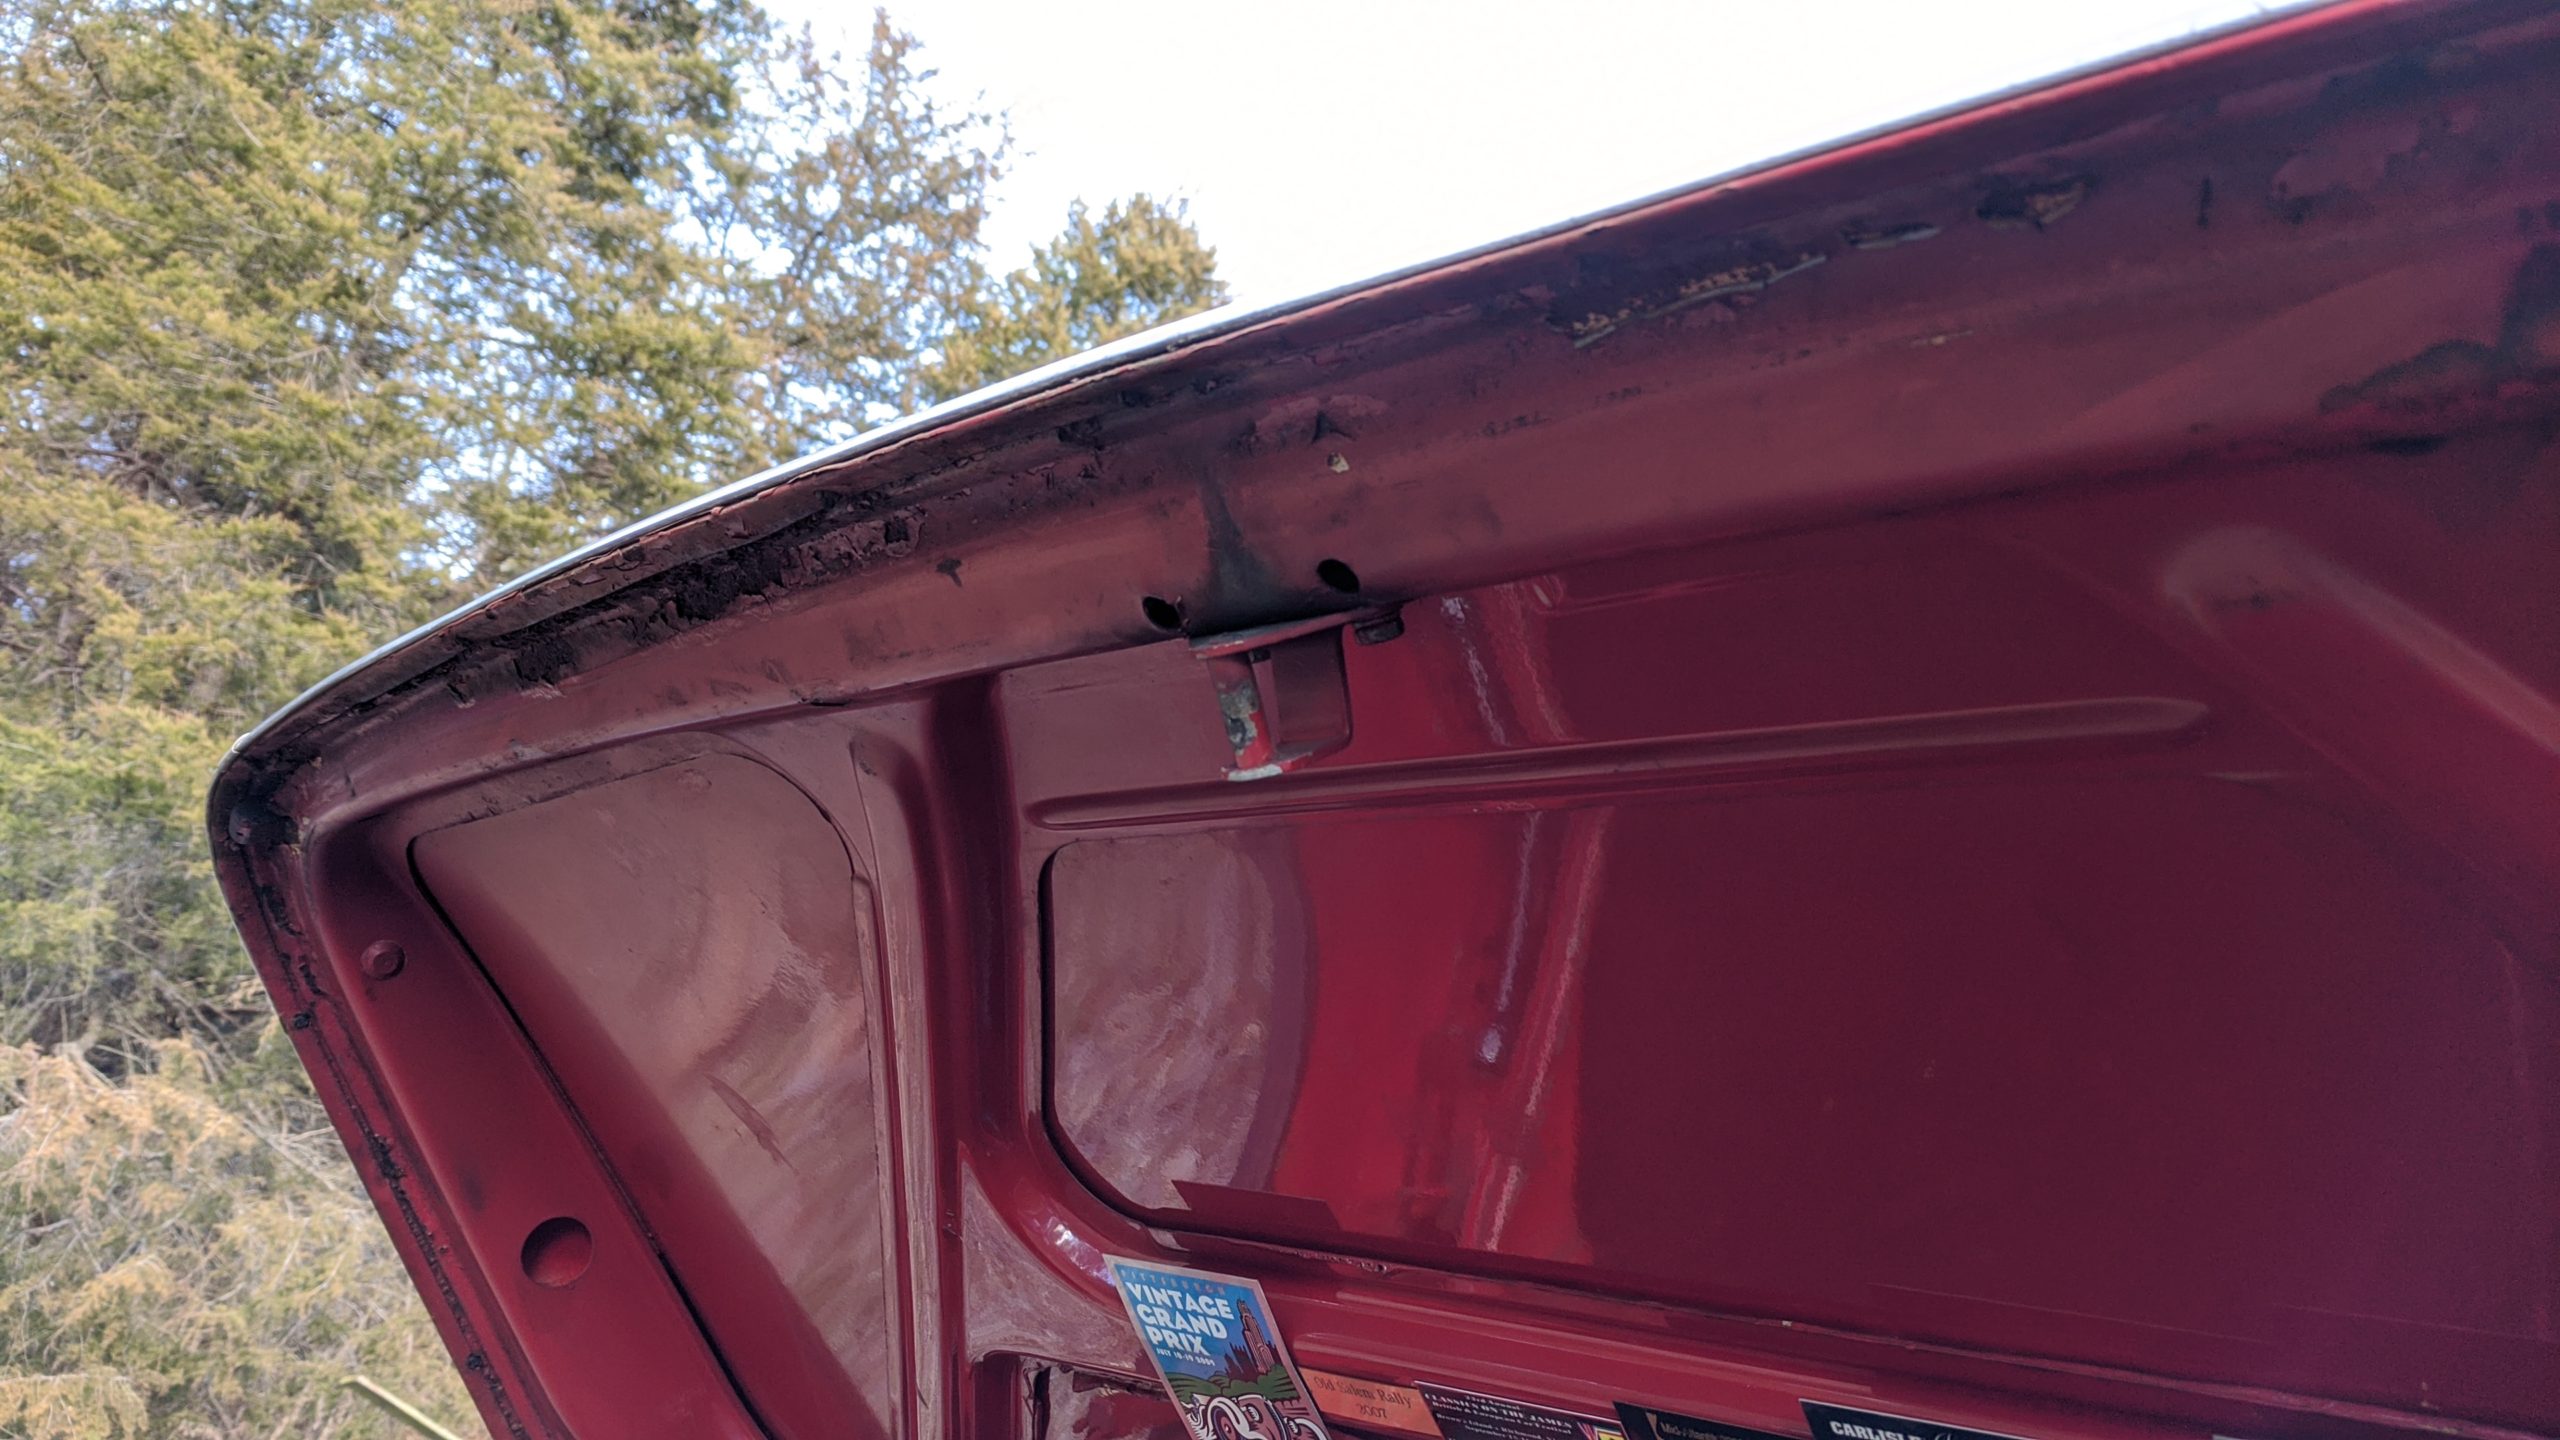
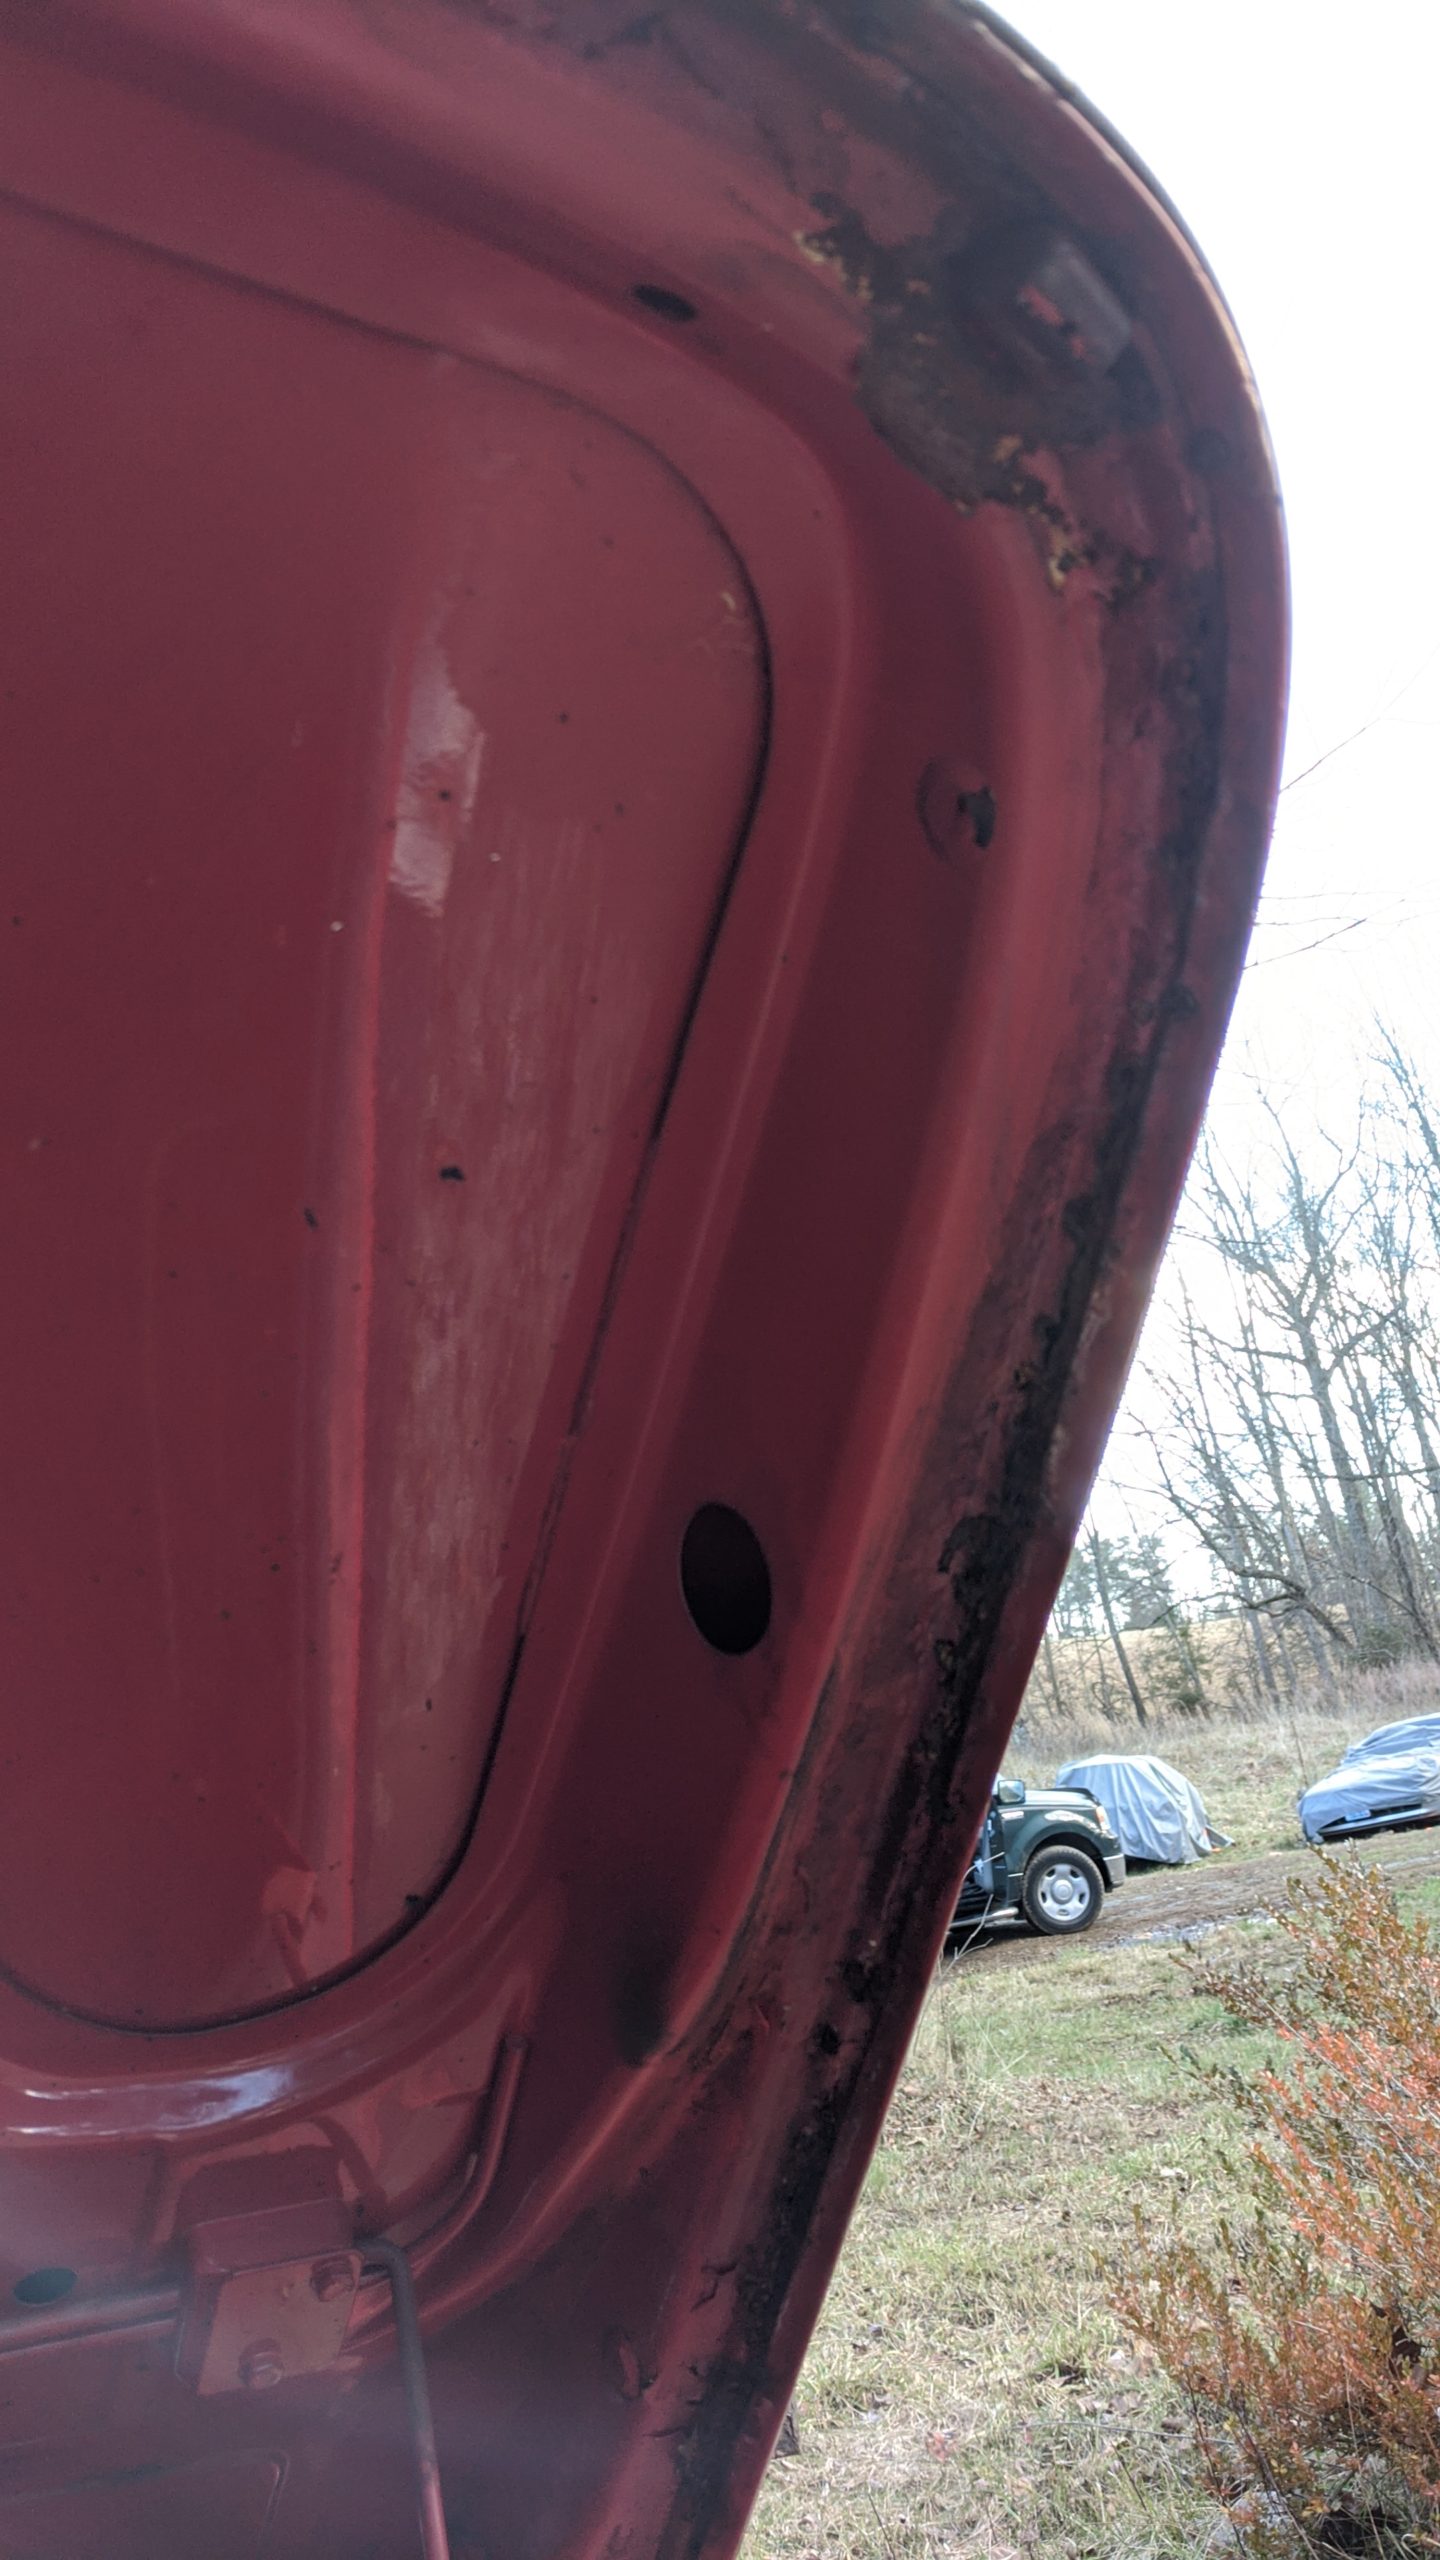
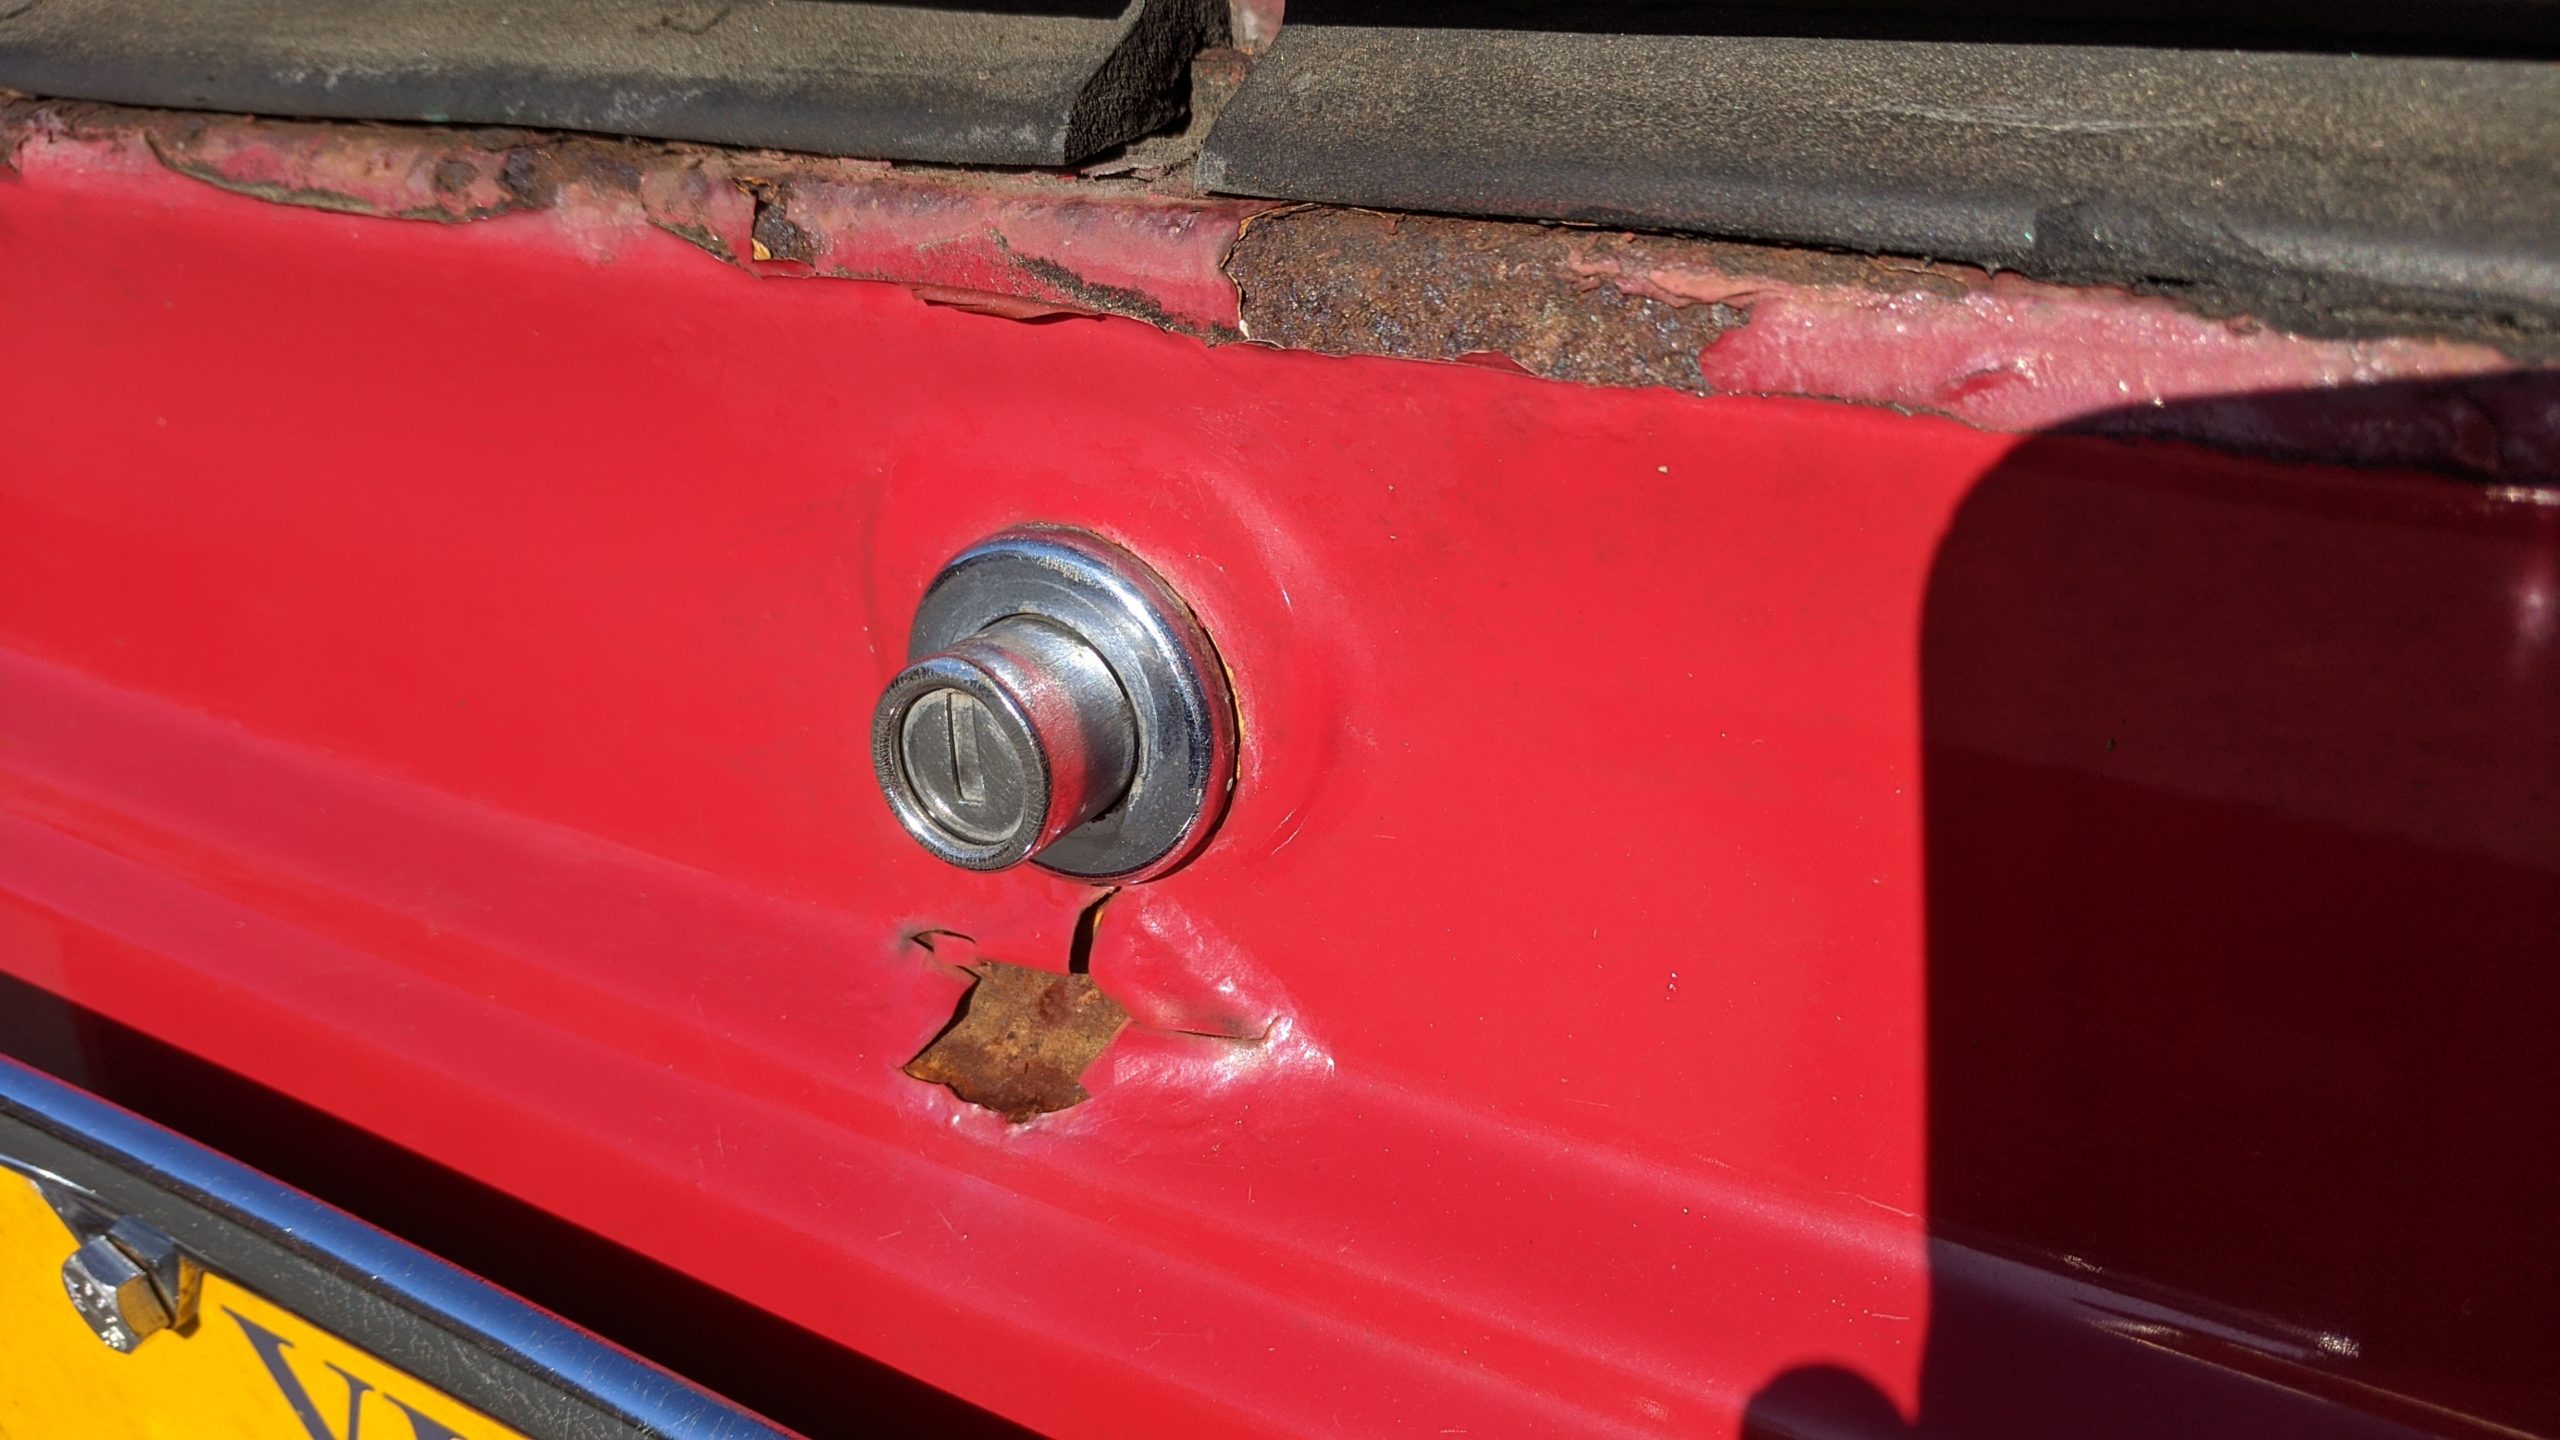
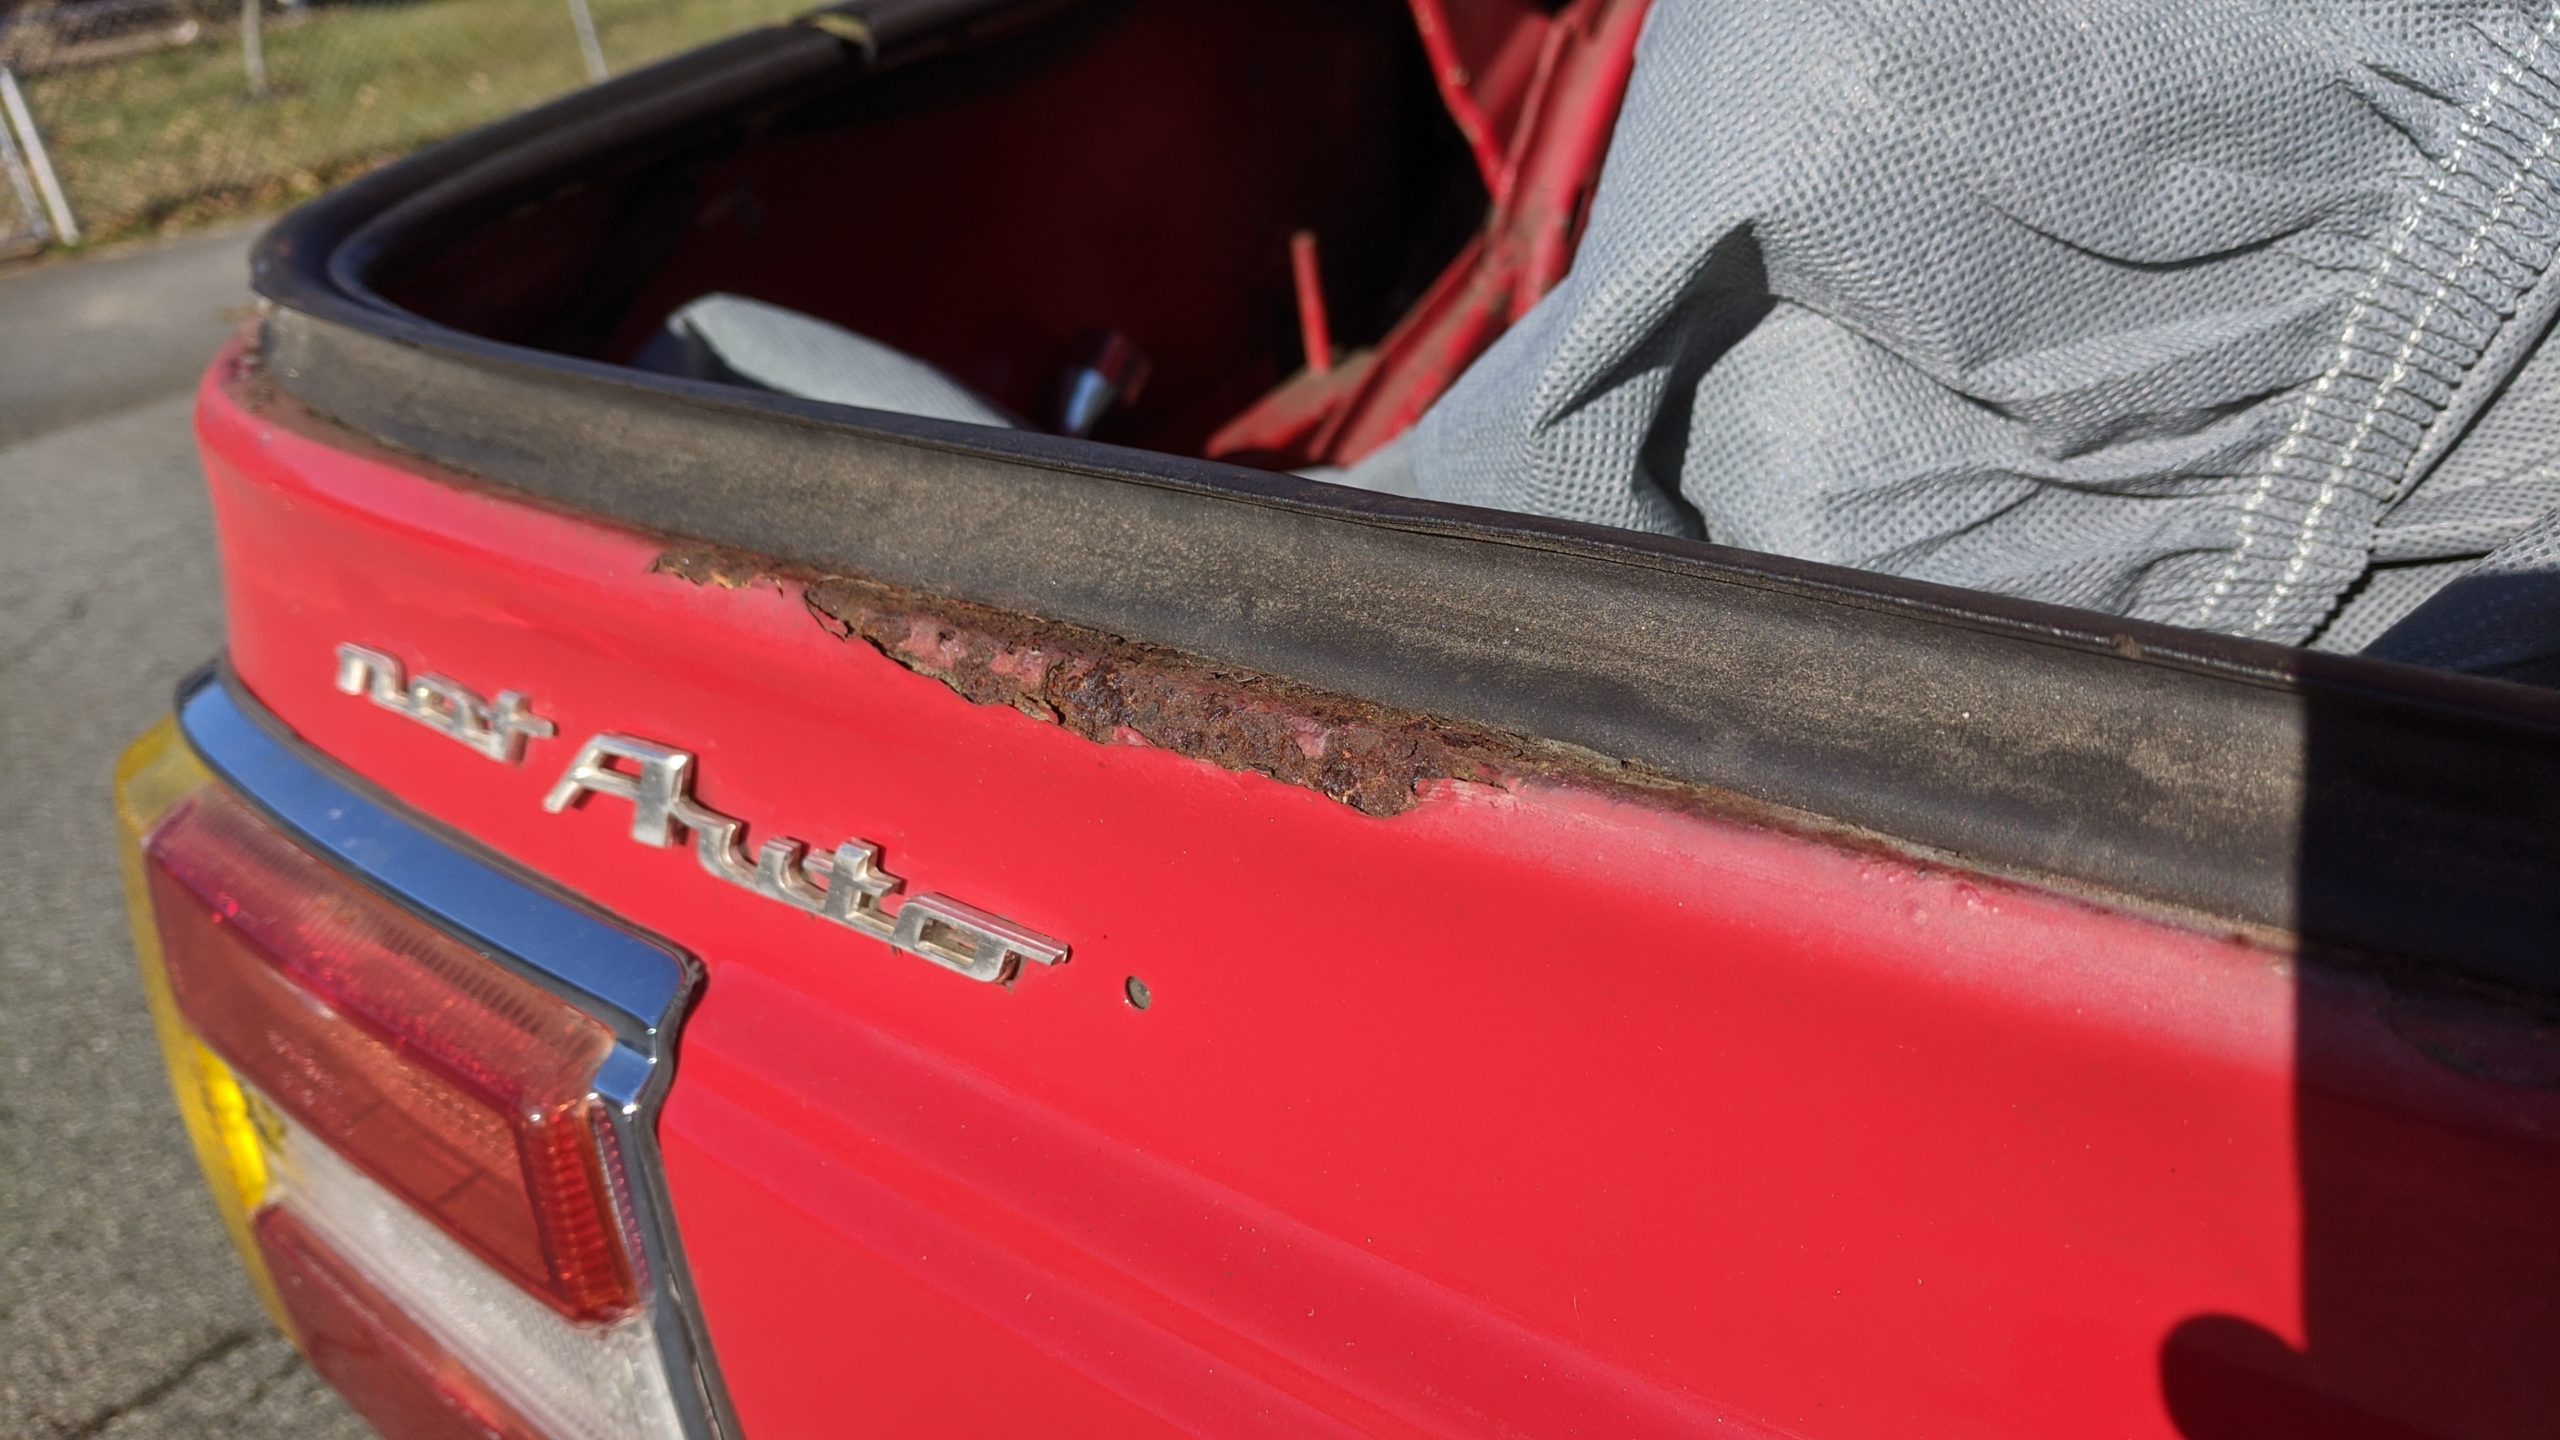
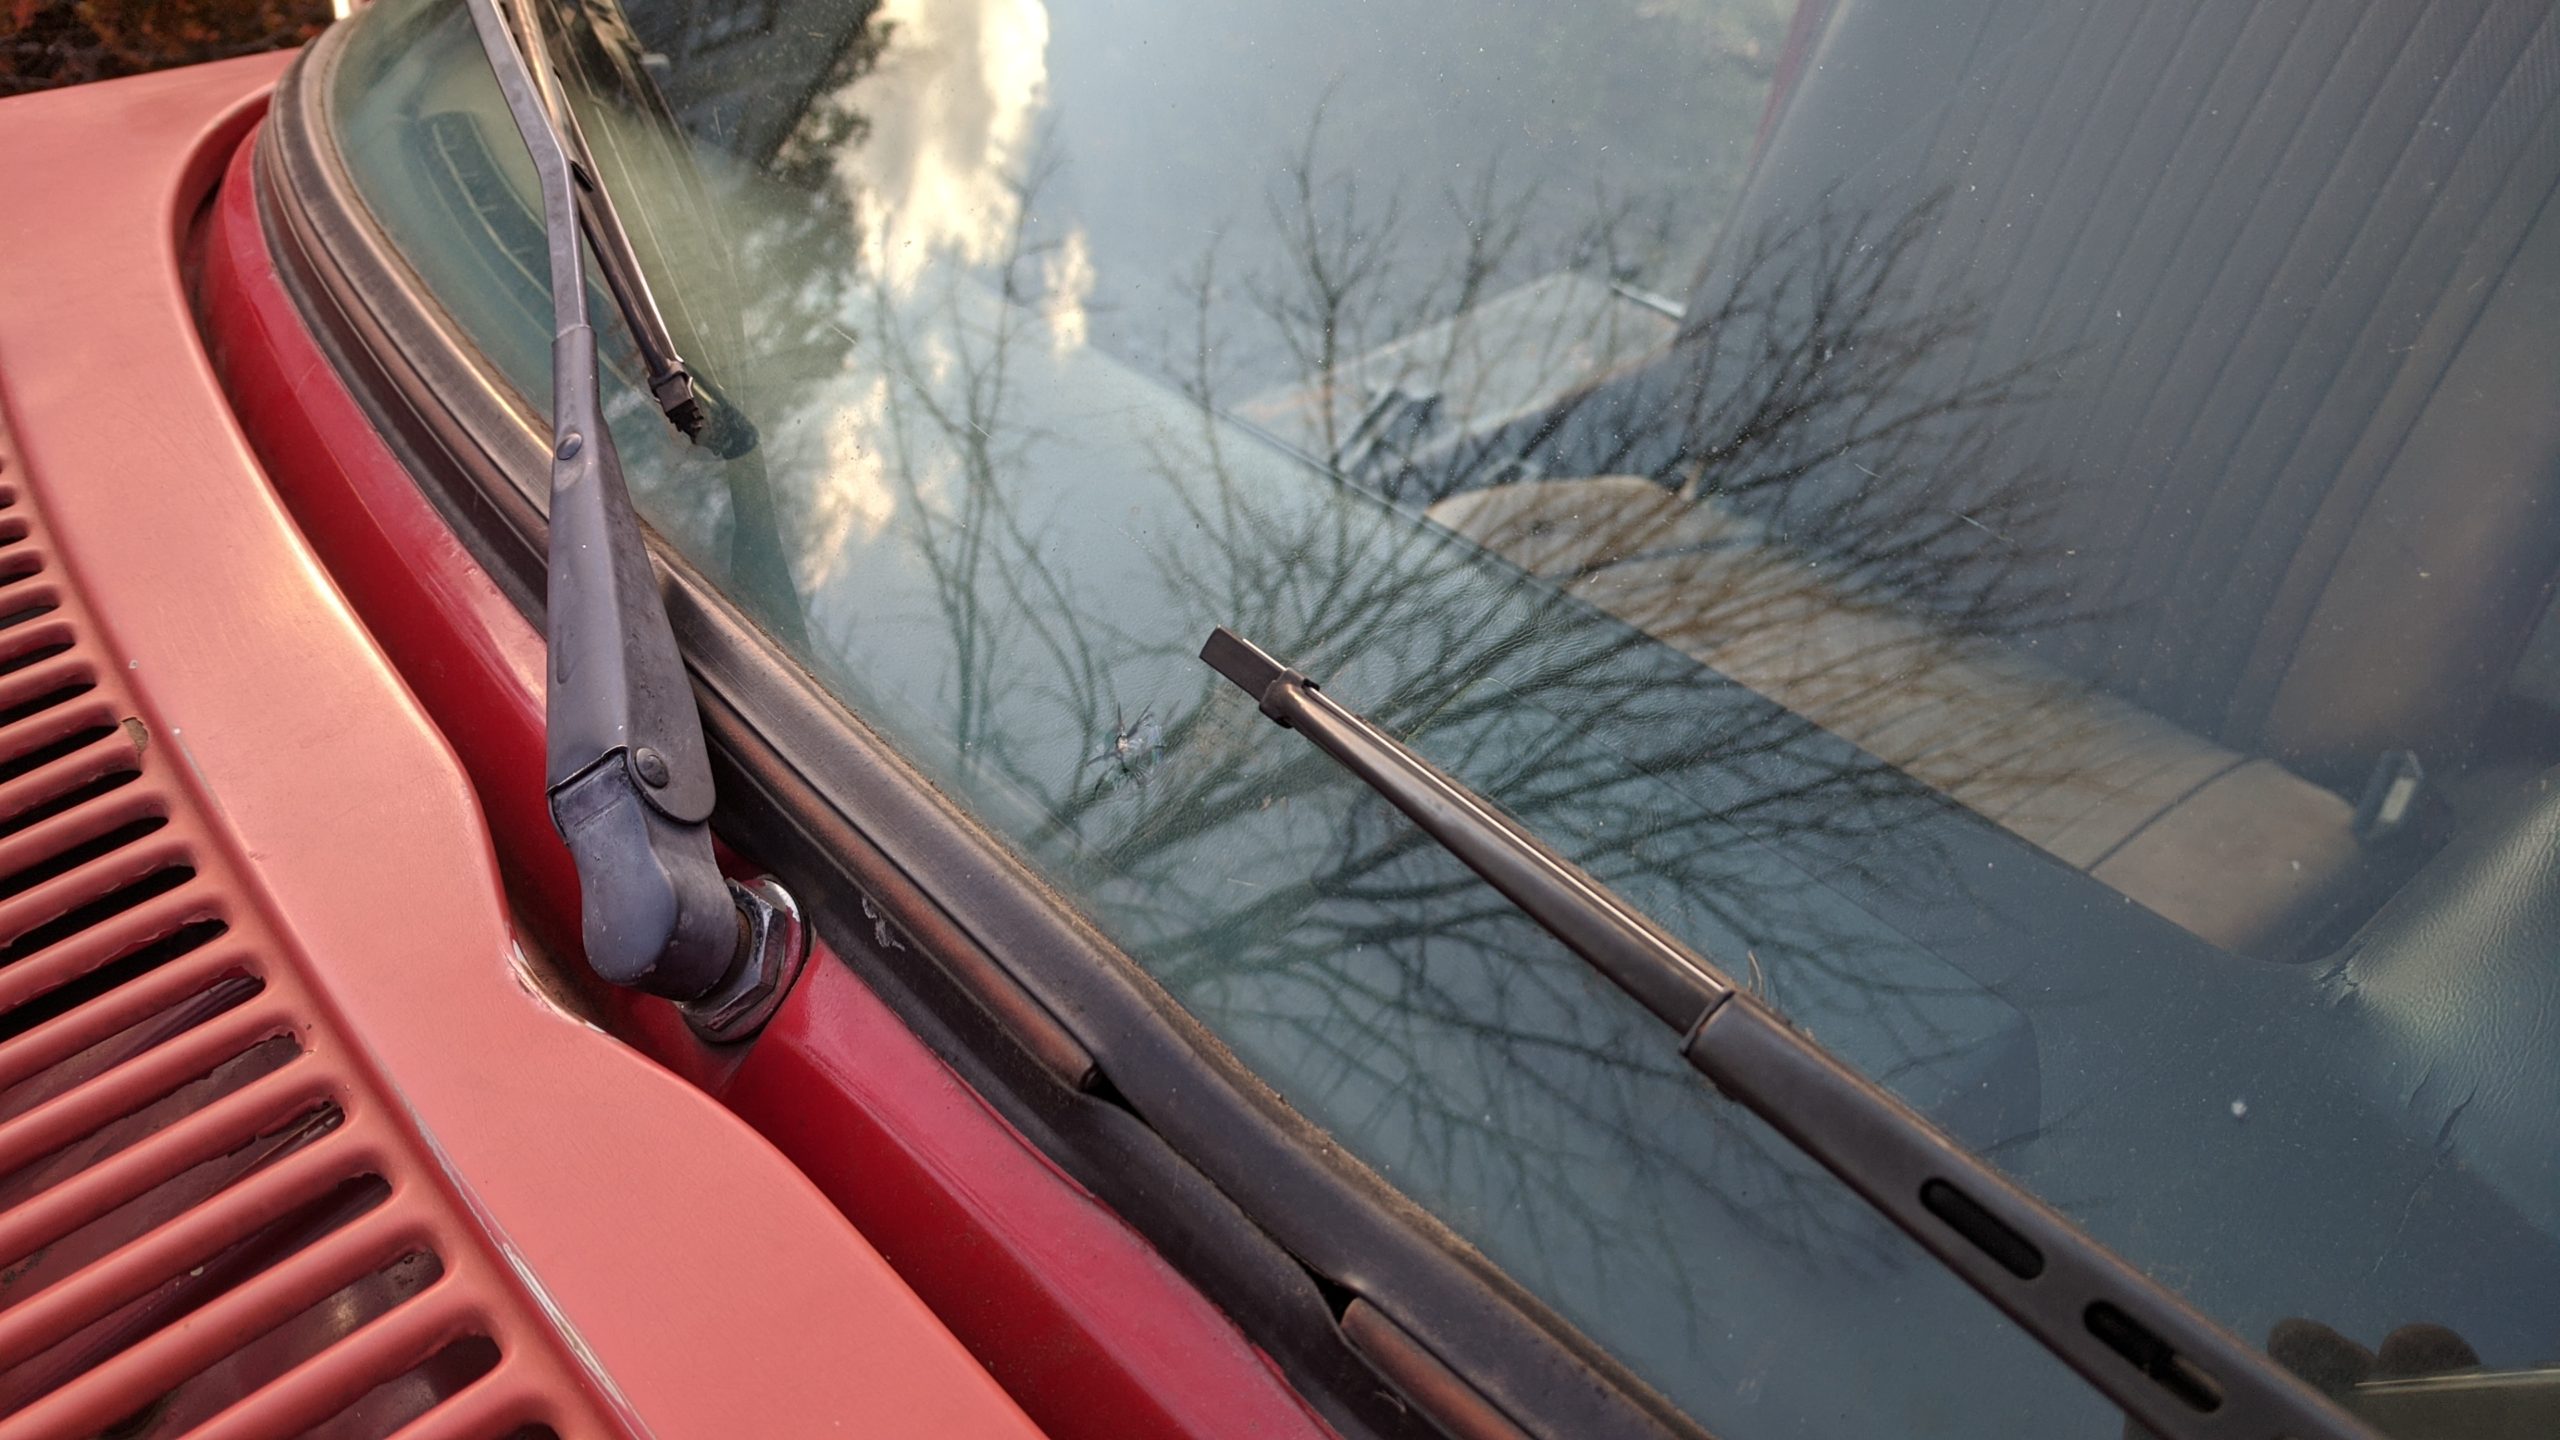
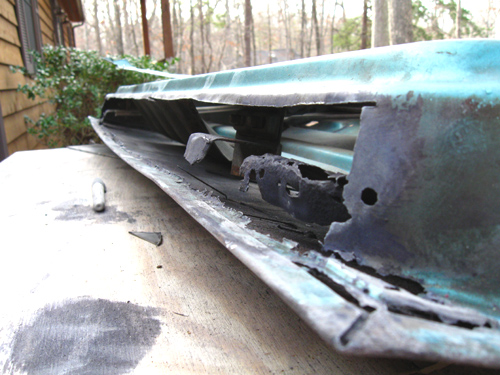
Rust:  Trunk lock surround and seal edge, passenger side rain gutter underside, passenger side B-pillar, door corners and edge, lower nose, trunk lid underside, small roof spot, small hood spot, floor boards have rusty spots

  • Clutch return spring is broken, spare used one included
  • Steering wheel is a cheap Nardi knock off, would not drive with it
  • Blower fan does not work, have a used spare to go with it
  • Tires on BBS basketweaves are old, rollers only
  • Speedometer doesn’t work, will include used replacement
  • Carb choke is not connected
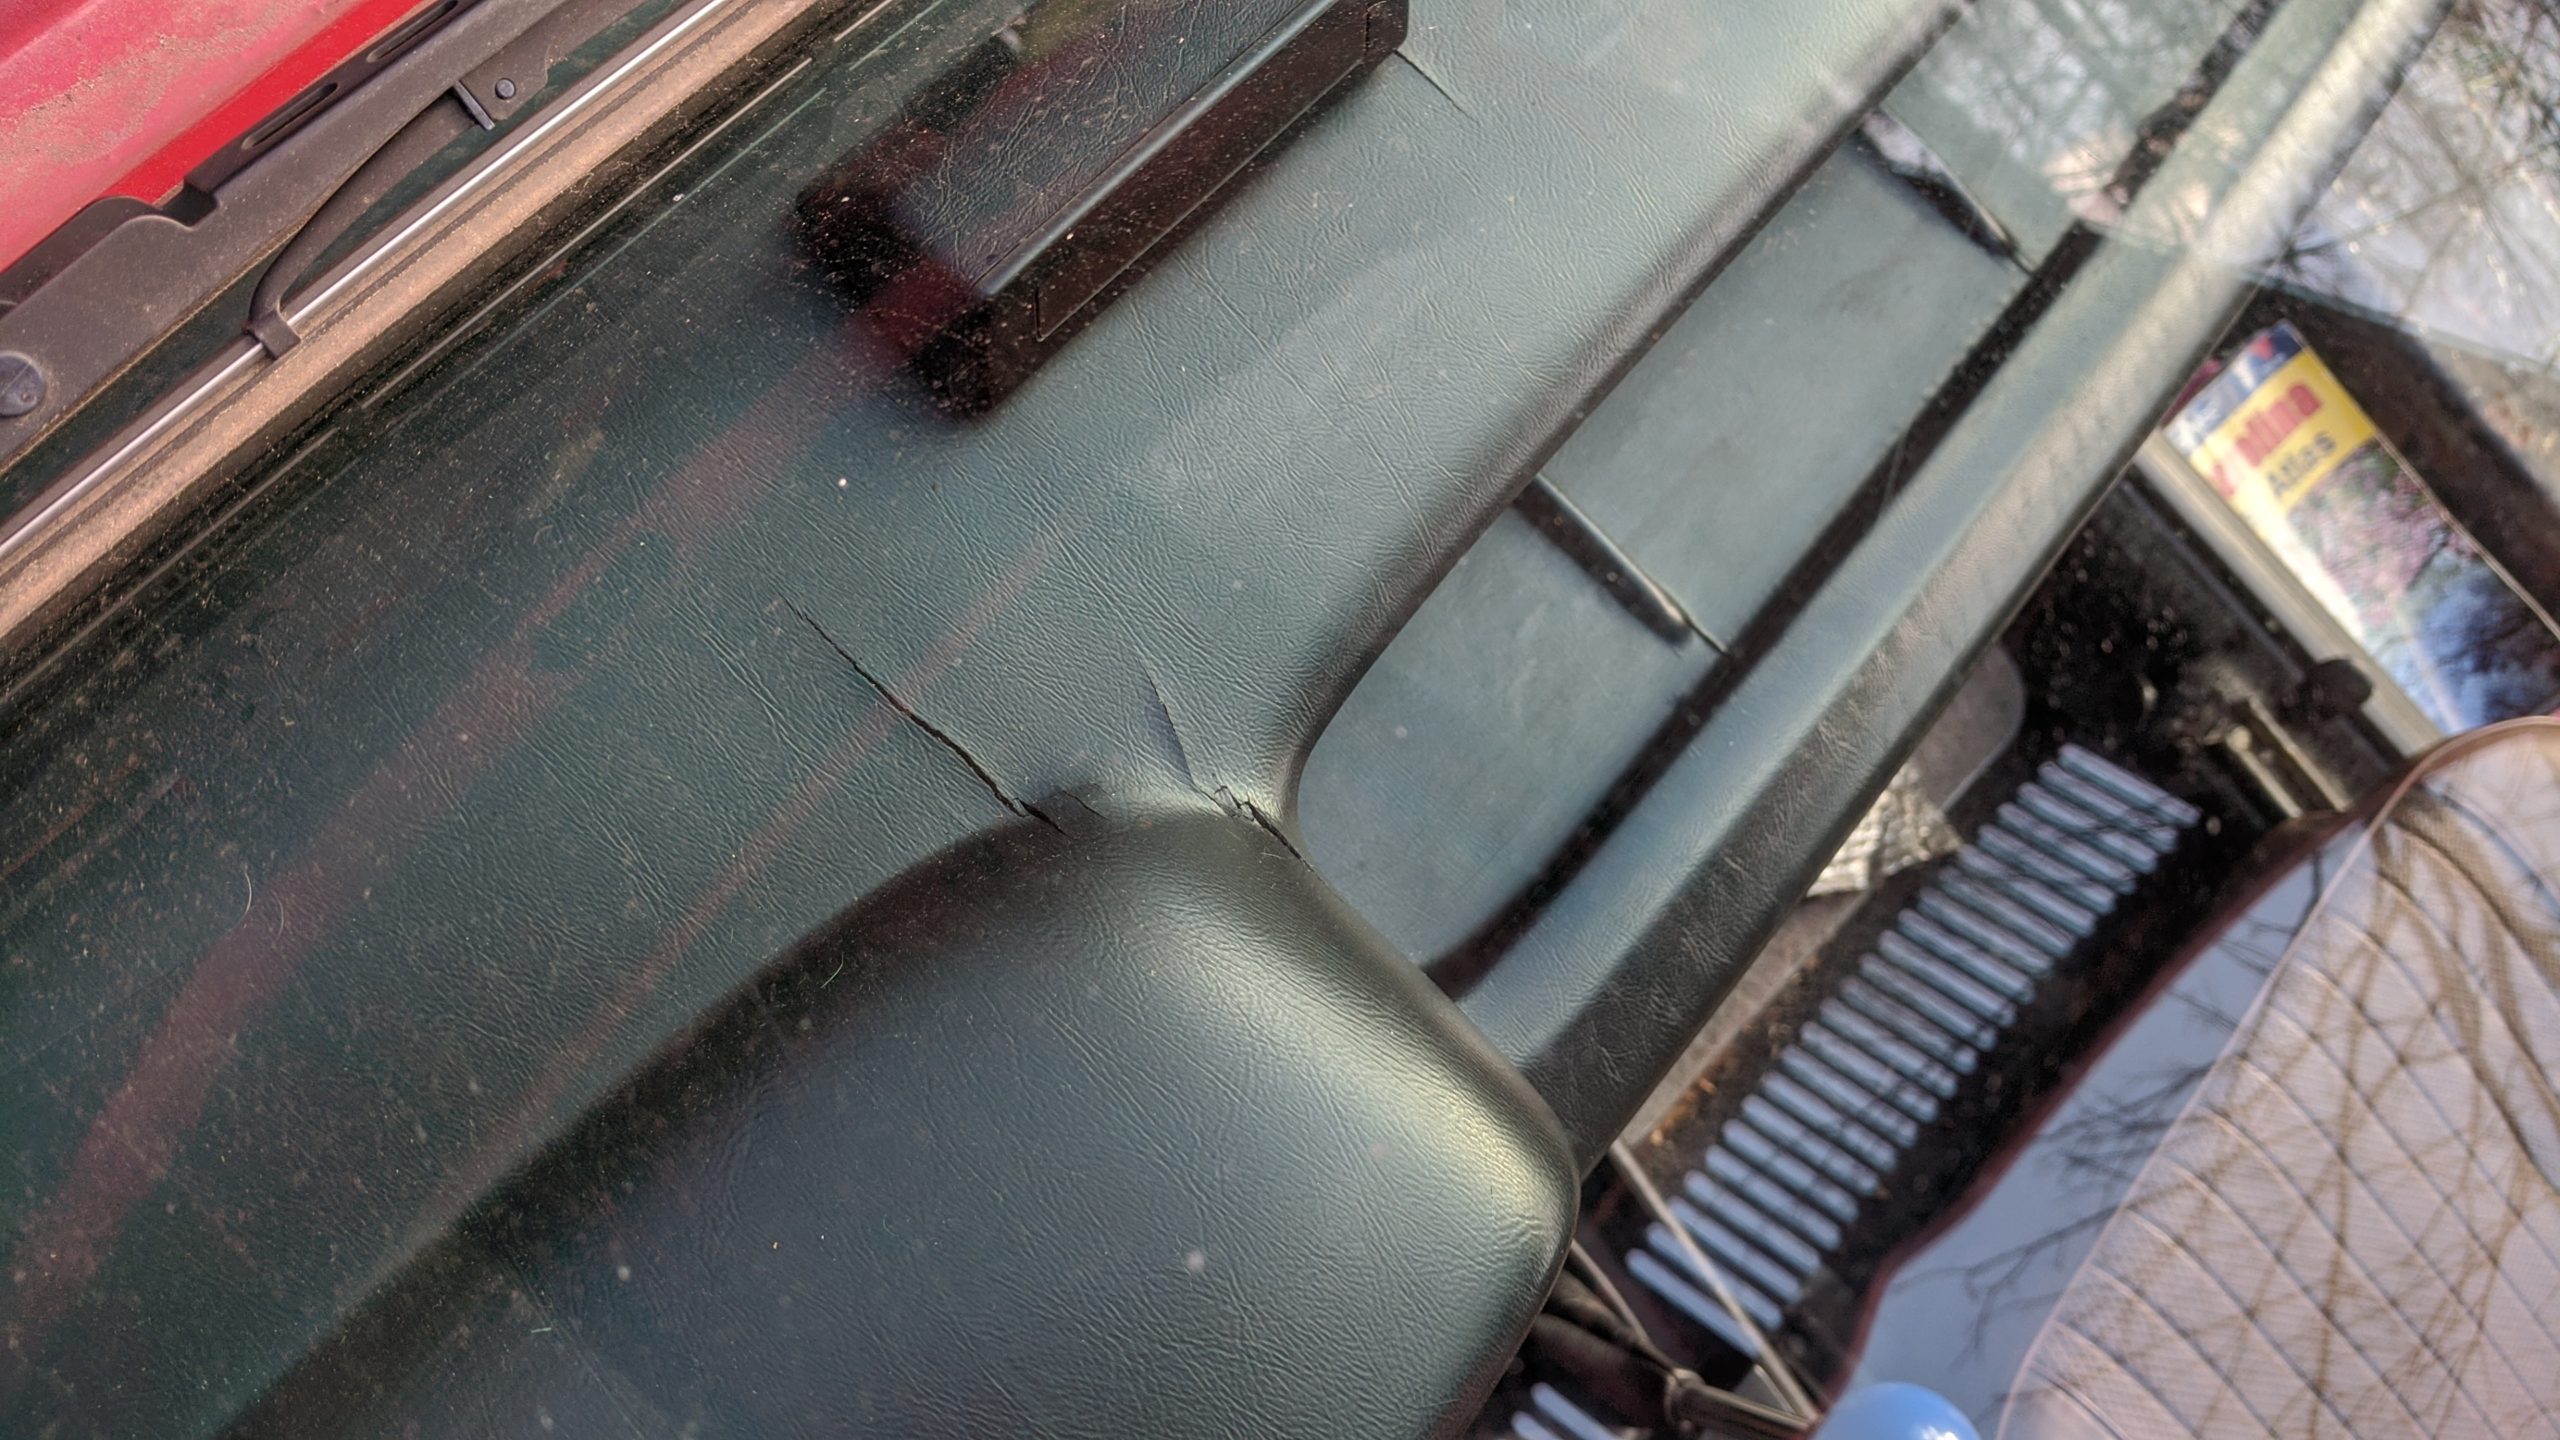
  • Dash is cracked in 3 small spots
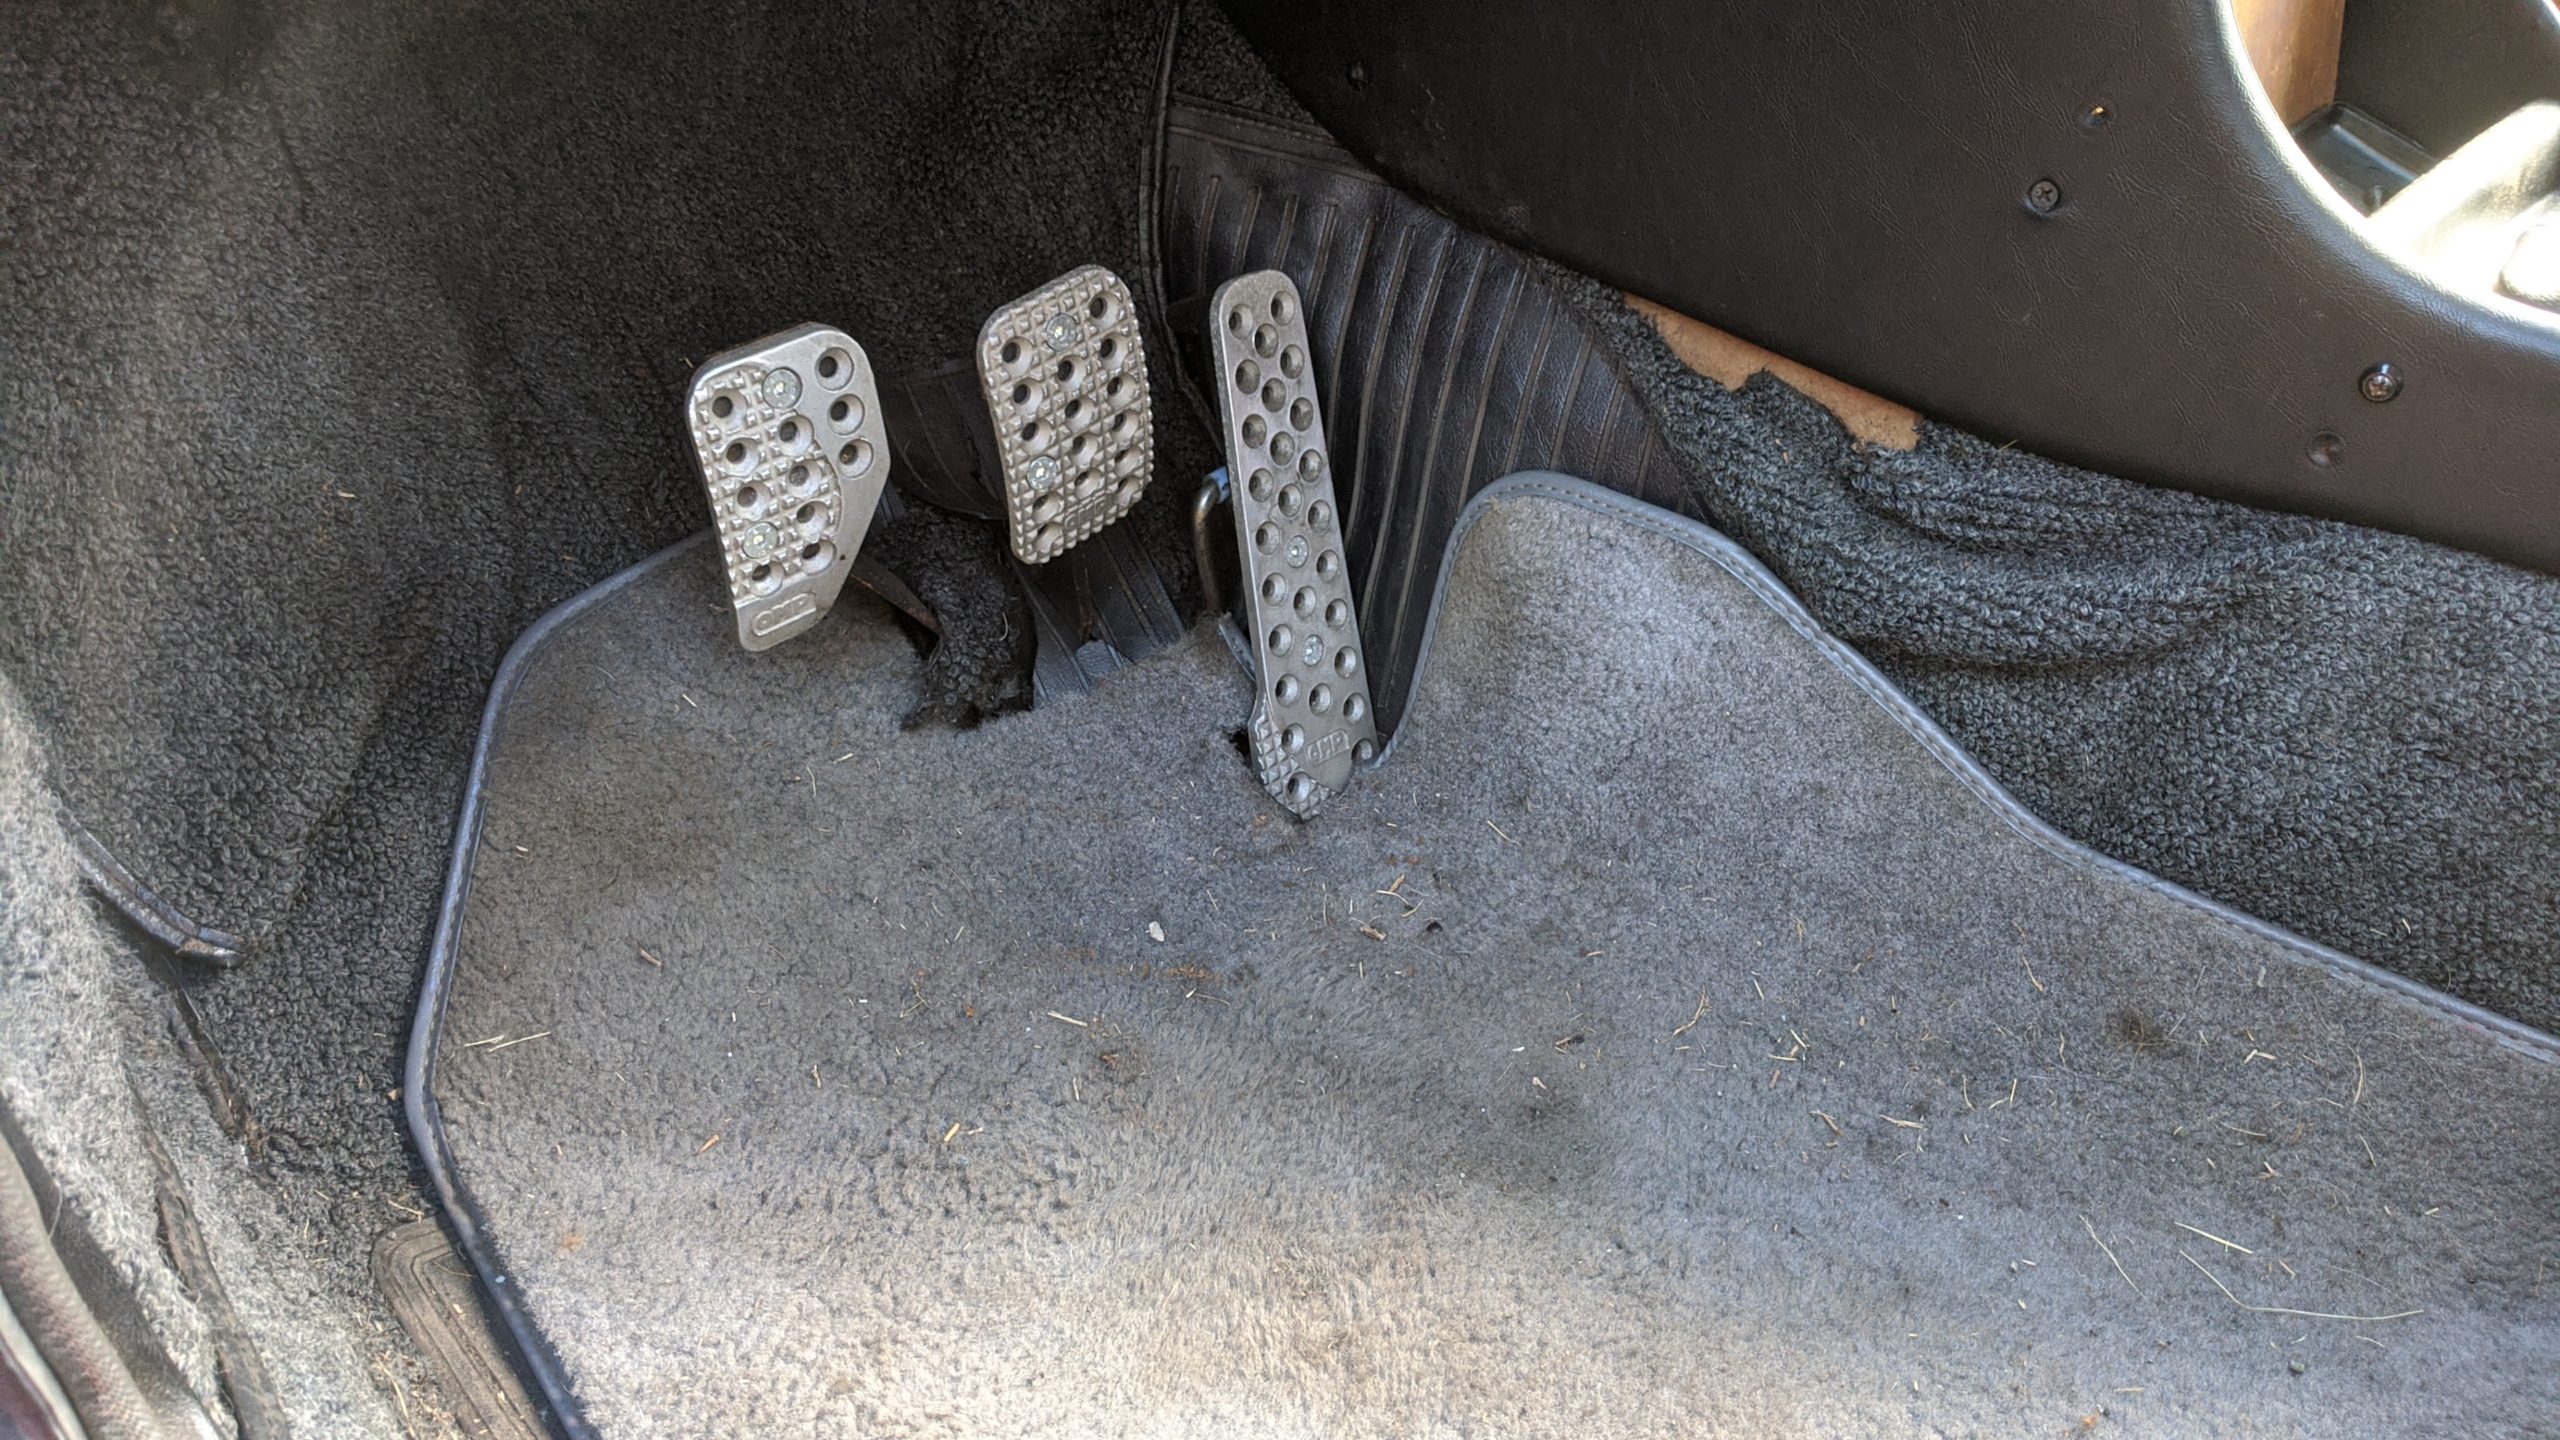
  • Carpet is worn
  • Driver side door leaks under heavy rain, gets carpet wet
  • Tape deck does not play


The Turkis car is finished

I finally finished the Turkis (turquoise metallic) ’74 2002tii.  We’ve been driving it fairly constantly and despite a vapor lock issue that I’ve resolved and few little tweaks it’s done…for now.  Here are some photos with a few write ups on the E24 rear seat install and other random bits yet to come.

IMG_20160416_163035 IMG_20160612_204228 turkis_C&C IMG_20160425_210719


MOMO steering wheel installation in a BMW 2002

I recently sprang for a MOMO Prototipo and new MOMO hub set for the red 2002.  A friend sold me a barely used Prototipo and the installation was pretty easy.

So when the time came to get a fancy new wheel for the turkis (blue) 02 I opted for an eBay search for a vintage wheel.  I never really cared for the Alpina 4 spoke wheel, something about that center pad bothers me.  But, I did find the same wheel (a MOMO Sigma A38) for sale in Portugal without the Alpina center pad.  And, while I had the dash apart to install it I snapped some photos.  (As a side note I find the 350mm Prototipo to be a little small both in wheel diameter and thickness of the wheel itself.  However it does give me a little more leg room in the 2002.  The MOMO A38 is a little larger in diameter and has a thicker grip.)  

Continue reading “MOMO steering wheel installation in a BMW 2002”

MINI Cooper R50 Oxygen sensor replacement and installation

This is an oldie as I did this repair a while back. But I was just looking at my Amazon wishlist for some 2002 related stuff (more on that later, I hope) and saw that I still had the oxygen sensor for the MINI saved for future reference.

So, this is as good a time as any to do a quick run down. First, what caused me to replace the O2 sensor in the first place? The SES or Check Engine light kept coming on then going off, then it would come back, then leave…you know the routine. This is almost always an oxygen sensor if you don’t immediately notice any other issues with the car. O2 sensors can start to go bad but not immediately affect driveability. I checked the OBD2 code with a code reader I borrowed from my local BMW CCA chapter and determined that it was an O2 sensor (I forget the code it threw it has been so long since I did this.) Or you can pick up scanners pretty cheap now like this Autel AutoLink scanner.

So, after much forum searching and reading I found that this Bosch 13878 Oxygen Sensor on Amazon is basically identical to the factory oxygen sensor…plus it’s a Bosch and I trust them. Also, happy bonus for you, these are now $55 and they were $85 when I bought them. Lucky. I don’t recall if this same sensor will work for an R53 or later model Coopers. Mine is a 2006 Cooper, non-S.

Continue reading “MINI Cooper R50 Oxygen sensor replacement and installation”

MINI Cooper R50/R53 parking light replacement

What should be a relatively easy job of replacing parking lights in a car…actually is. Easy, that is, easy if you have hands as small as a child’s but possessing the strength of a Russian bear. The parking lights on an R50/R53 MINI (2002-2006 model years) are not difficult to get at or see, just to remove. But a few simple tricks will make the job slightly less painful. I said slightly.

Continue reading “MINI Cooper R50/R53 parking light replacement”

MINI Cooper battery replacement

Sorry, no photos to go along with this post, this was an unscheduled repair. The just over 5 year old battery in our R50 kicked over its last kick this past weekend. Fortunately we were at a friend’s house and not stranded somewhere far away from an Autozone. Speaking of which, Autozone just happens to carry a perfect replacement battery for the MINI Cooper R50.

I first checked out this thread from NAM to see what options were available. Then I checked online and luckily the Autozone in town had a battery in stock. Autozone’s Duralast battery for the MINI Cooper R50 (not the supercharged R53) is part # H5-DLG and it cost me $141 with tax.

The battery fit perfectly in the stock under hood location. The only thing I had to do was swap the vent plug around so the correct side was lined up with the vent tube. The factory support strap fit exactly where it should and the battery is the correct shape with both posts lining up just right. A few minutes with a 10mm wrench and a friend willing to let me borrow his 318ti for a quick drive to the Autozone and we were back in business. Easy!

UPDATE:  I finally had to replace the replacement battery after 7 years.  Not bad at all and I totally recommend this Duralast battery for your R50!

MINI Cooper water pump replacement

Well, after almost 96,000 miles it was time for a new water pump. After replacing the inferior original thermostat with an upgraded one in 2009, I once again started noticing coolant loss from the reservoir tank and hearing the familiar sloshing sound behind the air conditioning/heater controls. The sloshing sound was coming from the heater core indicating that the coolant level had dropped and air had been introduced into the system. I figured it was highly unlikely that the thermostat gasket had failed again. A quick peak under the car during an oil change revealed that quite a few blue coolant boogers had dried on the A/C compressor, which is directly below the water pump. Time for some wrenching.

Continue reading “MINI Cooper water pump replacement”

Finally, some progress

March is reserved as “finish the damn Turkis” car month. Since August I’ve only really made progress on prepping a fender and removing a few small bits and pieces. But this month I’ve been working nearly every night after work and on weekends to try and get the body ready for paint ASAP. I doubt that I’ll finish the car in time for The Vintage but I’m hoping to have it in primer, or very very close by the end of the month.

Nearly done with the driver side bondo and prep. There remains 3 or 4 spots in need of smoothing and a thin coat of glaze will be needed to fill in small scratches and imperfections, then comes the fine grit. The blue paint on this quarter panel is just used as a guide coat to make my mistakes stand out just that much more. The color is supposed to be factory Turkis, but it looks a bit too blue. Well, too blue compared to 30+ year old original paint. We still haven’t decided if we’ll go with this color or have some more Turkis re-mixed at a different shop.

Continue reading “Finally, some progress”